
6 L4-2.5L (2010)
3. Inspect the exhaust studs for contact with the converter flange.
-
If contact is found (as shown above), proceed to Step 4.
-
If contact is not found, proceed to Step 6.
4. Inspect further back along the exhaust system to the hangers.
NOTE:
The hangers may be bent from a previous repair or procedure that is causing the exhaust to be misaligned.
5. Adjust the hangers to ensure the exhaust is hanging in the proper position.
6. Remove the catalyst converter and middle pipe all together according to the Workshop Manual or MS3 online instructions (section 01-15A
EXHAUST SYSTEM REMOVAL/INSTALLATION [L5]).
NOTE:
Failure to follow the instructions may result in rattle noise due to misalignment of exhaust system.
7. Remove the seal ring from exhaust manifold according to the Workshop Manual or M53 online instructions (section 01-15A EXHAUST SYSTEM
REMOVAL/INSTALLATION [L5]).
8. Remove the exhaust studs and washers and discard them.
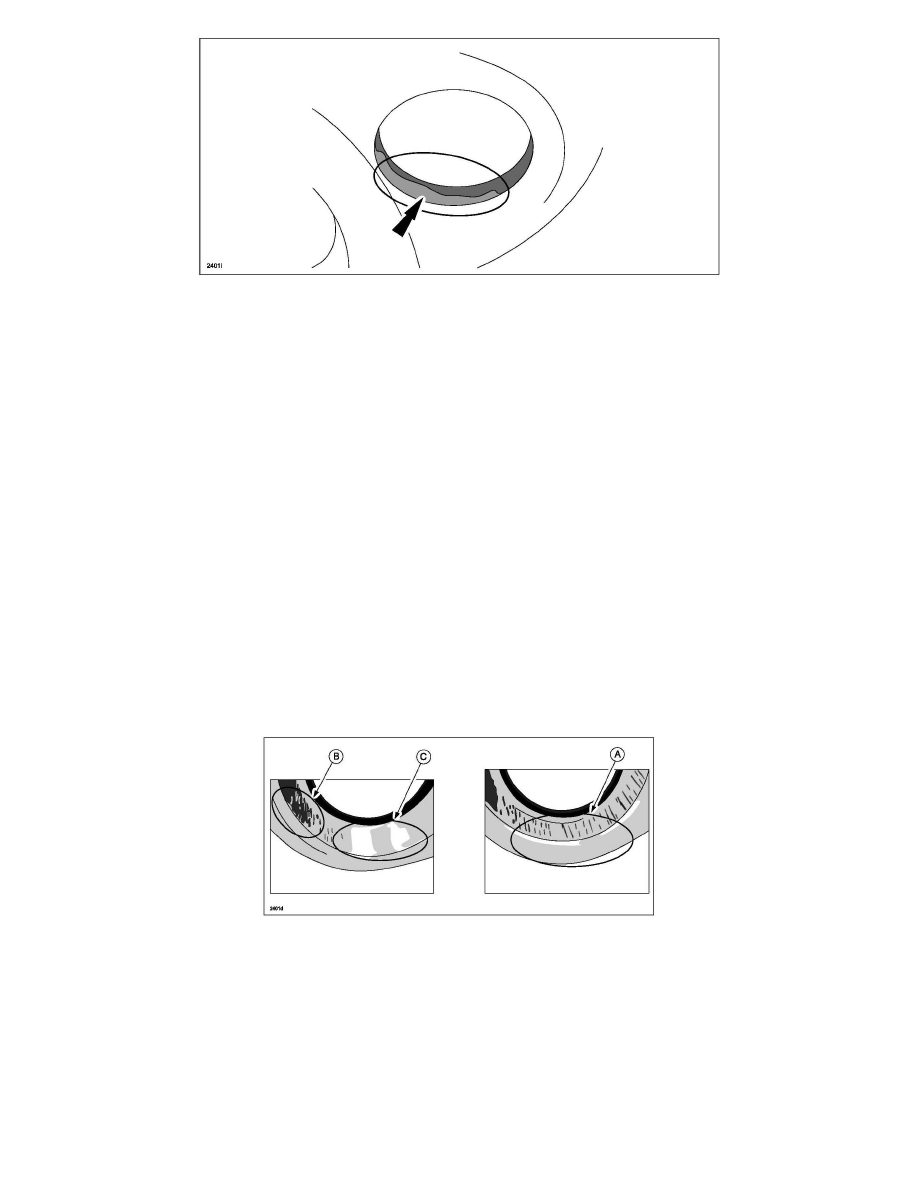
9. If severe damage (A) appears on round surface of catalytic converter-side flared flange, replace catalytic converter.
NOTE:
Refer to TWC and Middle Pipe Removal Note" in the Workshop Manual or M53 online instructions (section 01-15A EXHAUST SYSTEM
REMOVAL/INSTALLATION [L5]).
10. Stuff a cloth into exhaust manifold and catalytic converter to prevent dust or debris from entering.
11. Spray parts cleaner at exhaust manifold-to-seal ring installation position, and round surface of catalytic converter-side flared flange. Let it sit for 2 -
3 minutes.
12. Using sandpaper (# 80 - # 400), polish flared portion (A) of catalytic converter side (B) and seal ring installed location in exhaust manifold side (C)
until bare metal is exposed.