
6 L4-2.5L (2010)
Auxiliary Power Outlet: Testing and Inspection
ACCESSORY SOCKET INSPECTION
Front
1. Disconnect the negative battery cable.
2. Remove the following parts:
a. Upper panel See: Body and Frame/Interior Moulding / Trim/Console/Service and Repair/Removal and Replacement/Upper Panel
Removal/Installation
b. Decoration panel See: Body and Frame/Interior Moulding / Trim/Dashboard / Instrument Panel/Service and Repair/Removal and
Replacement/Decoration Panel Removal/Installation
c. Shift knob (MTX) See: Transmission and Drivetrain/Manual Transmission/Transaxle/Shifter M/T/Service and Repair
d. Shift panel See: Body and Frame/Interior Moulding / Trim/Console/Service and Repair/Removal and Replacement/Shift Panel
Removal/Installation
e. Center panel lower See: Body and Frame/Interior Moulding / Trim/Dashboard / Instrument Panel/Service and Repair/Removal and
Replacement/Center Panel Lower Removal/Installation
f.
Accessory socket (Front) See: Service and Repair
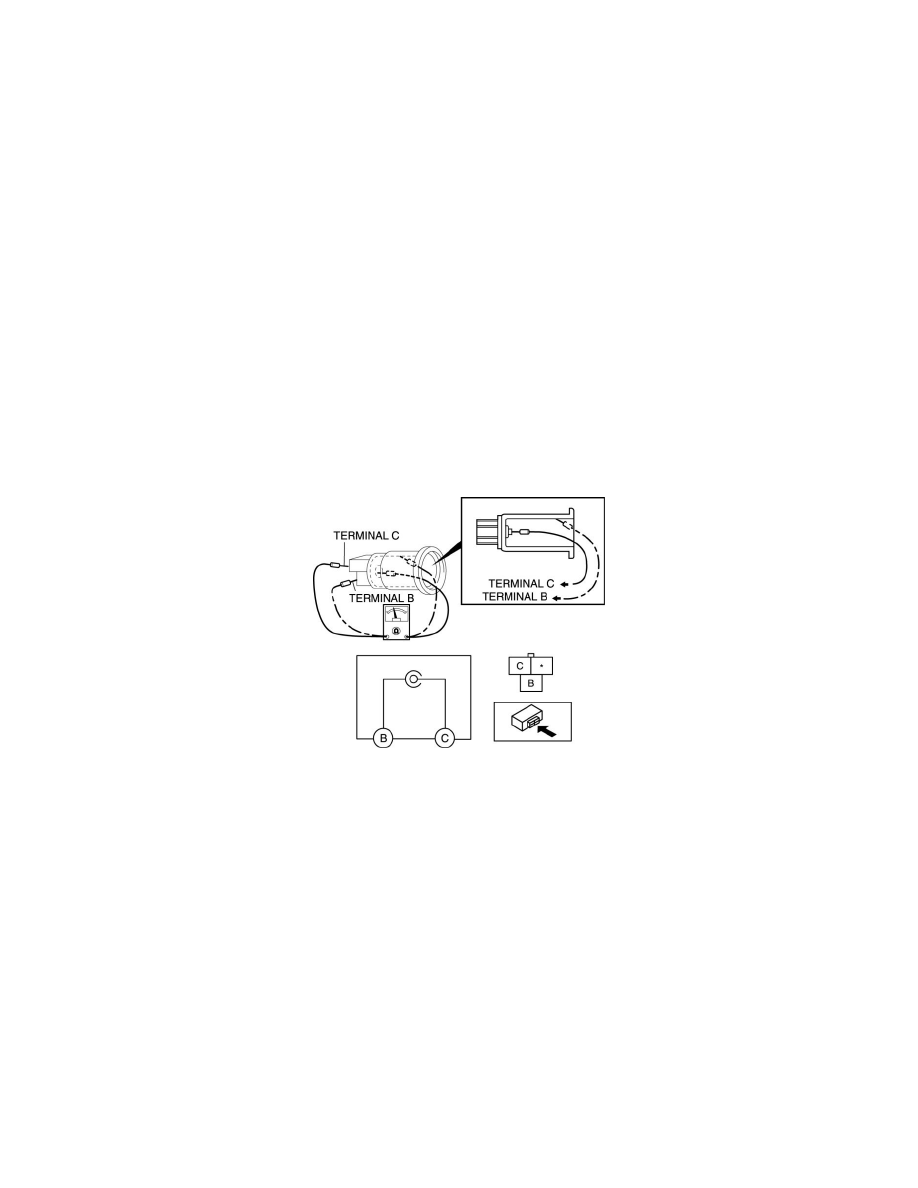
3. Connect a tester as shown in the figure and verify that there is continuity.
-
If the continuity cannot be verified, replace the accessory socket (Front).
Rear
1. Disconnect the negative battery cable.
2. Remove the following parts:
a. Upper panel See: Body and Frame/Interior Moulding / Trim/Console/Service and Repair/Removal and Replacement/Upper Panel
Removal/Installation
b. Shift knob (MTX) See: Transmission and Drivetrain/Manual Transmission/Transaxle/Shifter M/T/Service and Repair
c. Shift panel See: Body and Frame/Interior Moulding / Trim/Console/Service and Repair/Removal and Replacement/Shift Panel
Removal/Installation
d. Decoration panel (See See: Body and Frame/Interior Moulding / Trim/Dashboard / Instrument Panel/Service and Repair/Removal and
Replacement/Decoration Panel Removal/Installation.)
e. Center panel lower See: Body and Frame/Interior Moulding / Trim/Dashboard / Instrument Panel/Service and Repair/Removal and
Replacement/Center Panel Lower Removal/Installation
f.
Rear console See: Body and Frame/Interior Moulding / Trim/Console/Service and Repair/Overhaul