
6 L4-2.5L (2010)
CAUTION:
-
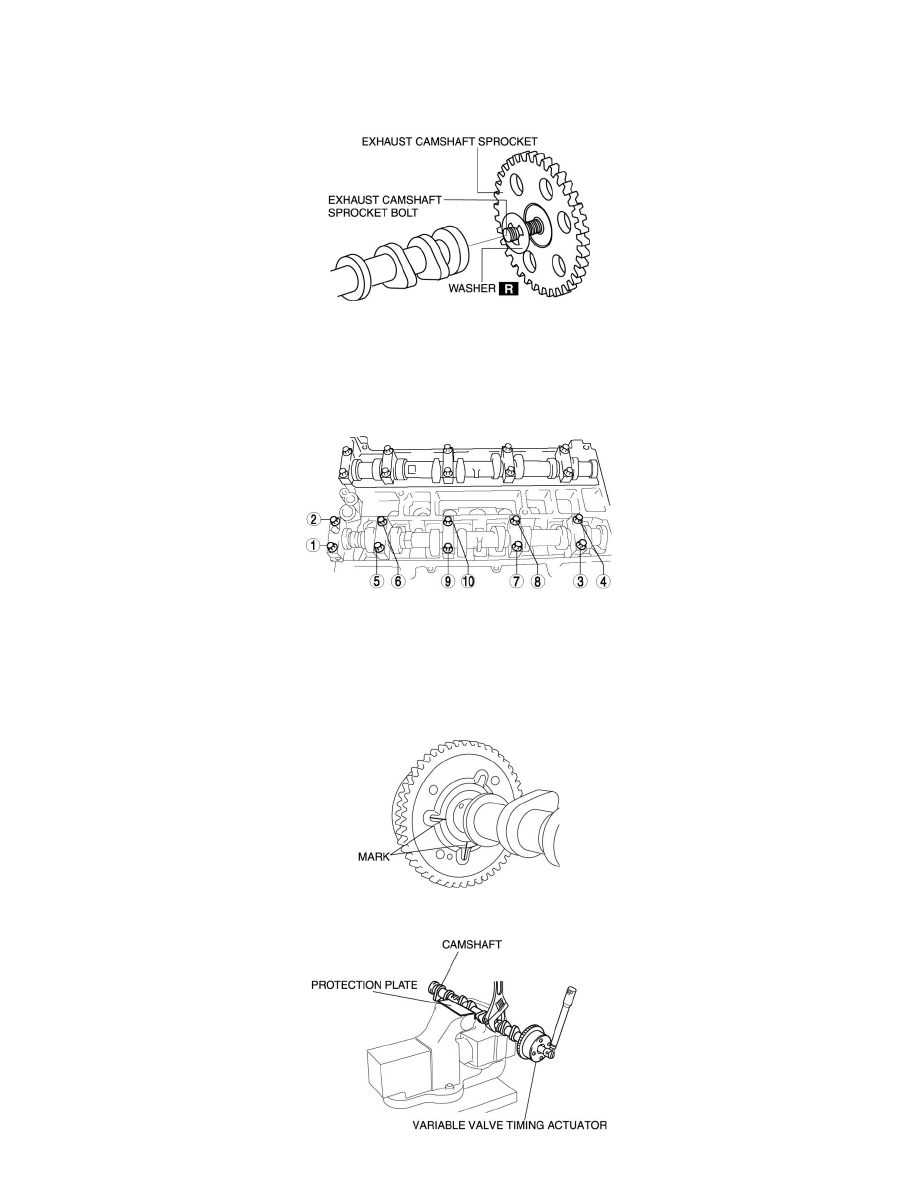
Perform the work carefully so that the washer does not drop out.
20. Remove the exhaust camshaft sprocket bolt, exhaust camshaft sprocket, and washer as a single unit.
21. Remove the OCV. See: Engine, Cooling and Exhaust/Engine/Engine Lubrication/Engine Oil Control Valve/Service and Repair
NOTE:
-
The camshaft caps are to be kept ordered for correct reassembly in their original positions. Do not mix the caps.
22. Loosen the camshaft cap bolts in two or three steps in the order shown in the figure and remove the camshaft cap.
23. Remove the variable valve timing actuator and the camshaft on the intake air side as a single unit.
24. Remove the variable valve timing actuator.
NOTE:
-
Do not add scratch marks to the camshaft thrust area.
a. Mark the camshaft and variable valve timing actuator as shown in the figure to make sure they are installed in their original position.
b. Secure the camshaft in a vise.