
6 L4-2.5L (2010)
CAUTION:
-
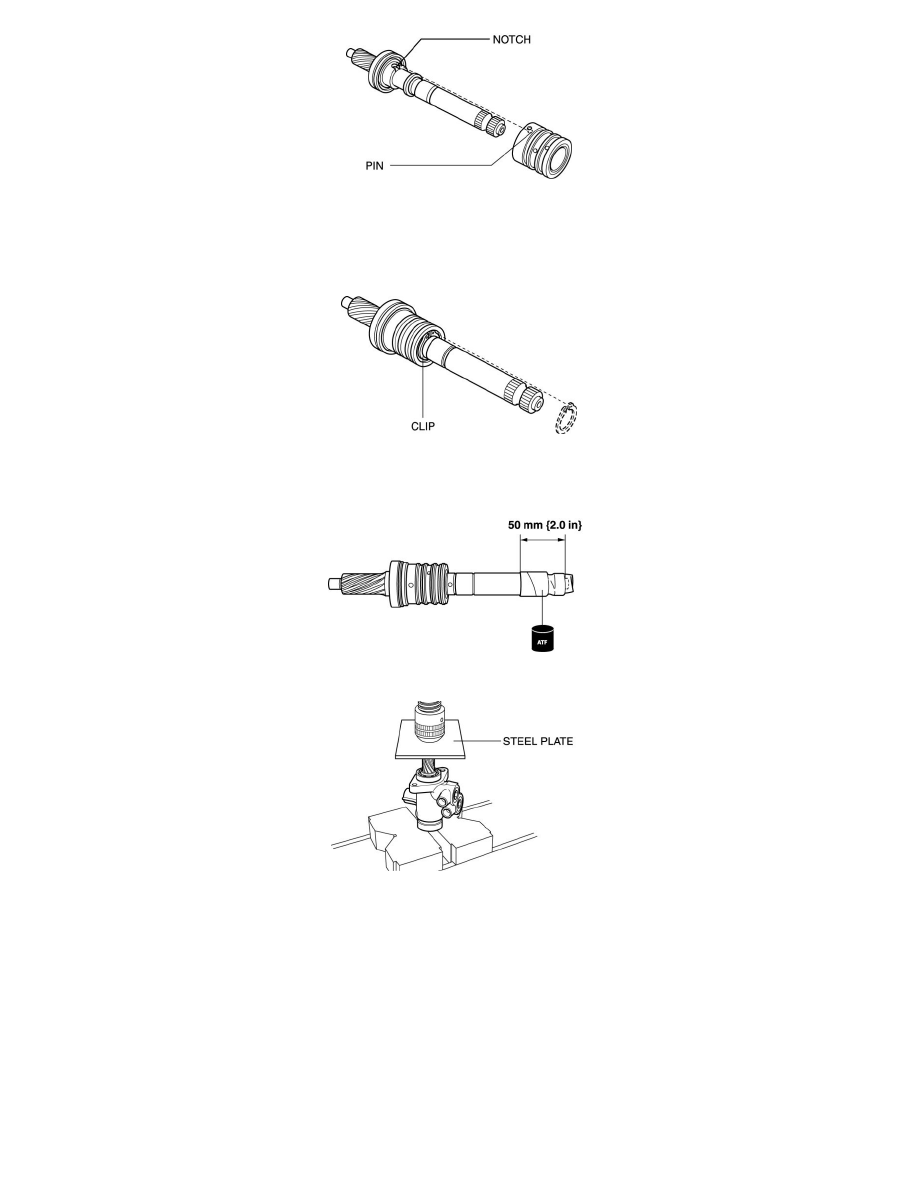
When assembling the sleeve, be careful not to deform or damage the seal ring assembled to the pinion shaft. When assembling the sleeve,
assemble slowly and do not apply excessive force so as to prevent deformation and damage to the seal ring.
5. Assemble the clip to the groove of the pinion shaft as shown in the figure.
Pinion Shaft Component Assembly Note
1. Wrap vinyl tape to the end of the pinion shaft at the position 50 mm {2.0 in} from the end of the piston shaft, and apply ATF to the surface.
2. Assemble the pinion shaft component to the valve housing using a press and steel plate.
3. Remove the vinyl tape wrapped around the pinion shaft.
Adjusting Cover, Locknut (Adjusting Cover) Assembly Note
1. Apply screw locking agent to the screw area of the adjusting cover, and assemble to the gear housing.
2. Tighten the adjusting cover with a tightening torque of 20-29 Nm {2.1-2.9 kgf-m, 15-21 ft-lbf} and then loosen.
3. Tighten the adjusting cover again with a tightening torque of 5.9 Nm {60 kgf-cm, 52 in-lbf}.
4. Return the adjusting cover to 10-20° using the SST.