
6 V6-3.0L DOHC (2003)
25.
Completely clean area where Small Foam Seal was removed with isopropyl alcohol.
26.
Allow alcohol to dry completely.
27.
Peel off backing from new Small Foam Seal.
28.
Adhere new Small Foam Seal onto top/center of heater box, pressing firmly to ensure a tight seal.
29.
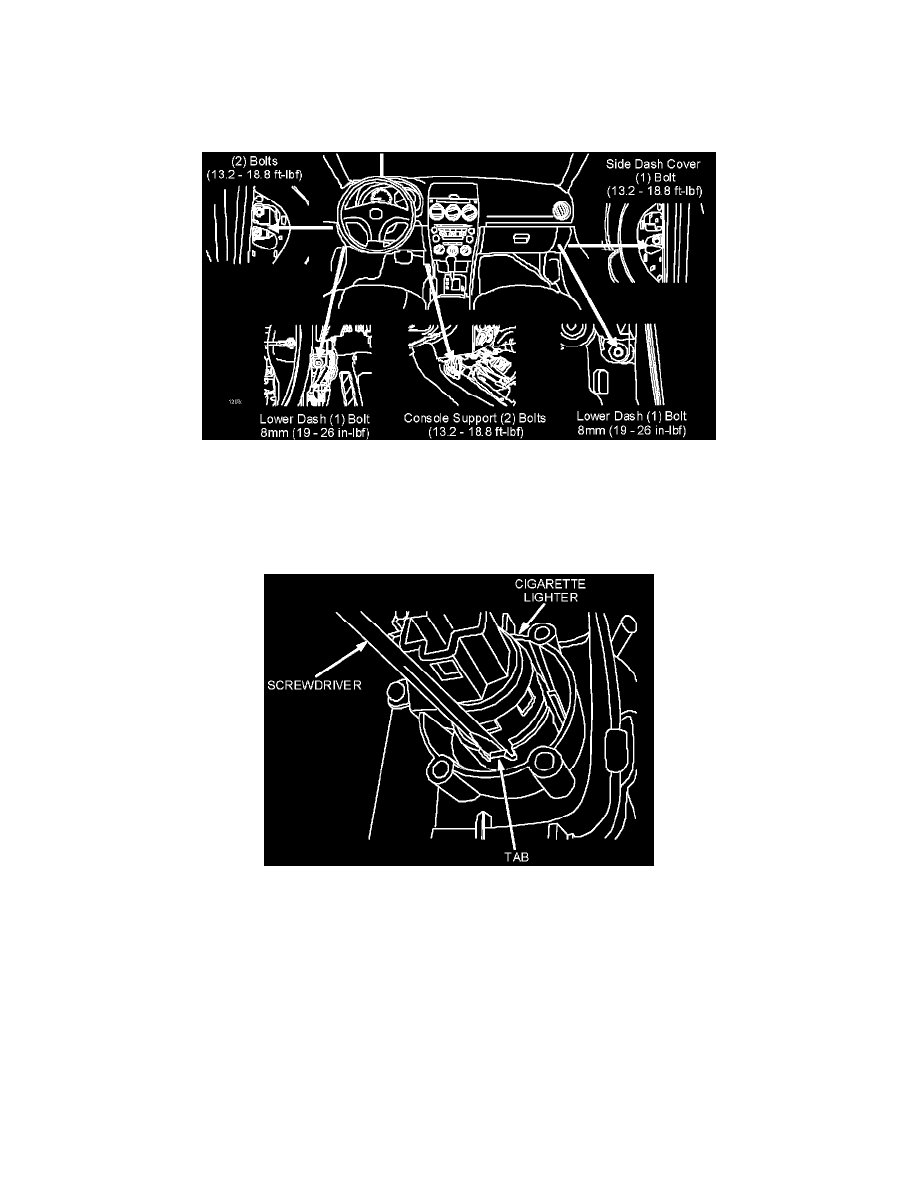
Reinstall dashboard according to Workshop Manual (Section 09-17 DASHBOARD REMOVAL/INSTALLATION).
NOTE:
Keep the following important points in mind during reinstallation:
^
After installing two (2) left side dash cover bolts, one (1) right side dash cover bolt, and both "A" pillar trim pieces, visually check that
gaps at both ends of A pillars are equal. Shift dashboard assembly as required to obtain equal gaps.
^
On Manual A/C models, confirm wire cable is installed correctly.
^
Confirm reference marks on steering column shafts are aligned, and four (4) nuts are torqued to 11.6 - 16.5 ft-lbf.
^
When reinstalling shift knob on ATX and MTX models, do not exceed thirteen (13) complete turns. Additional turns may crack shift
knob's inner plastic insulation.
^
On MTX V6 models, prior to reinstalling front console trim (with cigarette lighter), push cigarette lighter housing outward to allow
clearance during reinstallation. To release cigarette lighter, use a small flat head screwdriver, move tab on plastic ring, then push lighter
outward. After console trim is installed, push cigarette lighter inward until a "click" sound is heard.
30.
Reinstall glove compartment in reverse order.