
6 V6-3.7L (2009)
2.
Perform a Warranty Vehicle Inquiry using your eMDCS System and inspect the vehicle for a Campaign Label MSP22 attached to the vehicle's
hood. Refer to eMDCS System - Warranty Vehicle Inquiry Results table above.
NOTE:
Verify the campaign number as the vehicle may have multiple labels.
REPAIR PROCEDURE
1.
Start engine and turn headlight switch to AUTO position.
2.
Using a piece of cardboard or thick paper, cover sensor located on windshield (sensor is directly opposite of rear view mirror mount on OUTSIDE
of vehicle).
NOTE:
Cover sensor for a minimum of 20 seconds.
-
If headlights turn on with sensor covered, then T-Harness is properly connected. Proceed to "CAMPAIGN LABEL INSTALLATION".
-
If headlights do not turn on with sensor covered, proceed to Step 3.
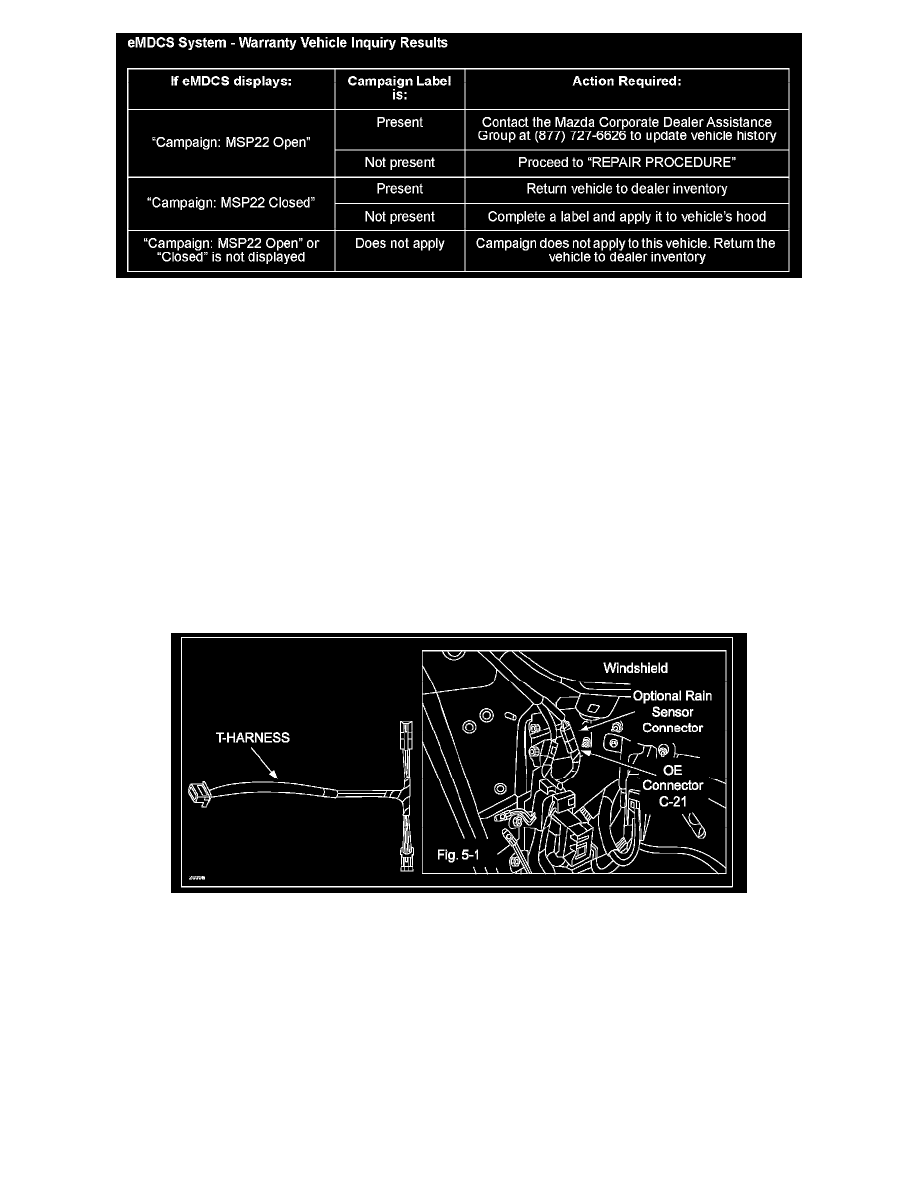
3.
To properly connect T-Harness connector to vehicle harness connector, refer to Fig. 5-1 of the EC Mirror Installation instructions for connector
location (locate OE connector (C-21) under driver side dash, near A-pillar).
NOTE:
Accessing connectors does not require removal of any panels.
WARNING:
Use care when reaching up into the base of the "A" pillar area to repair these connectors, as there are may be sharp surfaces.
4.
After proper connections are completed, start engine and turn headlight switch to AUTO position.
5.
Use cardboard or thick paper to cover sensor on windshield.
NOTE: