
6 V6-3.7L (2009)
7. Slowly compress the camshaft timing chain tensioner (RH) piston by hand.
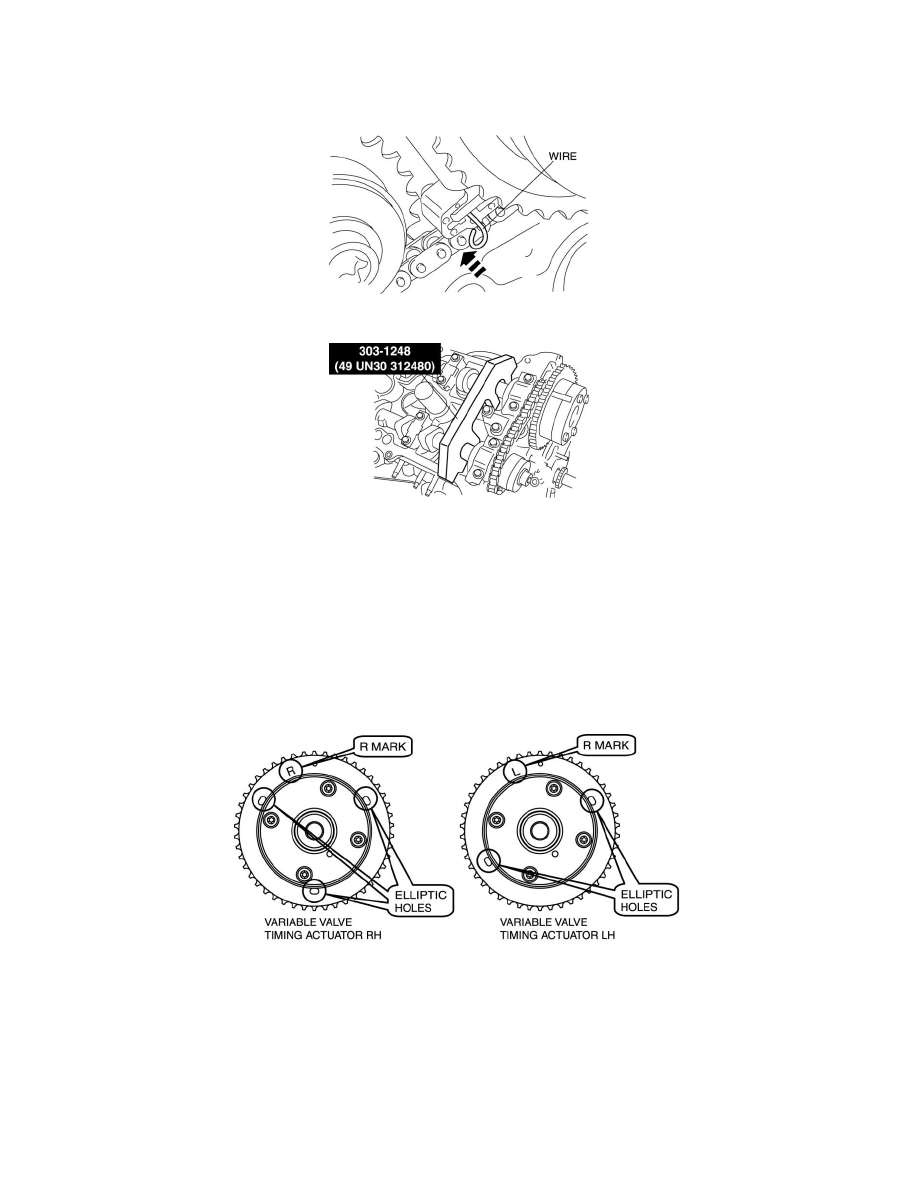
8. Insert an approx. 1.0 mm {0.039 in} thin wire or paper clip into the camshaft timing chain tensioner (RH) shown in the figure to hold the
tensioner piston.
9. Install the SST onto the camshafts (RH).
NOTE:
-
The camshaft sprocket is integrated with the variable valve timing actuator and cannot be disassembled.
10. Remove the variable valve timing actuator, camshaft timing chain and the exhaust camshaft sprocket of the RH bank as a single unit using the
appropriate tools.
11. Remove the SST from the camshafts (RH).
Variable Valve Timing Actuator Component Installation Note
NOTE:
-
Identify the variable valve timing actuator as shown in the figure.
1. Align the alignment marks on the camshaft timing chain and both intake and exhaust side camshaft sprockets of both banks.
RH