
6 V6-3.7L (2009)
NOTE:
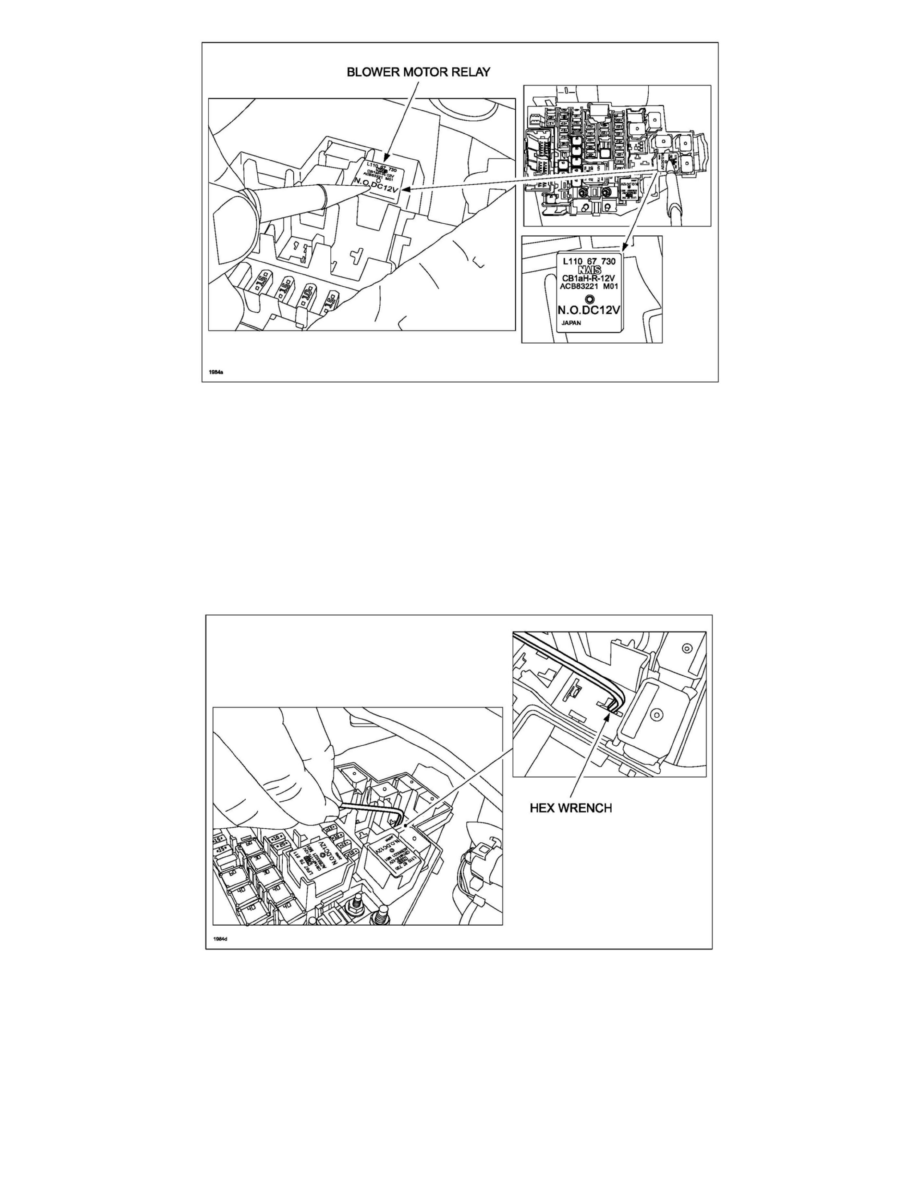
Refer to graphic on EJB top cover as necessary. The correct inspection relay is "BLOWER" relay, not "BLOWER 2" relay.
Recommended Blower Relay Removal Tool: Small right angle needle-nose pliers.
6.
Using small right angle needle-nose pliers, gently remove HVAC blower motor relay by carefully pulling straight up (gently wiggle while pulling
up) to avoid cracking relay housing.
CAUTION:
Be very careful not to apply too much pressure to the blower relay during removal with the pliers, otherwise relay housing cracking could
occur.
7.
Using an "L" shaped (3 mm or 1/8") hex wrench, lightly push down on all four (4) fuse box blower relay terminals.
-
If all four (4) fuse box terminals stay at the surface of the fuse box, proceed to Step 8.
-
If any one of the four (4) fuse box terminals can be pushed down below the surface of the fuse box, proceed to "REPAIR PROCEDURE"
below.
8.
Slowly and firmly reinstall HVAC blower motor relay into EJB box. Push into proper location straight down to bottom of relay cavity.
NOTE: