
6 V6-3.7L (2009)
Shifter A/T: Service and Repair
AUTOMATIC TRANSAXLE SHIFT MECHANISM REMOVAL/INSTALLATION
Selector Lever Removal/Installation
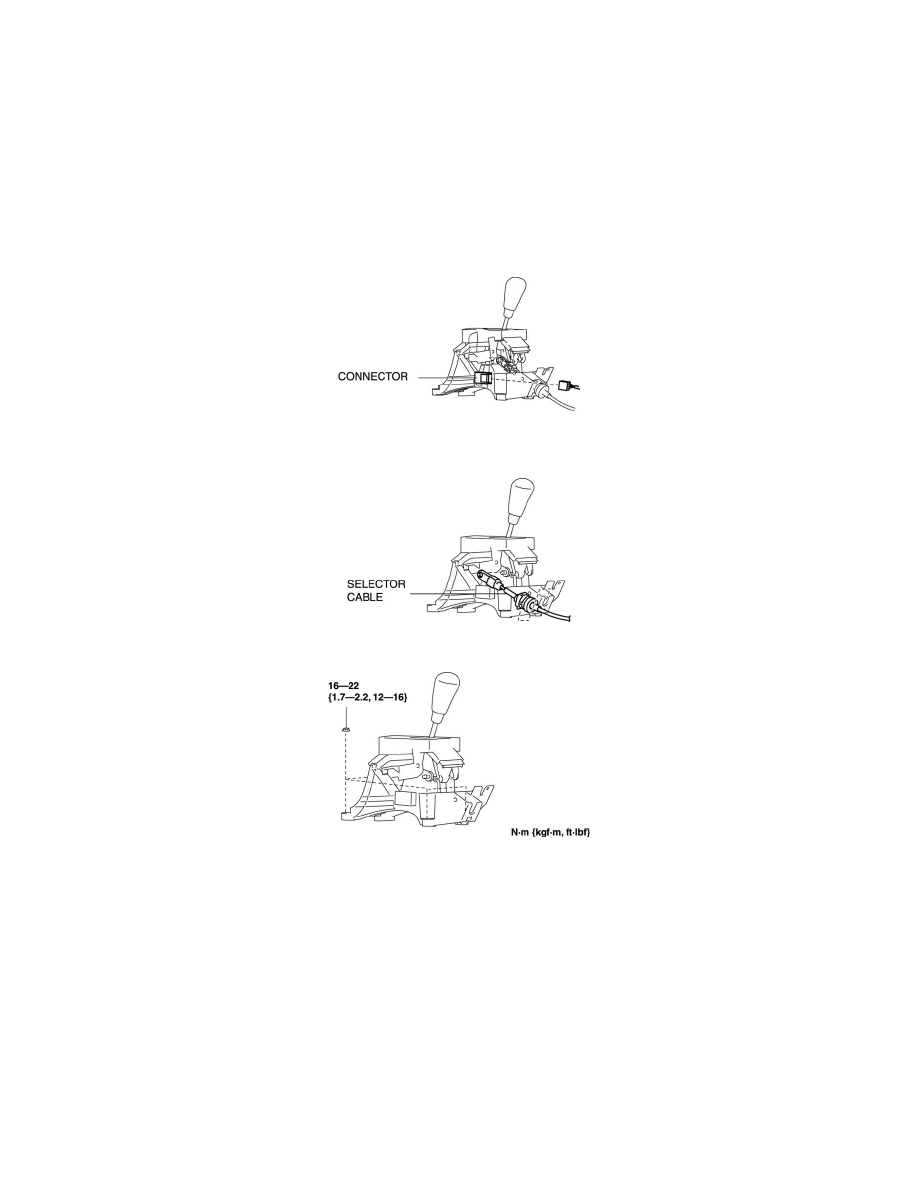
1. Disconnect the selector lever component connector.
a. Disconnect the negative battery cable.
b. Remove the rear console. (See See: Body and Frame/Interior Moulding / Trim/Console/Service and Repair/Removal and Replacement/Rear
Console Removal/Installation.)
c. Disconnect the selector lever component connector.
2. Remove the selector lever component.
a. Disconnect the selector cable from the selector lever.
b. Remove the selector lever component.
3. Install in the reverse order of removal.
Selector Cable Removal/Installation
1. Disconnect the negative battery cable.
2. Remove the aerodynamic under cover NO.2. (for 5ATX) See: Body and Frame/Splash Guard/Service and Repair/Aerodynamic Under Cover
No.2 Removal/Installation
3. Remove the rear console. (See See: Body and Frame/Interior Moulding / Trim/Console/Service and Repair/Removal and Replacement/Rear
Console Removal/Installation.)
4. Remove the dashboard. (See See: Body and Frame/Interior Moulding / Trim/Dashboard / Instrument Panel/Service and Repair/Removal and
Replacement/Dashboard Removal/Installation.)
5. Remove the A/C unit. (See See: Heating and Air Conditioning/Housing Assembly HVAC/Service and Repair/Removal and Replacement.)