
6 V6-3.7L (2009)
Valve Body: Removal and Replacement
Control Valve Body Removal/Installation [FS5A-EL]
CONTROL VALVE BODY REMOVAL/INSTALLATION [FS5A-EL]
Primary Control Valve Body On-Vehicle Removal
WARNING:
-
A hot transaxle and ATF can cause severe burns. Turn off the engine and wait until they are cool.
-
Using compressed air can cause dirt and other particles to fly out, causing injury to the eyes. Wear protective eyeglasses whenever using
compressed air.
1. Disconnect the negative battery cable.
2. Remove the aerodynamic under cover NO.2. See: Body and Frame/Splash Guard/Service and Repair/Aerodynamic Under Cover No.2
Removal/Installation
3. Remove the front crossmember. See: Body and Frame/Frame/Cross-Member/Front Cross-Member/Service and Repair/Front Crossmember
Removal/Installation
4. Clean the transaxle exterior throughout with a steam cleaner or cleaning solvents.
5. Drain the ATF. See: Service and Repair/Removal and Replacement/Automatic Transaxle Fluid (ATF) Replacement [FS5A-EL]
6. Remove the oil pan.
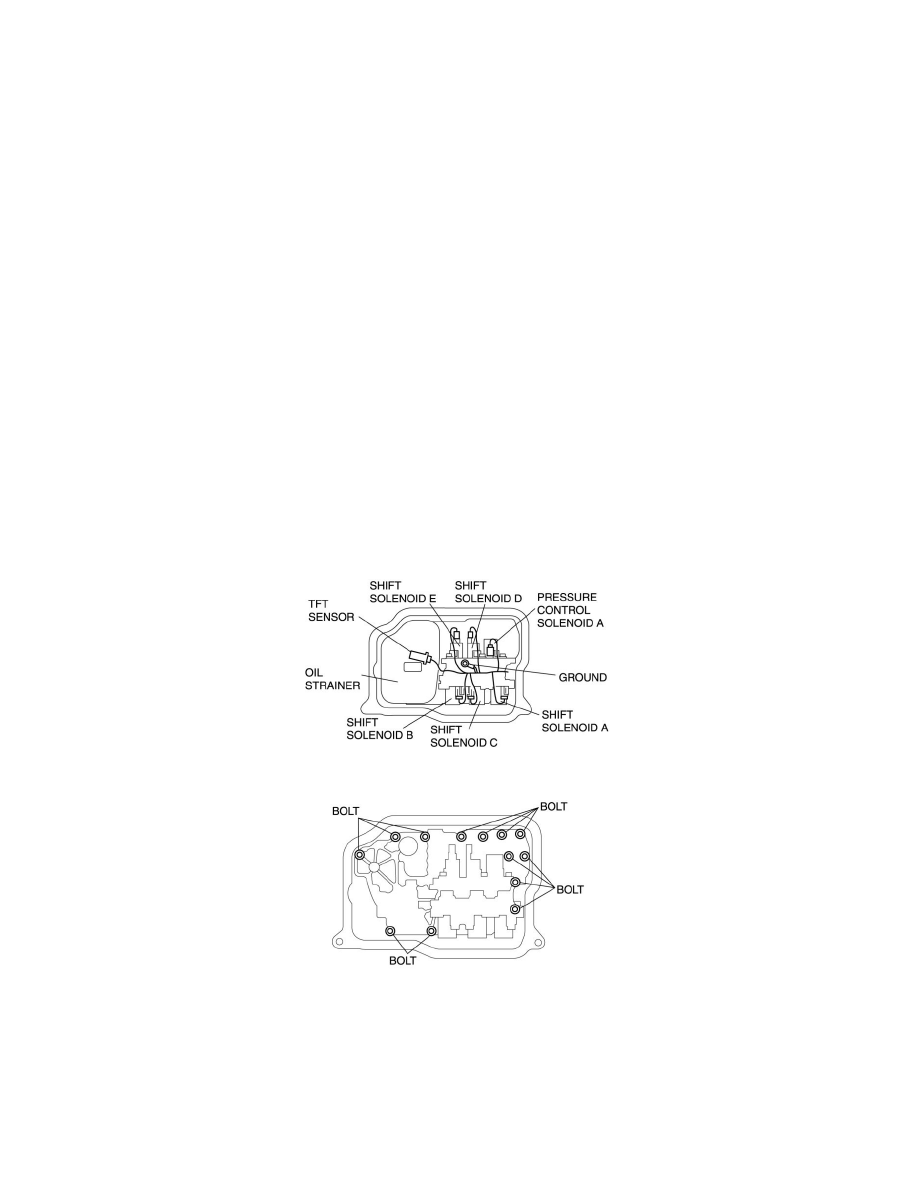
7. Remove the oil strainer.
8. Disconnect each solenoid valve connector and GND.
9. Remove the bolts as shown, then remove the primary control valve body.
10. Remove the accumulators and accumulator springs.