
6 V6-3.7L (2009)
2. Remove the air cleaner component. See: Engine, Cooling and Exhaust/Engine/Intake Manifold/Service and Repair
3. Remove the air cleaner bracket. See: Engine, Cooling and Exhaust/Engine/Intake Manifold/Service and Repair
4. Remove the aerodynamic under cover NO.1. See: Body and Frame/Splash Guard/Service and Repair/Aerodynamic Under Cover No.1
Removal/Installation
5. Clean the transaxle exterior throughout with a steam cleaner or cleaning solvents.
6. Drain the ATF. See: Service and Repair/Removal and Replacement/Automatic Transaxle Fluid (ATF) Replacement [AW6A-EL]
7. Disconnect the oil hose from the transaxle.
8. Remove the oil pipe. See: Transmission Cooler/Service and Repair/Removal and Replacement/Oil Cooler Removal/Installation [AW6A-EL]
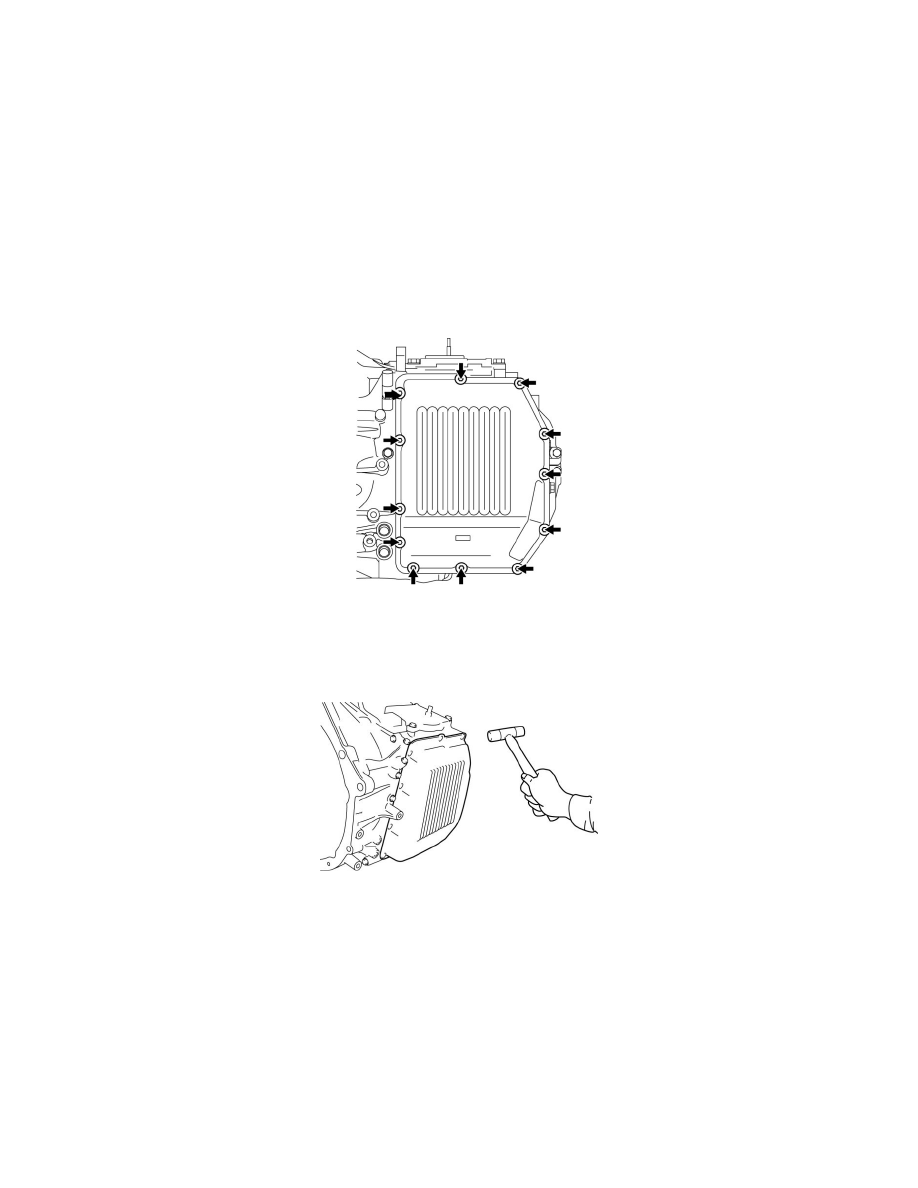
9. Remove the control valve body cover installation bolt.
CAUTION:
-
Do not damage the fitting surface of the transaxle case and the control valve body cover.
-
Do not deform the control valve body cover.
10. Using a plastic hammer, tap the control valve body cover to remove it.
CAUTION:
-
Be careful not to damage the solenoid valves and connectors.
-
Do not pull the wiring harnesses when removing the connector.
NOTE:
-
Disconnect the solenoid connector according to the following procedure:
1
Insert a precision screwdriver from the backside into the connector as shown in the figure.