
626 L4-2.0L DSL (1984)
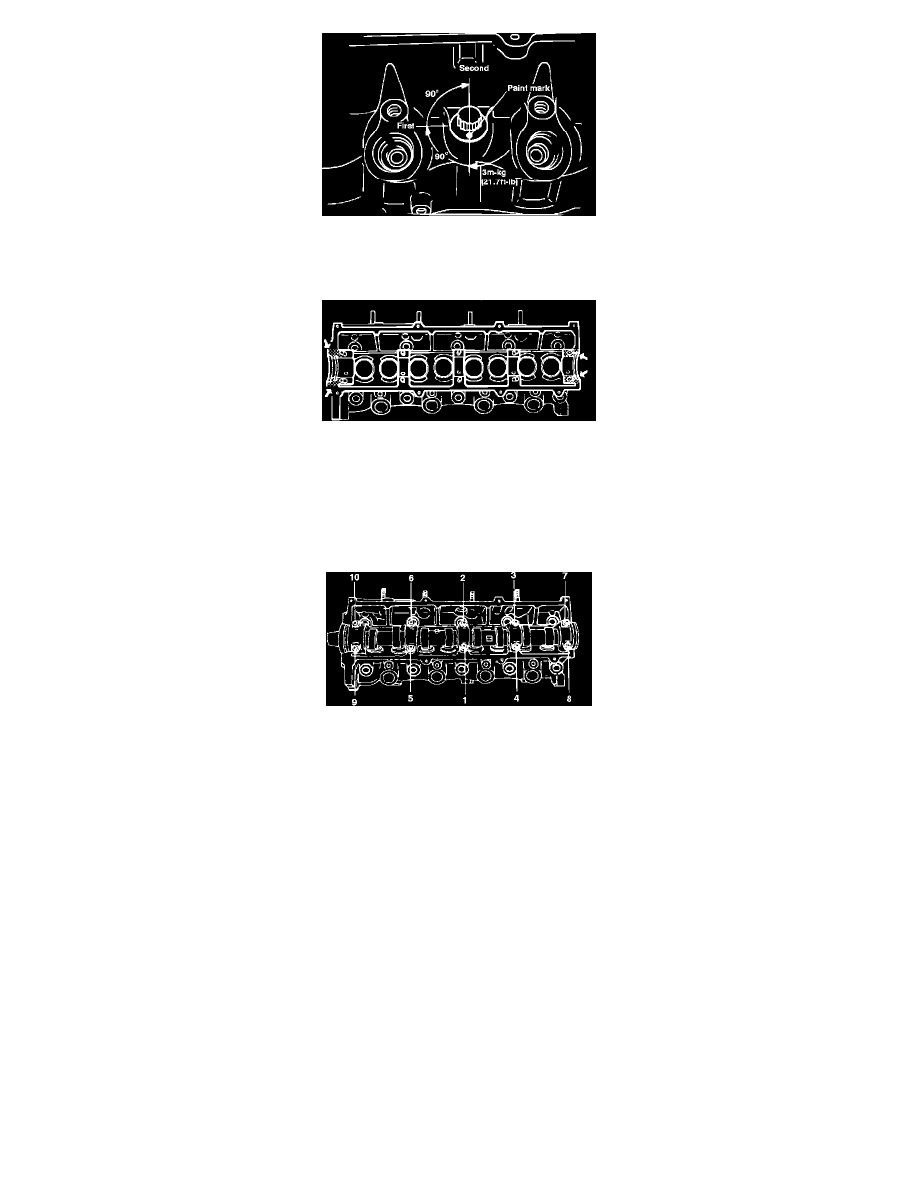
Fig. 25 Cylinder head angle tightening
15.
Place paint marks on bolt heads and, using paint marks as reference, tighten bolts 90-105°, then an additional 90-105 °, Fig. 25.
Fig. 26 Applying sealer prior to installing caps
16.
Apply thin coating of suitable sealant as shown, Fig. 26, and apply a coating of engine oil to surface of camshaft, then install camshaft on cylinder
head, ensuring semicircular key groove on camshaft is straight up.
17.
Place camshaft cap on each journal with arrows pointing toward front, then slightly tighten camshaft cap nuts.
18.
Apply a coating of engine oil to lip of front and rear camshaft oil seals and install seals. Front and rear oil seals are different sizes, do not
interchange.
Fig. 27 Tightening camshaft caps
19.
Tighten camshaft caps evenly in sequence, Fig. 27, torquing to 15-20 ft.lbs.
20.
Install front seal plate.
21.
Install front and rear timing belt as previously described, then adjust valves as described under ``Valves, Adjust.''
22.
Install cylinder head cover with gasket, then the right hand splash shield.
23.
Install and adjust drive belts.
24.
Connect exhaust pipe at exhaust manifold and install fuel injection pipe.
25.
Connect electrical connectors and hoses, then refill coolant and engine oil.
26.
Connect air cleaner hose, then the battery ground cable.