
626 L4-2000 1998cc (1983)
Note:
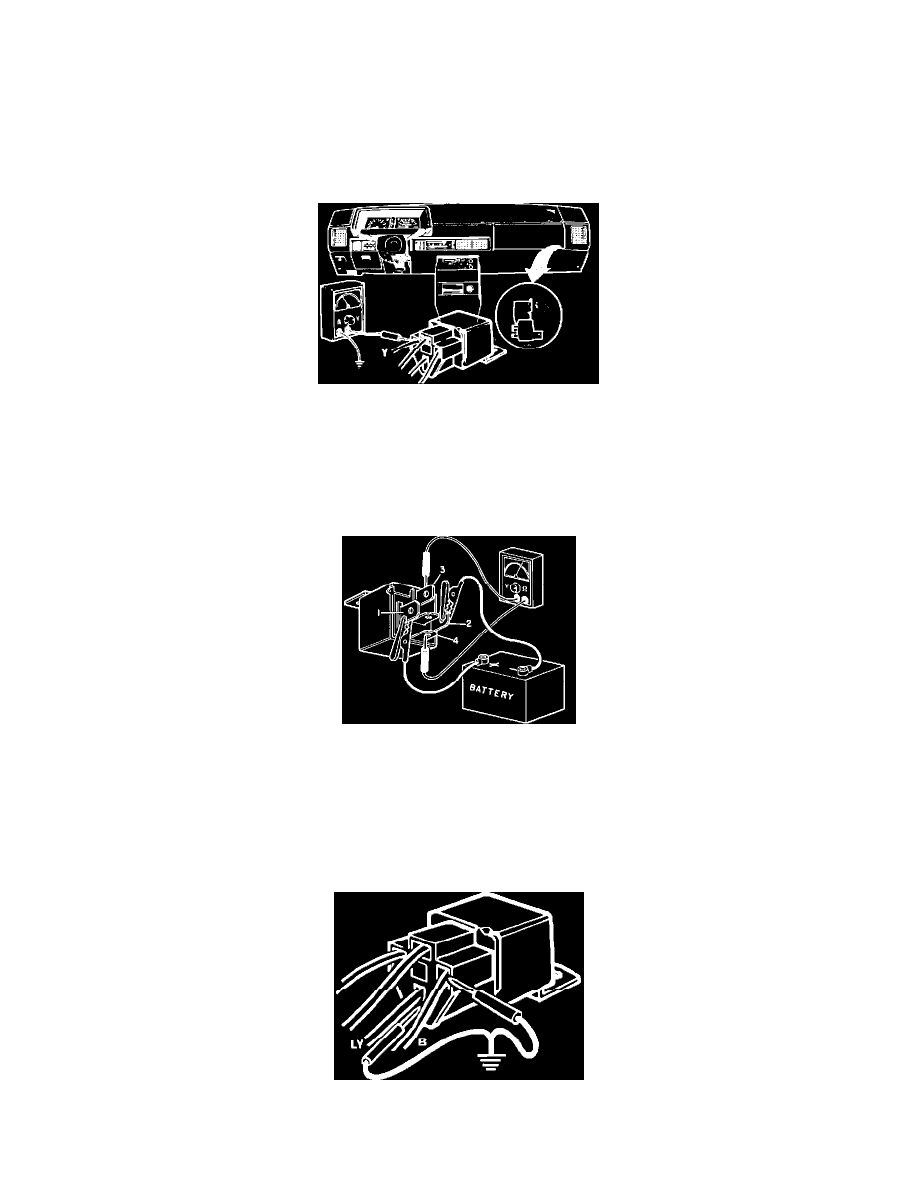
You will notice (2) relays located next to each other, check wire color codes for positive identification.
CHECKING RESULTS
A.
If the compressor clutch engages, proceed to Step 9.
B.
If the compressor clutch does not engage, check the blue-green wire for a loss of continuity between the A/C switch connector and the A/C relay
#3 connector.
A/C RELAY #3 CONNECTOR, YELLOW WIRE CHECK
Step 9. Check the yellow wire for power at the A/C relay #3 connector.
CHECKING RESULTS
A.
If no power exists in the yellow wire, check for a loss of continuity between the 20 AMP fuse marked "Cooling Fan" and the A/C relay #3.
APPLYING 12 VOLTS TO TERMINALS
B.
If power exists, follow the (3) steps below in order to troubleshoot the A/C relay #3.
(1)
Remove A/C relay #3 from connector.
(2)
Apply 12 volts to terminals 1 & 2 as shown.
(3)
Using OHM meter, check for continuity between terminals 3 & 4 as shown.
^
If continuity exists, reconnect the A/C relay #3 and proceed to Step 10.
^
If no continuity exists, replace the relay.
BLUE-YELLOW AND BLACK, GROUNDTO A/C RELAY #3 CONNECTOR
Step 10. Separately ground the blue-yellow and black wire at the A/C relay #3 connector.