
626 L4-2184cc 2.2L SOHC F2 (1989)
LOCATION I: RIGHT FRONT SIDE OF PASSENGER COMPARTMENT
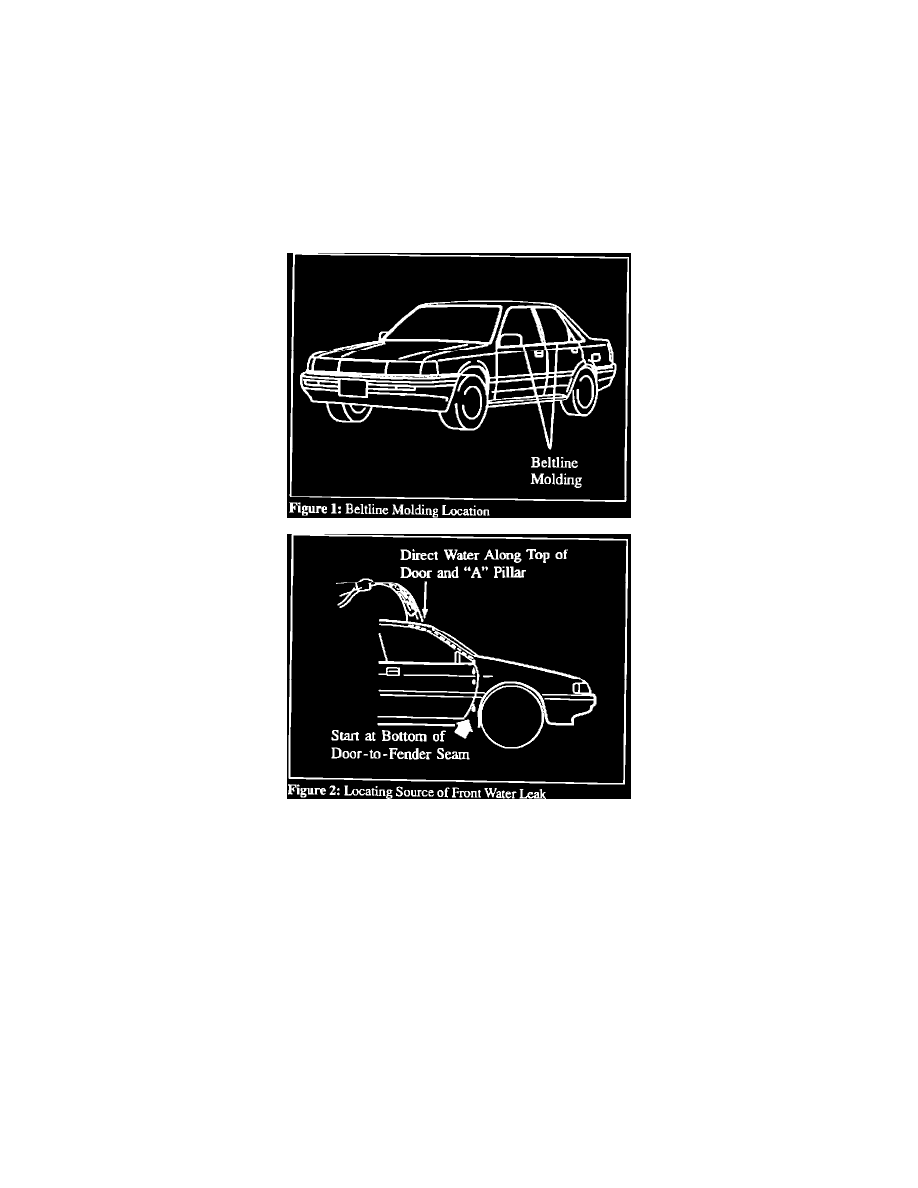
Location of Water Leak Source
1.
Remove the dash undercover, scuff plate and kick panel. Pull back the carpet and pad. Remove the front seat, carpet, and pad if necessary.
2.
At least 12 minutes should be spent during initial hose testing, because the water may have to move through several body seams before being
detected.
3.
Turn the water pressure to the hose so that a 12" to 18" stream of water is present while the hose is in a vertical position.
4.
Get inside the vehicle and use a flashlight to help locate the water entry point.
5.
With the door closed, watch for water leaks during hose test. Have an assistant slowly direct the water stream up from the bottom portion of the
door-to-fender seam, then up the "A" pillar to the top of the door and around the windshield. Next, have the assistant slowly direct water along the
window beltline molding (if the vehicle is a four door, perform this test on both the front and rear doors.) Figures 1 and 2.
NOTE:
DO NOT direct water into blower motor opening (under cowl panel).