
626 L4-2184cc 2.2L SOHC F2 (1989)
tight fit to the existing hose.
AREA B: UNDER DASH
1.
Confirm that the upper cowl drain plug (black tube) has been modified (the dimension of the drain hole has been enlarged to 10 mm). Also
confirm that there are no obstructions and that the plug drains properly.
2.
Using a mechanic's mirror, look for signs of water leakage under the dash (e.g. water/washer solvent stains).
3.
Set the heater control air intake control lever to the first position. Remove the blower fan (3 screws) and look for water entering the blower motor
opening.
4.
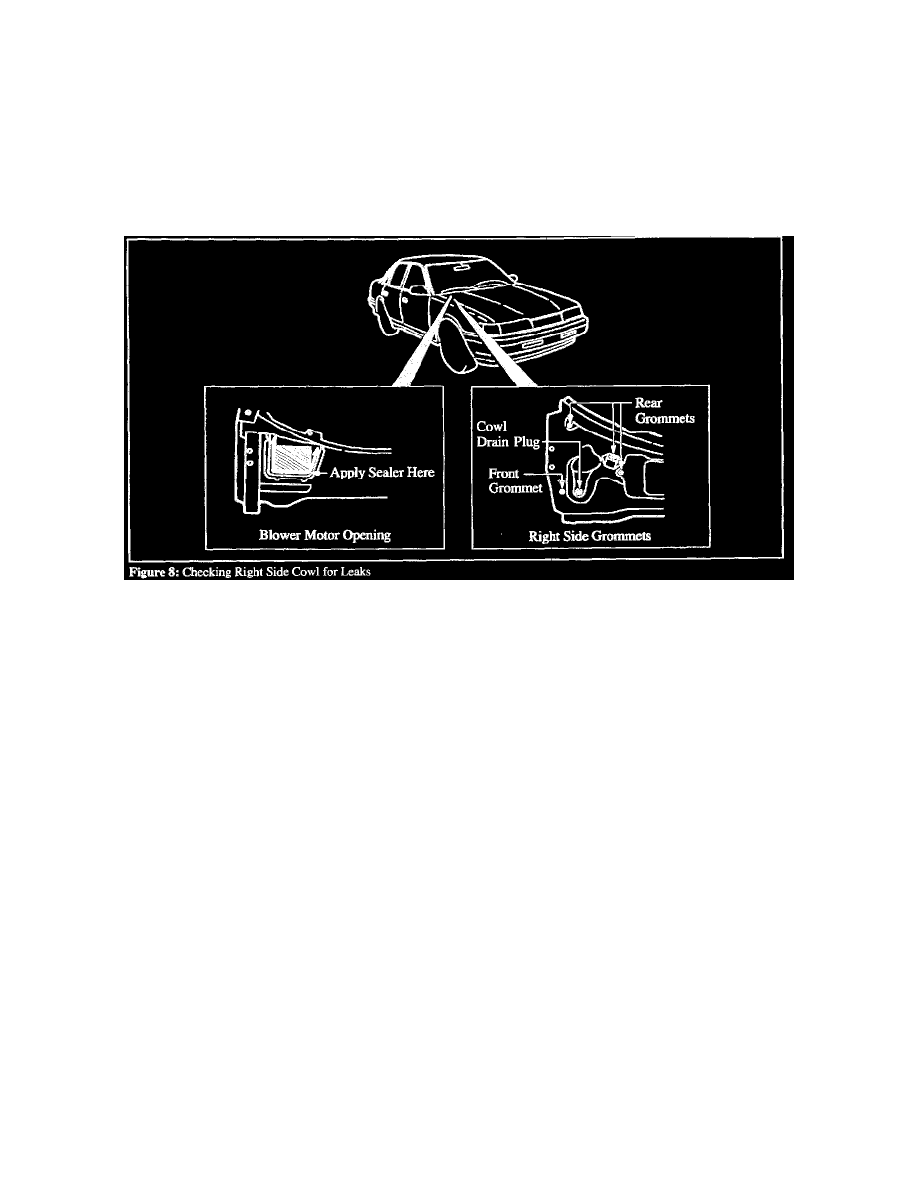
Check all grommets shown in Figure 8 for leaks by spraying water on each one. Replace any grommets that leak.
Note:
Apply silicone sealer to the bottom of the grommet during installation.
5.
If the grommets do not leak, seal the baffle seam by reaching up through the blower motor opening and seal the areas indicated in Figure 8.
6.
If water is leaking from the the firewall, check for studs and grommets that might be loose or improperly seated on the engine side of the firewall.
If necessary, remove, redress, and reinstall the studs. Retap the holes and, if necessary, replace the bolts. Apply sealer to the threads before
installing the bolts. Apply silicone sealer to the bottom of the grommets prior to installation.
7.
If a leak is found, remove the black plastic cowl vent, then remove the foam strip from the underside.
Note:
Before installing the new foam pads, make sure to apply sealer to both sides of the pad.
8.
Reinstall the black plastic cowl vent. Perform a water leak test by directing water around the outer edges of the cowl vent. Inspect for water
leakage or moisture.
AREA C: CORNER OF FIREWALL AND INNER FENDER