
626 L4-2184cc 2.2L SOHC F2 (1989)
NOTE:
This procedure should only be done by experienced body shop personnel.
2.
Remove door jam nut and bolt, also remove the four (4) upper fender bolts. Using a mechanic's mirror, inspect sealer hidden by upper fender for
skips and pinholes. Figure 8.
NOTE:
The illustration shows the fender removed. Complete fender removal is not required.
CAUTION:
Use care when moving fender for inspection and resealing of body seams. Do not allow fender to buckle.
II. Left Front Side of Passenger Compartment Area
Locating Source of Water Leak
1.
Remove dash undercover, scuff plate and kick panel. Pull back carpet and pad.
2.
Spend at least 12 minutes during the initial hose test. The water must move through several body seams before being detected.
3.
The water pressure should create a stream 12" - 18" with the hose held vertical.
4.
Get inside vehicle. Use a flashlight to help locate point of water entry.
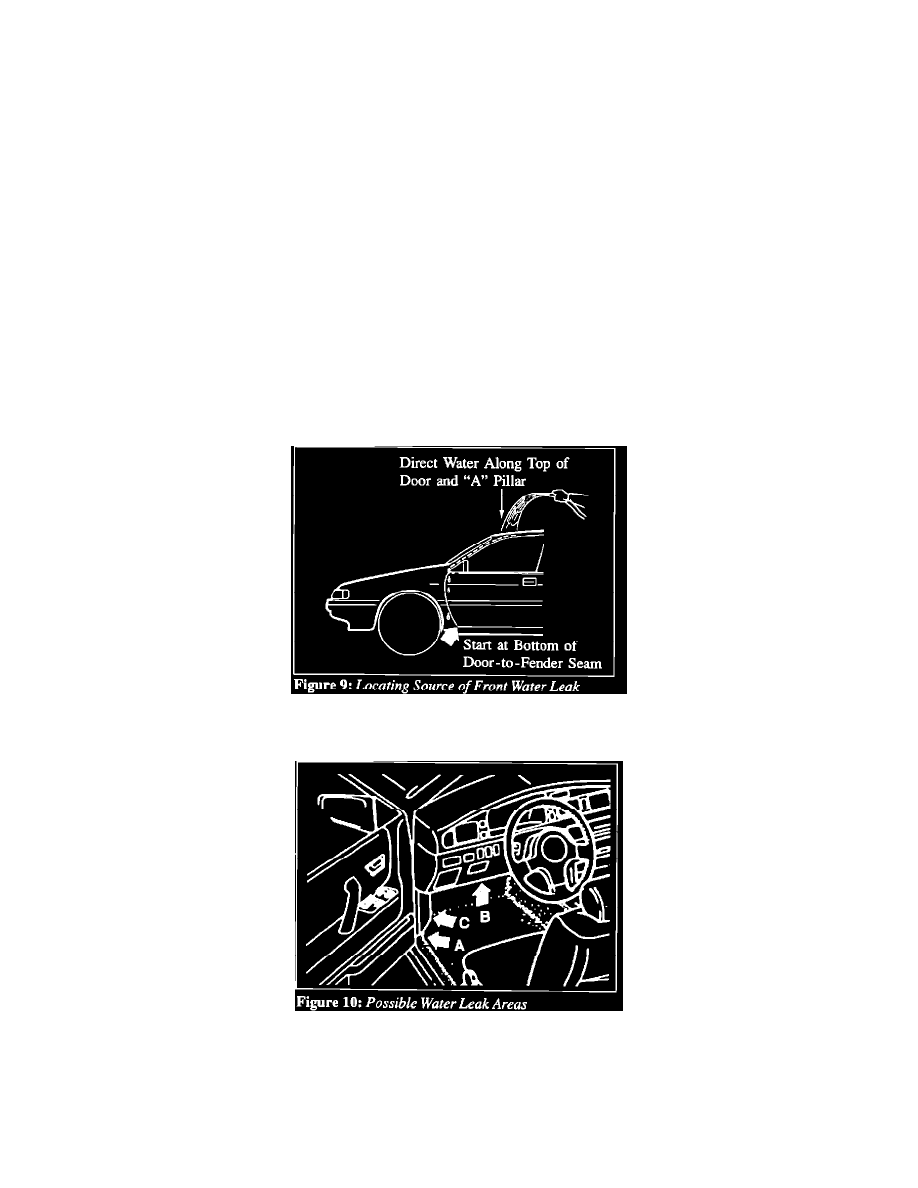
5.
With the door closed, watch for water leaks during the hose test. Slowly direct the water stream up from the bottom portion of the door-to-fender
seam, then continue up the "A" pillar to the top of door and around windshield. Figure 9.
6.
Note which area water enters the vehicle. Refer to the appropriate Inspection and Repair: A, B or C. Figure 10.
A - Kick Panel
B - Under Dash
C - Corner of Firewall & Inner Fender
Inspection & Repair