
626 L4-2184cc 2.2L SOHC F2 (1989)
Control Arm: Service and Repair
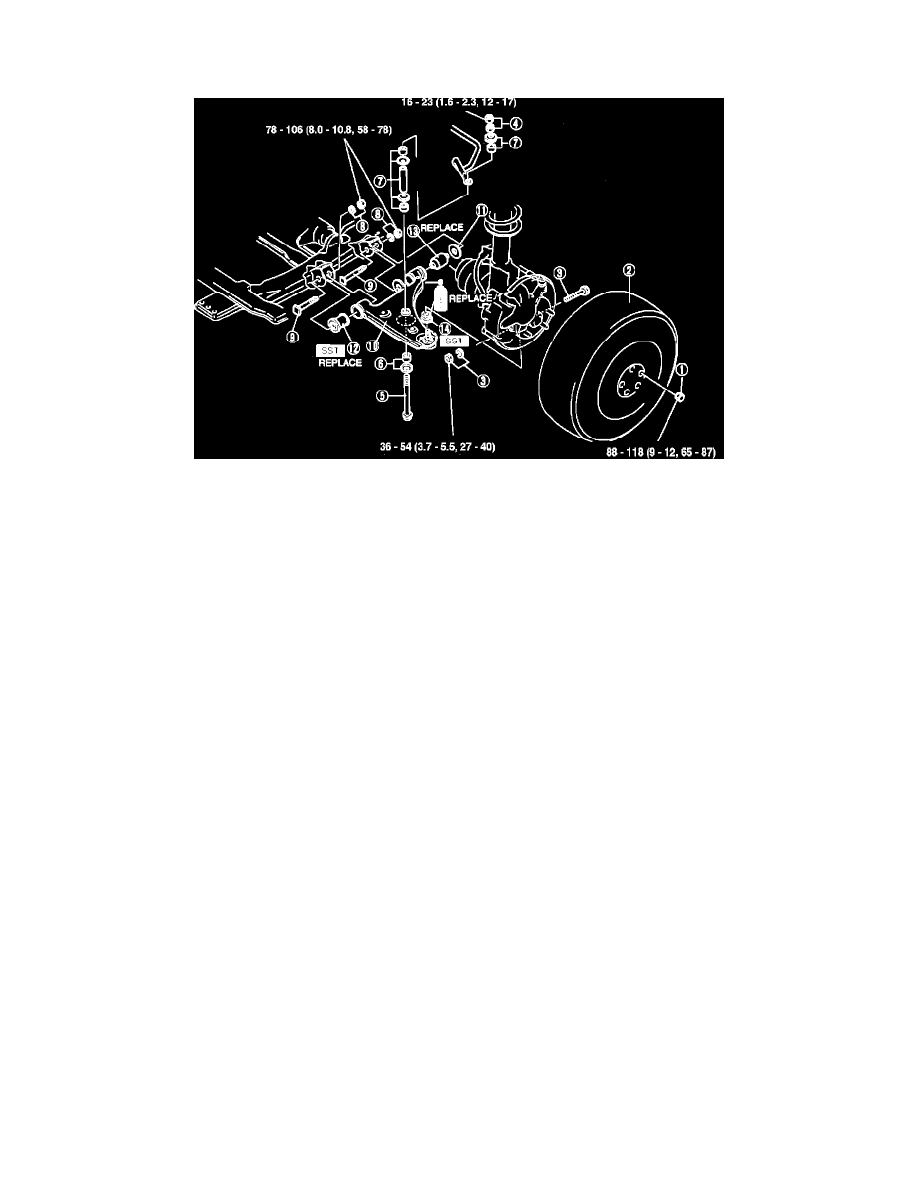
Lower Arm
Fig. 3 Front Lower Arm Replacement
1.
Raise and support vehicle and remove front wheel.
2.
Remove components in numerical order, Fig. 3.
3.
Check lower arm for damage or cracks, bushings for deterioration or wear and dust boot for damage, replacing as necessary.
4.
Check ball joint preload by attaching tool 490180510B or equivalent to ball joint, then attaching spring scale to tool and measuring ball joint
preload after shaking ball joint stud 3 or 4 times.
5.
When replacing lower arm front bushing, proceed as follows:
a. Cut away projecting rubber of lower arm bushing.
b. Using tool 49G0342A0 or equivalent, remove bushing.
c. Apply soapy water to new bushing and, using same tool, pull bushing into new arm.
6.
If necessary, replace lower arm front bushing in same fashion as front bushing.
7.
When replacing ball joint dust boot, proceed as follows:
a. Using chisel, remove dust boot. Do not damage ball joint.
b. Liberally coat inside of new dust boot with grease and press in with tool 498038785 or equivalent.
8.
Reverse removal procedure to install, noting the following.
a. Tighten stabilizer control link bolt so that there is .79 inch (20.1mm) of thread exposed.
b. Install lower arm spindle to lower arm and loosely tighten nut.
c. Install lower arm ball joint to knuckle arm, torquing to specification. Lower vehicle and check torque with vehicle unloaded.
d. Lower vehicle from jack and torque lower arm spindle nut, loosely tightened in step b, to 69-93 ft. lbs. Lower vehicle and check torque with
vehicle unloaded.