
626 LX L4-2.0L DOHC (1999)
Valve Clearance: Adjustments
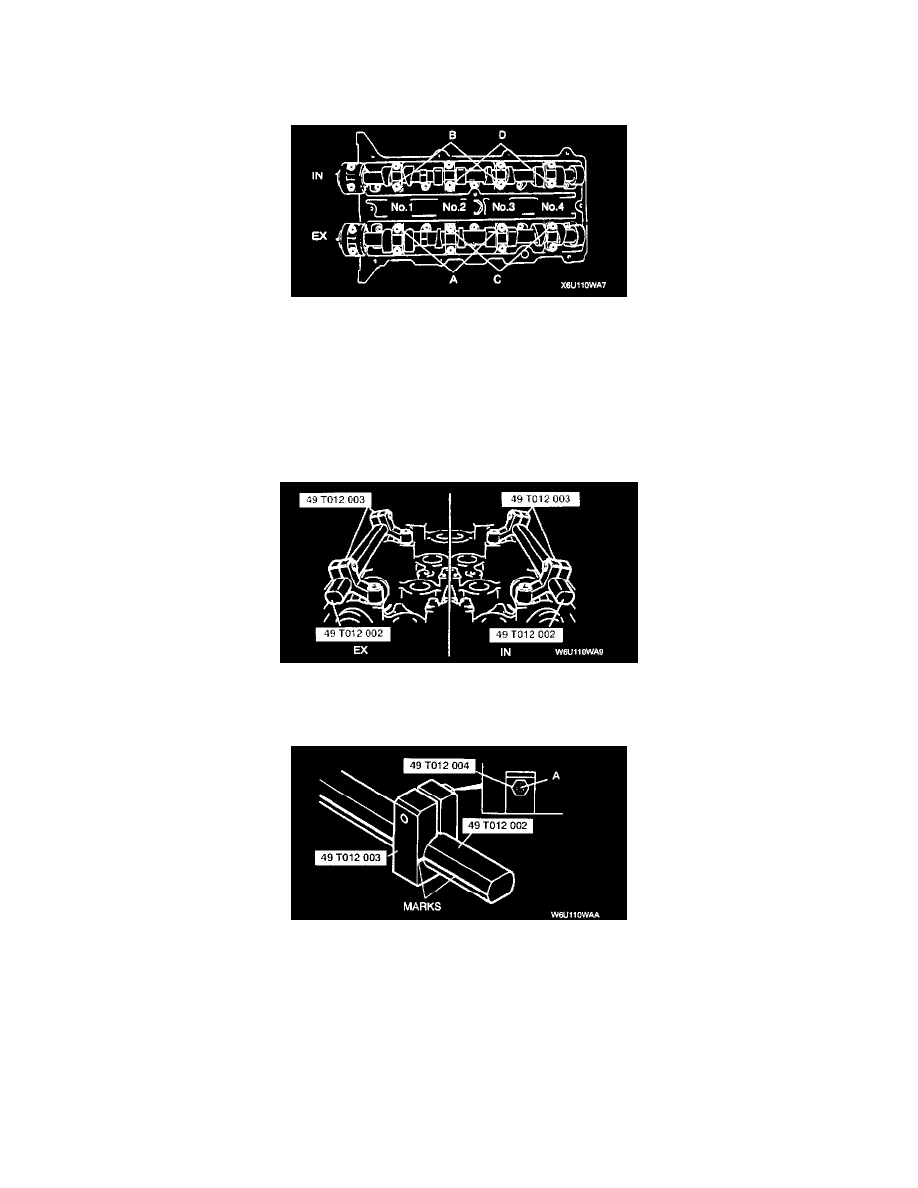
VALVE CLEARANCE ADJUSTMENT [FS]
Perform this same procedure for all camshafts requiring valve clearance adjustment.
1. Turn the crankshaft clockwise so that the cams on the camshaft requiring valve clearance adjustment are positioned straight up.
2. Remove the camshaft cap bolts as necessary. Remove only one pair of cap bolts at a time. Install the cap bolts before removing the next pair.
-
EX side No. 1, 2, 3 cylinder adjustment shim removal: A
-
IN side No.1, 2, 3 cylinder adjustment shim removal: B
-
EX side No.2, 3, 4 cylinder adjustment shim removal: C
-
IN side No.2, 3, 4 cylinder adjustment shim removal: D
Note:
-
For EX side No.2, 3 cylinder adjustment shim removal, remove bolts either A or C.
-
For IN side No.2, 3 cylinder adjustment shim removal, remove bolts either B or D.
3. Install the SSTs on the camshaft using the camshaft cap bolt holes.
Tightening torque: 11.3 - 14.2 Nm (115 - 145 kgf.cm, 100 - 125 inch lbs.)
4. Align the marks on the SSTs (shaft and shaft clamp).
5. Tighten bolts A to secure the Special Service Tool (SST) (shaft).