
626 LX L4-2.0L DOHC (1999)
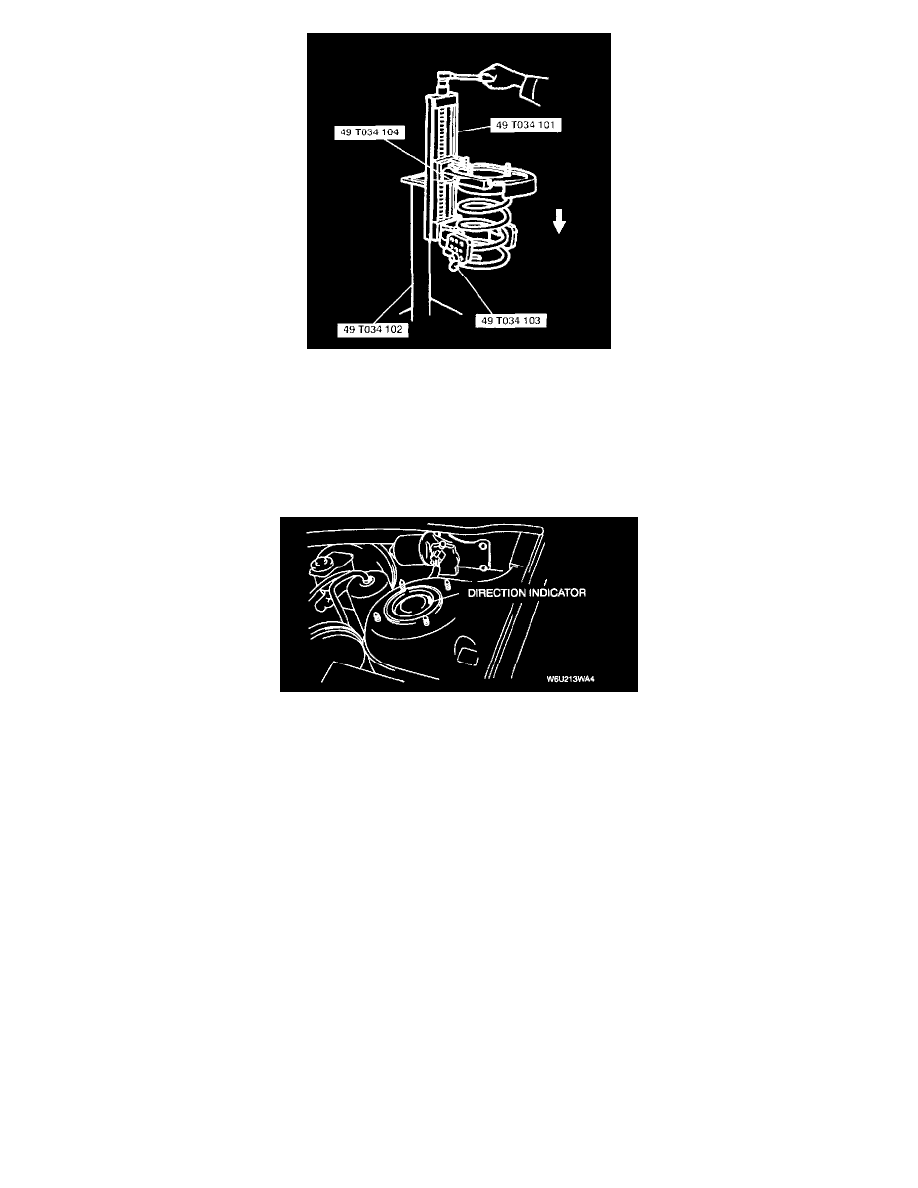
4. Compress the coil spring by using the SSTs.
5. Install the shock absorber so that the lower end of the coil spring is seated on the step of the lower spring seat.
6. Make sure that the marks on the shock absorber and upper spring seat are aligned.
7. Install the thrust bearing, mounting rubber, and piston rod nut, then remove the SSTs.
Piston rod nut tightening torque: 90 - 137 Nm {9.1 - 14.0 kgf.m, 66 - 101 ft. lbs.}
Front Shock Absorber and Coil Spring Installation Note
-
Face the mounting block direction indicator toward the rear outboard position, and install the shock absorber.
FRONT SHOCK ABSORBER INSPECTION
1. Remove the front shock absorber from the vehicle.
2. Inspect for damage and oil leakage.
3. Inspect the rubber bushing for deterioration and wear.
4. Compress and extend the shock piston at least three times. Verify that the operational force does not change and that there is no unusual noise.
1) Compress the shock absorber piston and release it.
2) Verify that the piston extends fully at a normal speed.
-
Replace the shock absorber as necessary.
FRONT SHOCK ABSORBER DISPOSAL
WARNING: The gas in the shock absorber is pressurized, and could spray metal chips into the eyes and face when drilling. Whenever
drilling into a shock absorber, wear protective eye wear.
1. Clamp a shock absorber flat or with the piston downwards.