
626 LX L4-2.0L DOHC (1999)
27. Install the manual control lever component and bolt.
Tightening torque 24 - 30 Nm (2.4 - 3.1 kgf-m,18 - 22 ft. lbs.)
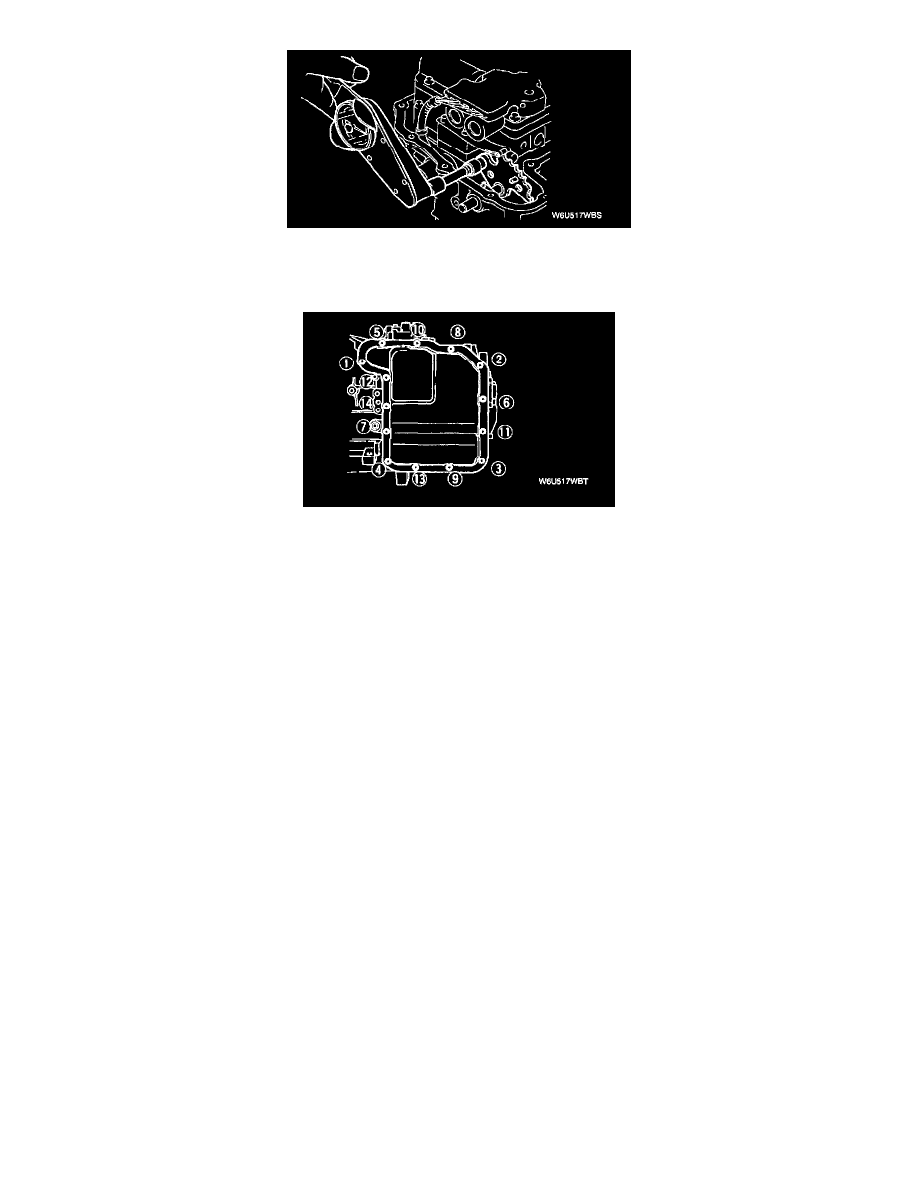
28. Install the control valve body cover gasket on the case. Install the cover to the case.
29. Install the fourteen mounting bolts in the sequence shown.
Tightening torque 14 - 18 N m (143 - 184 kgf-cm, 124 - 159 inch lbs.)
Caution: If reusing the hose clamp, position it in the original location on the hose and squeeze the clamp lightly with large pliers to ensure a tight
fit.
30. Install the oil hose.
31. Connect the solenoid body connector.
32. Connect the TR switch connector.
33. Install the splash shield.
34. Install the wheel and tire.
35. Install the fresh-air duct, air cleaner component.
36. Install the battery component.
37. Fill the transaxle with the specified ATF after installation.
38. Inspect for leakage of ATF from all connecting points.
39. Connect the negative battery cable.
40. Carry out the mechanical system test.
41. Carry out the road test.