
626 LX V6-2.5L DOHC (1997)
DISASSEMBLY
1. Disassemble in the order shown in the figure, noting the proper reassembly direction of the valves and internal parts.
WARNING: Using compressed air can cause dirt and other particles to fly out, causing injury to the eyes. Wear protective eye wear
whenever using compressed air.
2. Clean all parts and bores with compressed air and apply ATF to them immediately before assembly.
INSPECTION
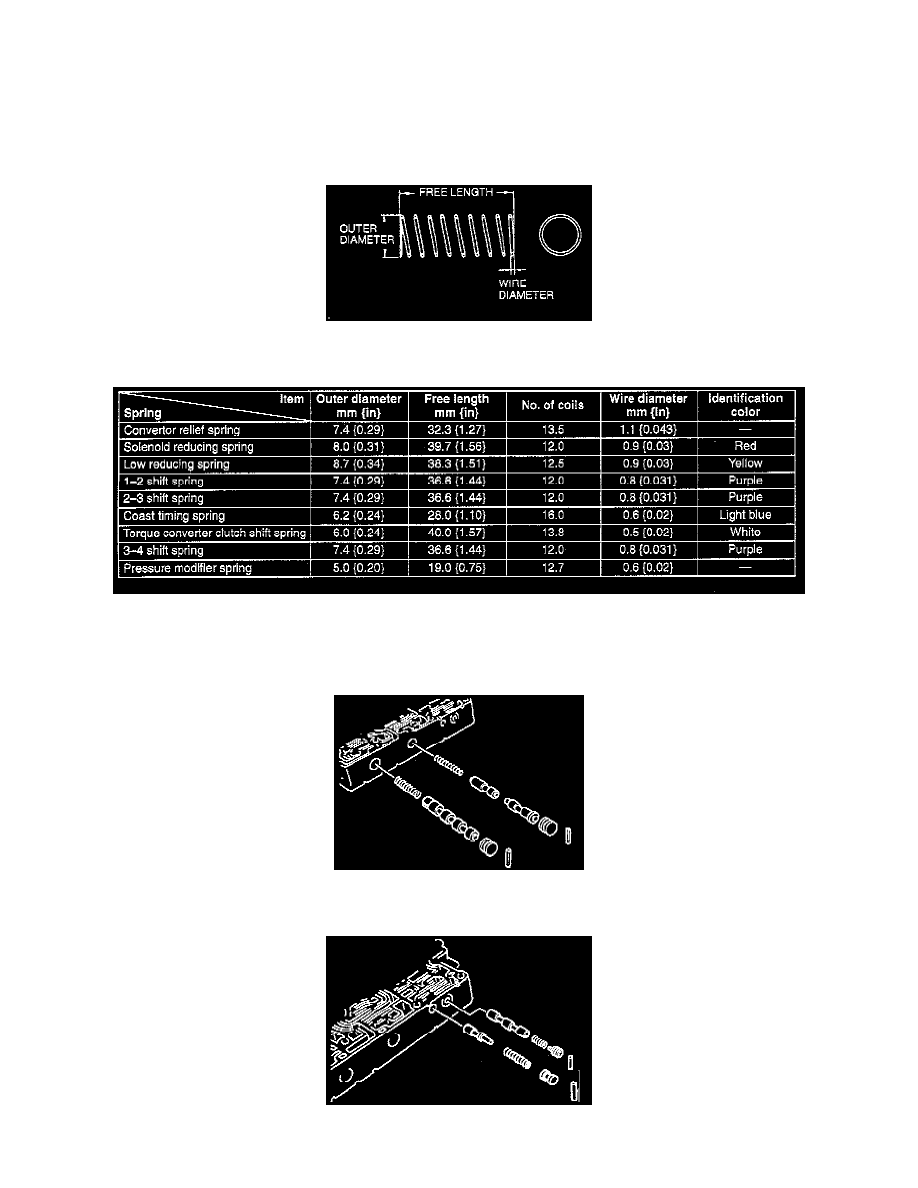
1. Measure the spring free length.
2. If not within the specifications, replace the spring.
ASSEMBLY
1. Assemble in the reverse order of disassembly, referring to Assembly Procedure
2. Install the 3-4 shift spring, 3-4 shift valve, stop plug, and stop pin.
3. Install the torque converter clutch shift spring, torque converter clutch shift valve B, torque converter clutch shift valve A, stop plug, and stop pin.
4. Install the coast timing valve, coast timing spring, stop plug, and stop pin.