
929 V6-3.0L DOHC (1993)
Valve Body: Service and Repair
Replacement
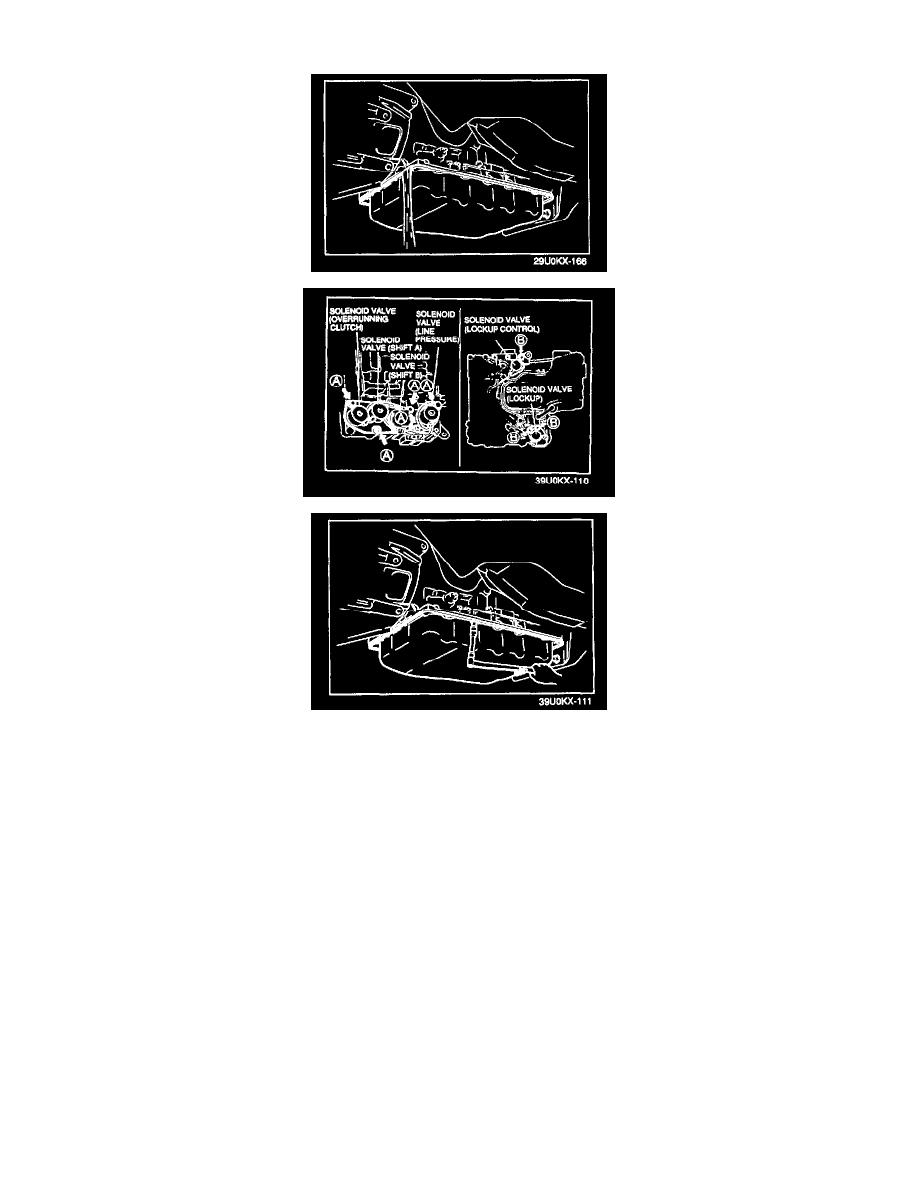
NOTE: If the solenoid valves (shift A, shift B, overrunning clutch, and line pressure) and not correct, replace the solenoids as an assembly.
1. Disconnect the negative battery cable.
2. Loosen the oil pan mounting bolts and drain the ATF into a suitable container.
3. Remove the oil pan.
4. Remove the control valve body.
5. Remove the solenoid valve(s).
6. Apply ATF to a new O-ring(s) and Install it on the solenoid valve(s).
7. Install the new solenoid valve(s) to the control valve body.
Tightening torque
A: 6.9 - 9.8 N.m (70 - 100 kgf.cm, 61 - 87 in.lbf)
B: 9.9 - 12.7 N.m (100 - 130 kgf.cm, 87 - 112 in.lbf)
8. Install the control valve body.
9. Clean the oil pan and the magnet, and set the magnet into the oil pan.
10. Install a new gasket and the oil pan.
Tightening torque: 5.0 - 7.8 N.m (50 - 80 kgf.cm, 44 - 69 in.lbf)
11. Fill the transmission with the specified amount and type of the ATF.
12. Connect the negative battery cable.