
929 V6-3.0L SOHC (1989)
Control Arm: Service and Repair
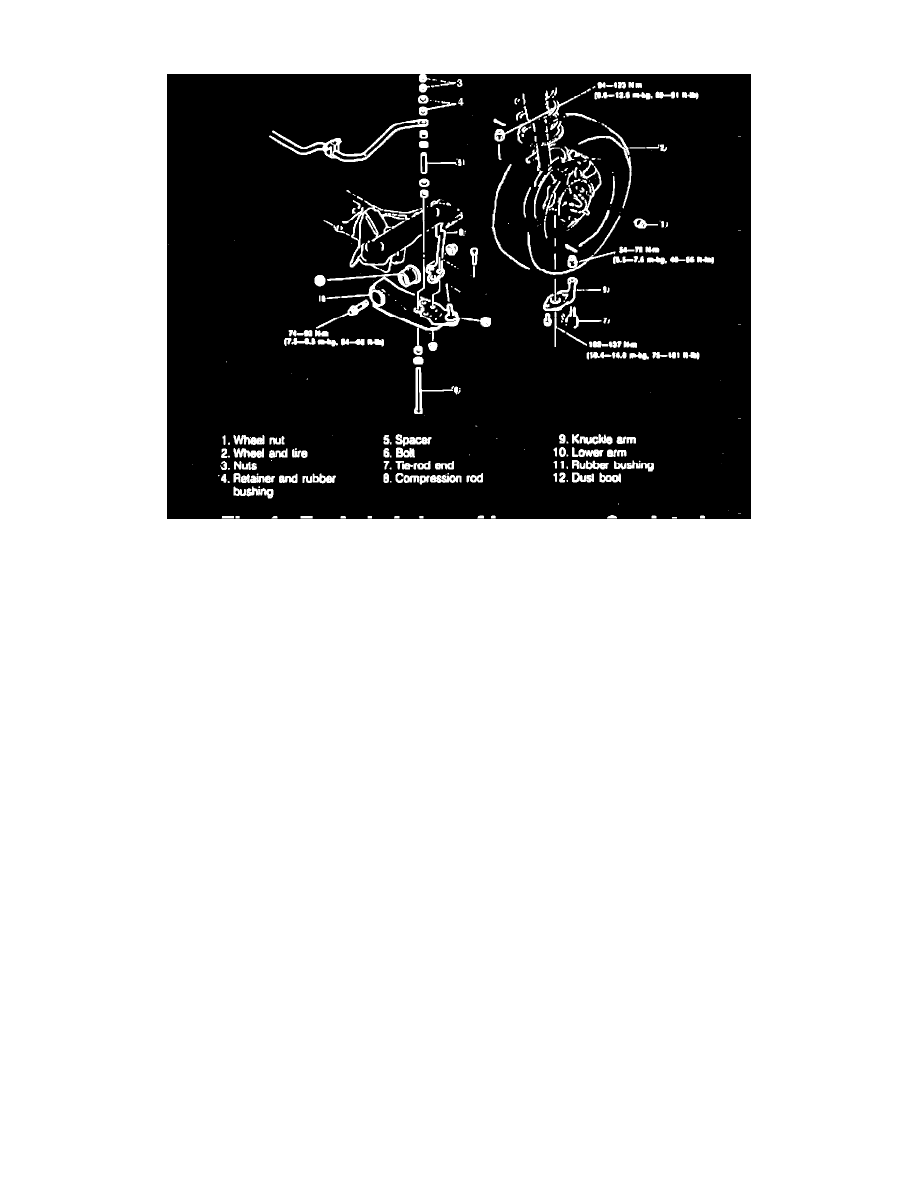
Fig. 4 Exploded View Of Lower Arm & Related Components
1.
Remove components in numerical order, Fig. 4, noting the following:
a. Press out lower arm bushing using tools 49H034201 and 49H034202 or equivalents.
b. Remove dust boot with a chisel.
2.
Check lower arm for damage or cracks, bushings for deterioration or wear and dust boot for damage, replacing as necessary.
3.
Check ball joint preload. Attach tool 490180510B or equivalent to ball stud and measure preload with a spring scale. Spring scale reading should
be 1.1-2.6 lbs. while ball stud is rotating. Measure preload after shaking stud of ball joint 3 or 4 times.
4.
If ball joint preload is not within specifications, replace ball joint. If it is necessary to replace ball joint, replace lower arm assembly.
5.
Reverse removal procedure to install, noting the following:
a. Use tools 49H034201 and 49H034202 or equivalents to press in lower arm bushing.
b. When installing dust boot, liberally coat inside of new dust boot with grease and use tool 49H028301 or equivalent to press on dust boot.