
929 V6-3.0L SOHC (1989)
Suspension Spring ( Coil / Leaf ): Service and Repair
Front Suspension
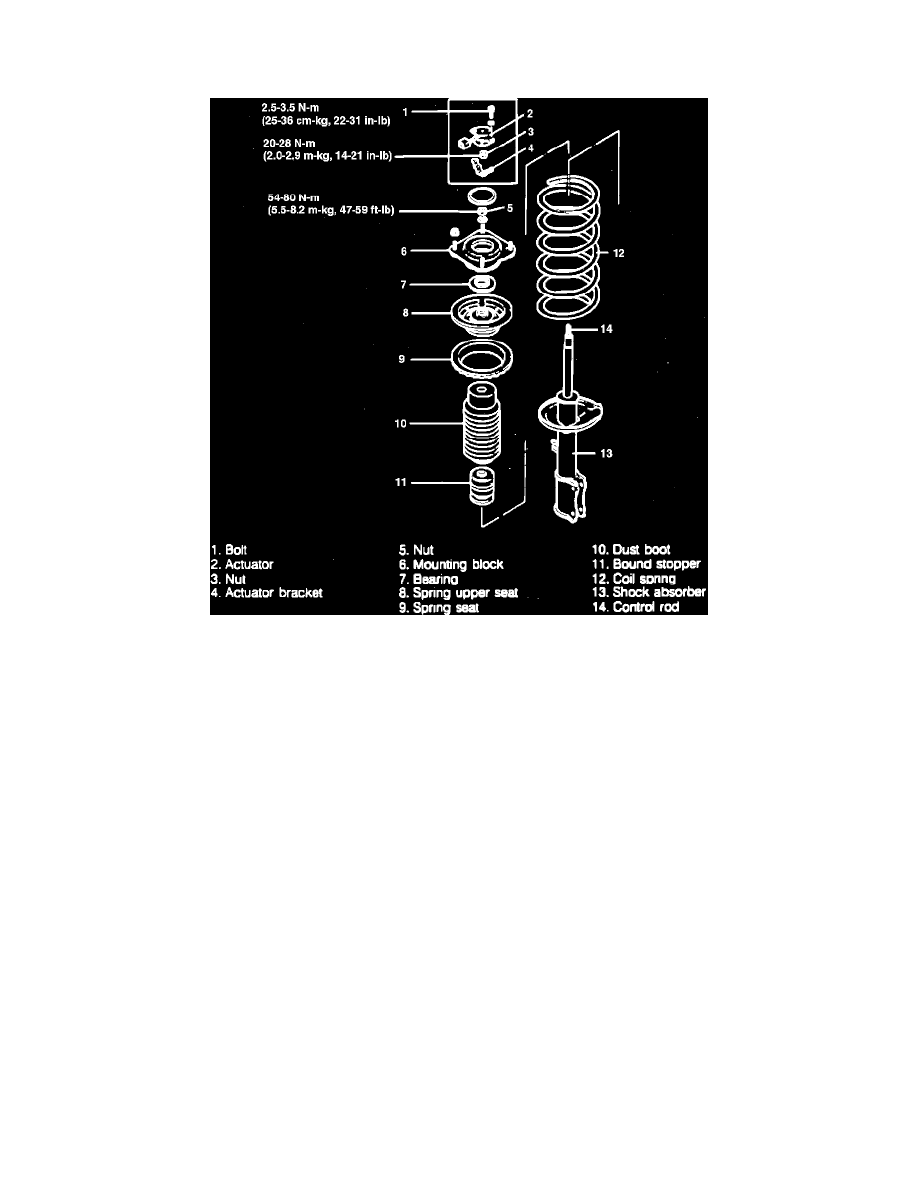
Fig. 3 Exploded View Of Shock Absorber Assembly
1.
Raise and support vehicle and remove front wheel.
2.
Remove brake hose clip.
3.
On models equipped with auto adjusting suspension, remove harness and bracket.
4.
On all models, remove caliper mounting bolt and caliper, then the lower shock absorber attaching bolts and nuts.
5.
On models equipped with auto adjusting suspension, disconnect actuator connector.
6.
On all models, remove rubber cap, then the upper shock absorber attaching nuts.
7.
Remove shock absorber assembly, then the mounting block from shock absorber.
8.
Loosen piston rod upper nut several turns. Do not remove nut.
9.
Using suitable tools, compress spring, then remove nut.
10.
Disassemble in numerical order, Fig. 3.
11.
Reverse disassembly procedure to assemble, noting the following:
a. Torque piston rod upper nut to specification.
b. Ensure spring is well seated in upper and lower spring seats.
12.
Remove removal procedure to install, noting the following:
a. Install mounting block to suspension tower so that white mark on mounting block faces front inside direction.
b. Torque harness and bracket assembly mounting bolt to specification.
c. Torque lower shock absorber mounting bolts to specification.
d. Torque upper shock absorber mounting nuts to specification.
e. Torque lug nuts to specification.