
B2300 L4-2.3L (2008)
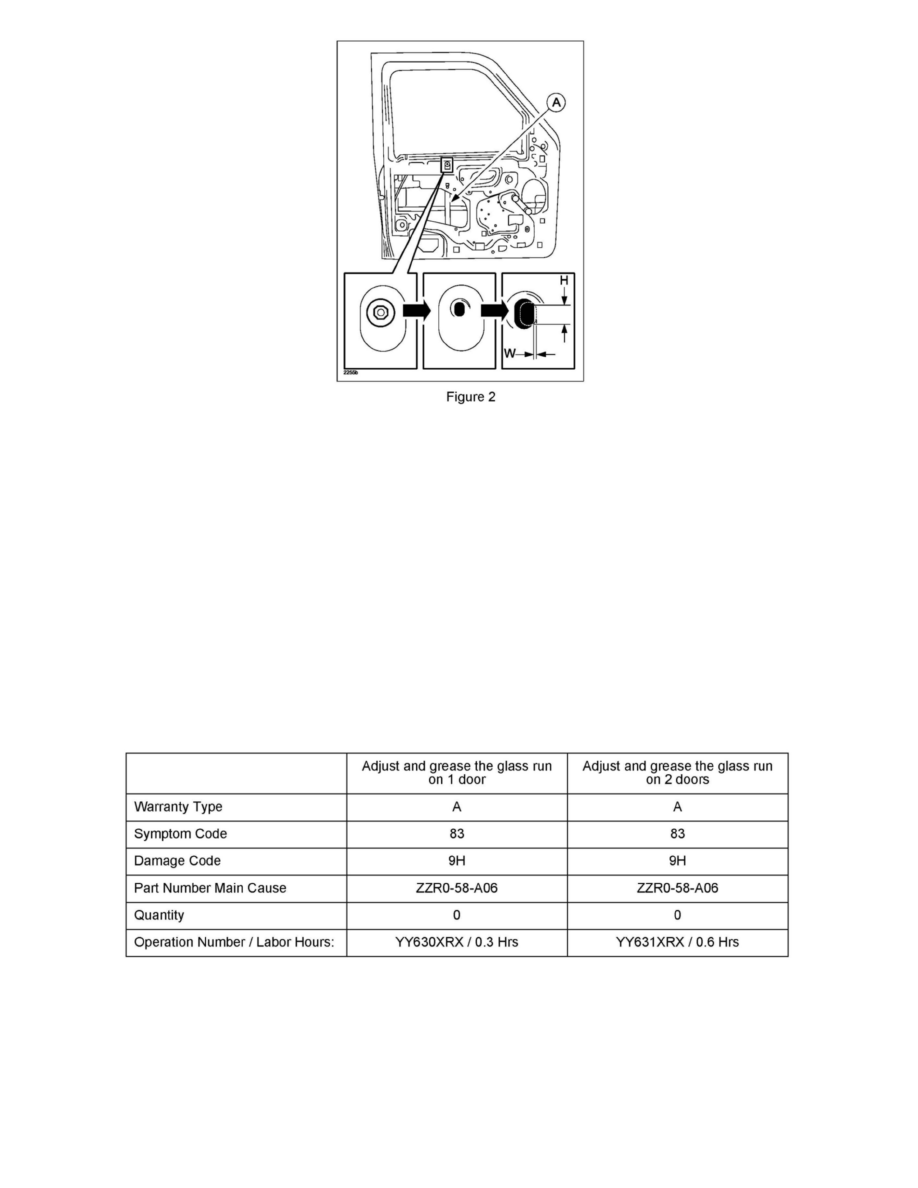
3. With window in down position, remove the top and bottom center door glass run retainer nuts and push door glass run (A) to the side. (Figure 2)
4. Rework the upper glass run attachment slot. (Figure 2)
a. Remove approximately 5/64" (2mm) of material at (W) and 25/64" (10mm) at (H).
b. Remove material from the front of vehicle side of the slot. Be careful to not leave burrs on the panel.
c. Coat newly exposed metal areas with locally sourced Anti-Corrosion Coating or Motorcraft(R) Anti-Corrosion Coating PM-13A.
5. Reposition glass run (A) and loosely attach fasteners.
6. Raise glass to full up position. While pushing outward on the lower attachment. Torque glass run attachment nuts, tighten to 106 lb-in (12 Nm). Be
careful not to force a different position of the stud when installing the upper nut.
7. Install panel following MS3 online or Workshop Manual (section 09-12 DOOR TRIM PANEL - FRONT).
8. Verify repair.
WARRANTY INFORMATION
NOTE:
^ This warranty information applies only to verified customer complaints on vehicles eligible for warranty repair.
^ This repair will be covered under Mazda's New Vehicle Limited Warranty term.
^ Additional diagnostic time cannot be claimed for this repair.