
B2300 L4-2.3L (2008)
Seals and Gaskets: Service and Repair
Automatic Transmission Extension Housing Seal and Bushing Removal / Installation - 4X2
AUTOMATIC TRANSMISSION EXTENSION HOUSING SEAL AND BUSHING REMOVAL / INSTALLATION - 4X2
Removal Note
1. Remove rear propeller shaft.
Caution:
^
Use the extension housing bushing remover carefully so that the seal area is not damaged.
Caution:
^
The tool will bottom when bushing is in the proper position.
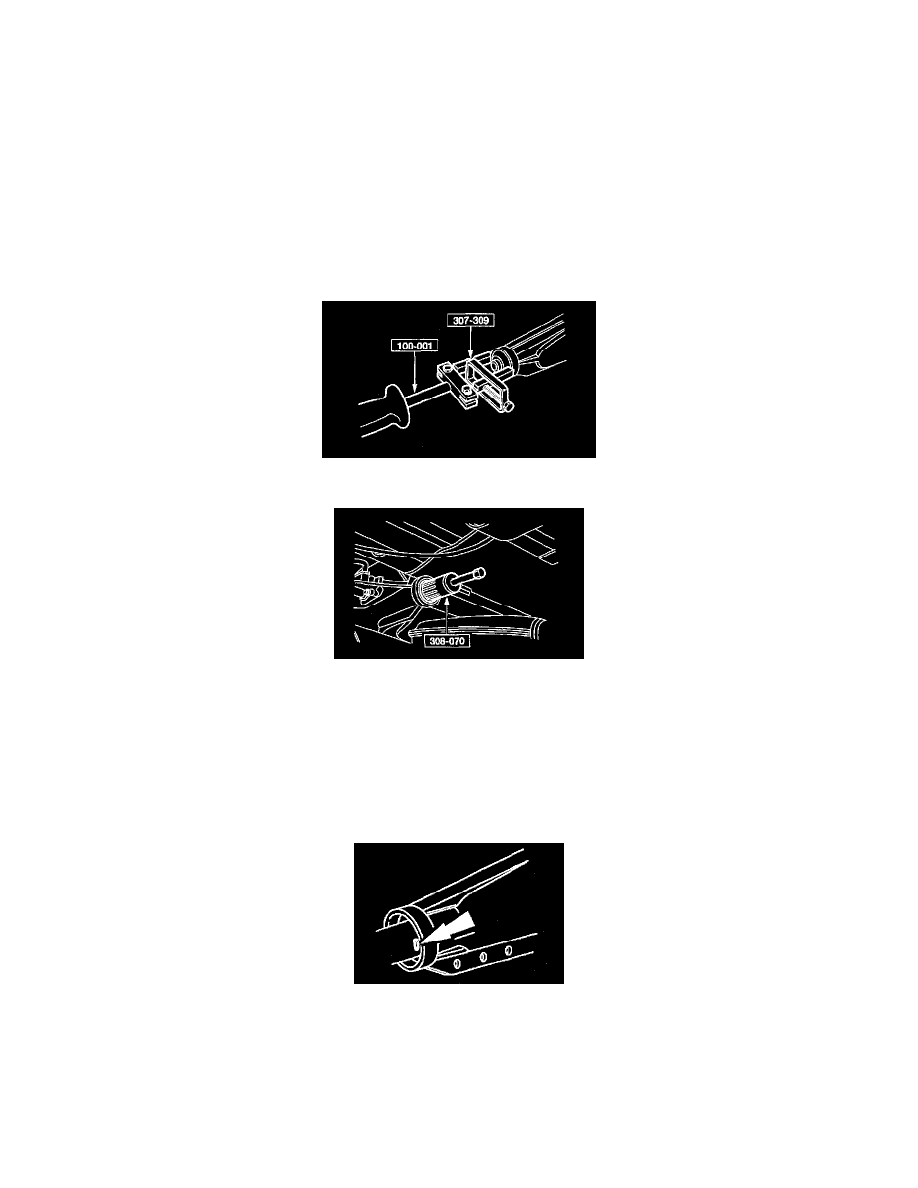
2. Using the slide hammer SST and the torque converter fluid seal remover SST, remove the extension housing seal.
3. Install extension housing bushing remover SST and remove extension housing bushing.
Installation Note
1. Position the extension housing bushing into the extension housing.
Caution:
^
The lube hole in the extension housing bushing must be aligned with the lube groove in the extension housing. This groove is located at
the 3 o'clock position when viewed from the rear.
Note:
^
Inspect the counterbore of the extension housing for burrs. Remove any burrs from the extension housing counterbore with an oil stone.
2. Use the transmission extension housing bushing installer SST to install the extension housing bushing.
Caution:
^
The tool will bottom when bushing is in the proper position.