
B2300 L4-2.3L VIN D (2004)
Drive/Propeller Shaft: Service and Repair
Propeller Shaft Runout and Balance
PROPELLER SHAFT RUNOUT AND BALANCE
1. Use a twin post axle contact hoist to raise and support the vehicle.
2. Remove the rear wheels and tires. Install the lug nuts to retain the brake drums.
Caution:
^
To prevent overheating, do not run the vehicle on the hoist for an extended period.
3. Note and record baseline speed.
1) With the transmission in gear, increase vehicle speed to the maximum vibration level. Note and record the speed of this vibration period as a
baseline speed.
4. Check the attachment of the propeller shaft to the rear companion flange. Replace any worn parts.
Warning:
^
Keep hands away from the balance weights while the propeller shaft is rotating.
5. Check the propeller shaft for out of balance.
1) With the transmission in gear, run the vehicle with the propeller shaft rotating 64 - 80 km/h (40 - 50 mph)
2) Have an assistant barely contact the propeller shaft with a marker in the rear, middle, and front end to indicate heavy spots.
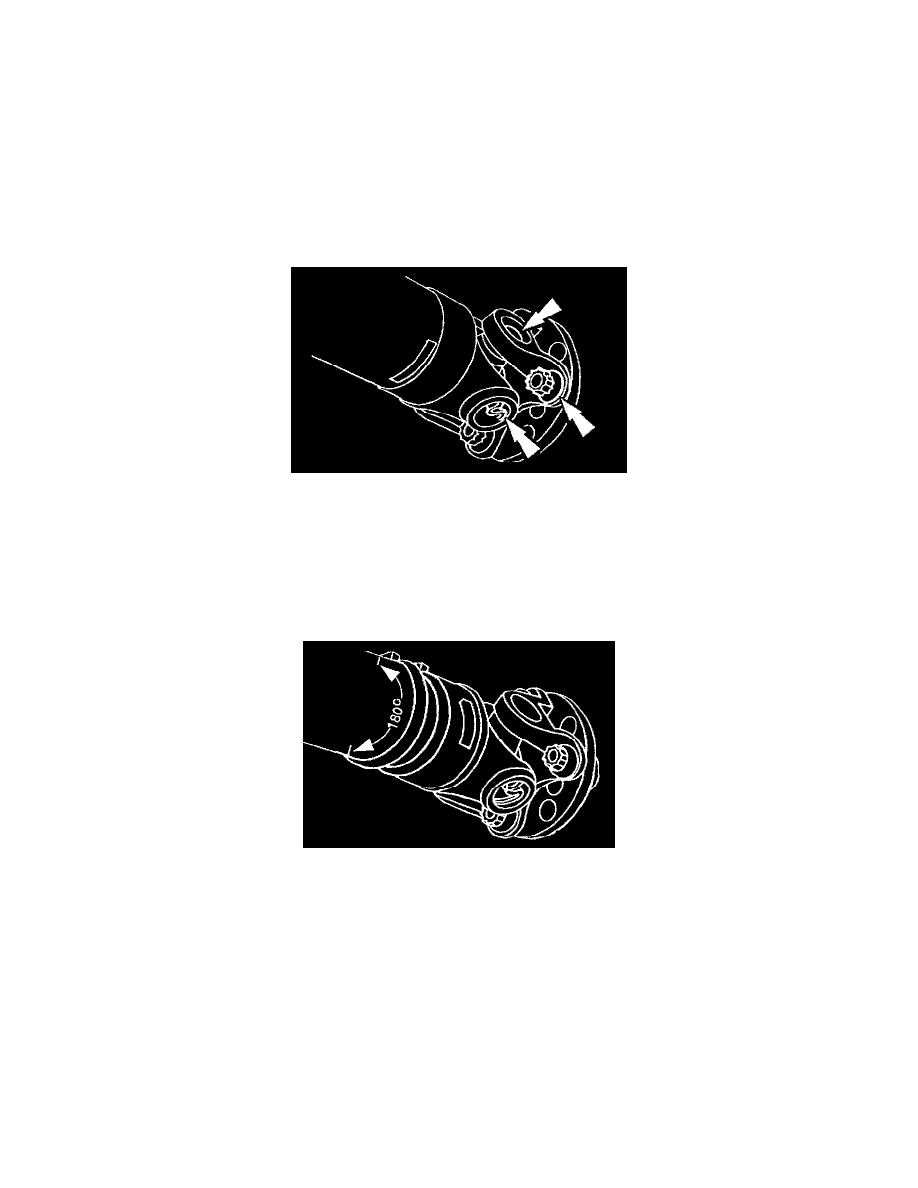
6. Balance the propeller shaft.
1) Install two stainless steel screw-type hose clamps on the propeller shaft with the clamp screws opposite the mark.
2) Tighten the hose clamps starting at the pinion yoke end of the propeller shaft.
7. Run the vehicle at baseline speed.