
B2300 Regular Cab 2WD L4-2.3L VIN A (1997)
CAUTION: Before assembly, make sure all parts are completely clean.
Assemble in the reverse order of disassembly, referring to the following notes:
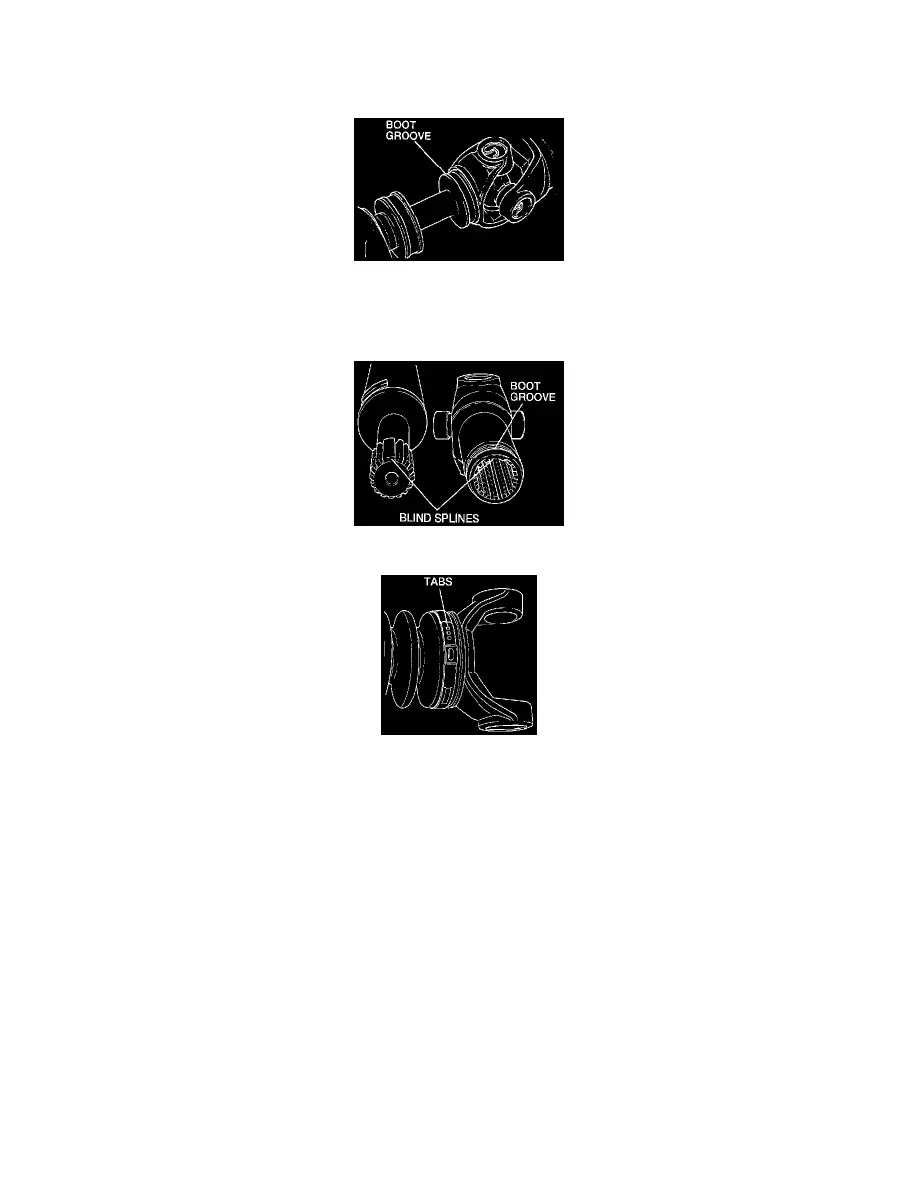
Dust Boot, Slip Yoke (8, 9)
1. Install the dust boot making sure the boot is seated in the boot groove.
2. Lubricate the slip splices with grease.
3. Push the slip yoke onto the stub shaft, making sure the blind splines are aligned.
4. Install the new clamps using Clamp Pliers T63P-9171-A, or equivalent making sure the clamp tabs are located in the dust boot slots.
NOTE:
-
Use the new original type of clamps when installing the boots. Use of other types of clamps may cause propeller shaft imbalance or grease
leakage due to poor sealing.
-
Do not crimp the clamp to the point where the clamp bridge is cut or the boot is damaged.
Centering Yoke And Centering Socket Yoke (6, 7)
1. Pack the socket relief and the ball with grease, then position the center yoke over the spider ends and press in the bearing.
2. Install the snap rings.
3. Install a new rubber seal on the centering ball stud.
4. Position the centering socket yoke on the stud.
5. Place the front spider in the center yoke.
6. With the spider loosely positioned on the center stop, seat the first pair of bearings into the centering socket yoke, then press the second pair
into the centering yoke.
7. Install the snap ring.
8. Apply pressure on the centering socket yoke and install the remaining bearing cup.
Bearing Cup, Spider (2, 3)
NOTE: The spider bosses (or lubrication plugs on kits) must be assembled in their original positions to provide proper clearance.