
B2300 SE Regular Cab 2WD L4-2.3L VIN A (1997)
Entering/Exiting Diagnostic Mode
The diagnostic mode is entered by grounding the black one-pin diagnostic connector. The connector is clipped to the I/P reinforcement to the right of
the steering column bend bracket and in front of the black relay box #1.
The diagnostic mode is exited (returned to normal operation) immediately upon removal of the ground on the diagnostic input.
Retrieving Diagnostic Trouble Codes (DTCs)
The diagnostic mode consists of the following three steps:
1. Tone and/or Door Ajar Lamp Test
2. Trouble Code Test
3. Input Test
Erasing Diagnostic Trouble Codes (DTCs)
Trouble codes are erased when either:
1. The ignition has been moved to START position at any time during diagnostic mode.
2. Power is removed from CTM.. 7BUO23 002
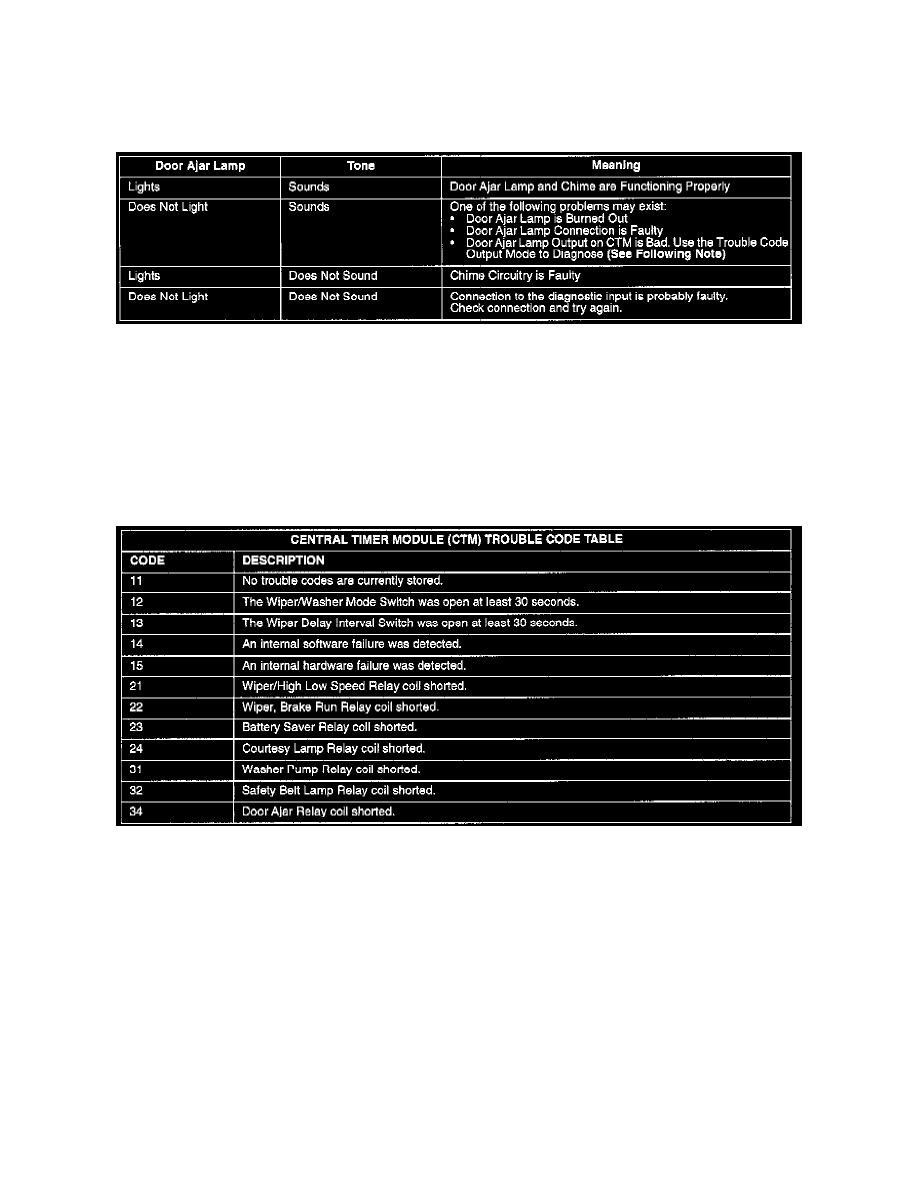
1. Tone and Door Ajar Lamp Test
NOTE:
^
Step 1 is run immediately upon entry into the diagnostic mode.
When the diagnostic mode is first entered (by grouping the test pin connector) and the key is ON, the CTM will generate a tone and/or light the door
ajar lamp for three (3) seconds. The tone sounds different than the normal warning chime.
If the key is in RUN or ACCY use the following table if the diagnostic mode can not be entered.
After the three second test is completed, the tone will stop and the door ajar lamp will go out and the CTM will pause for one second. Next, proceed to
Step 2 or Step 3.
NOTE:
^
On some vehicles, the door ajar lamp will not light during this test. This is due to software differences in the CTM. If the door ajar lamp does
not light, but comes on when the door is open or during the input test, then the system is functioning properly.
2. Trouble Code Test