
B2300 SE Regular Cab 2WD L4-2.3L VIN A (1997)
REMOVAL NOTES
Rear bracket and insulator assembly
1. Remove the silencer.
2. Remove the rivet which attaches the bracket and insulator assembly to the frame.
Exhaust Manifold
1. Remove the intake air system components.
2. Remove the EGR pipe at the exhaust manifold and loosen at the EGR valve.
3. Disconnect the heated oxygen sensor connector.
4. Remove the two nuts and remove the rear engine lifting eye from the exhaust manifold studs.
5. Remove the exhaust manifold retaining bolts and studs.
6. Remove the exhaust manifold from the vehicle.
INSTALLATION NOTES
Rear bracket and insulator assembly
1. Position the bracket and insulator assembly on the frame.
2. Attach the bracket and insulator assembly with a nut and bolt.
Tightening torque: 68-94 Nm (50-70 ft.lbs.)
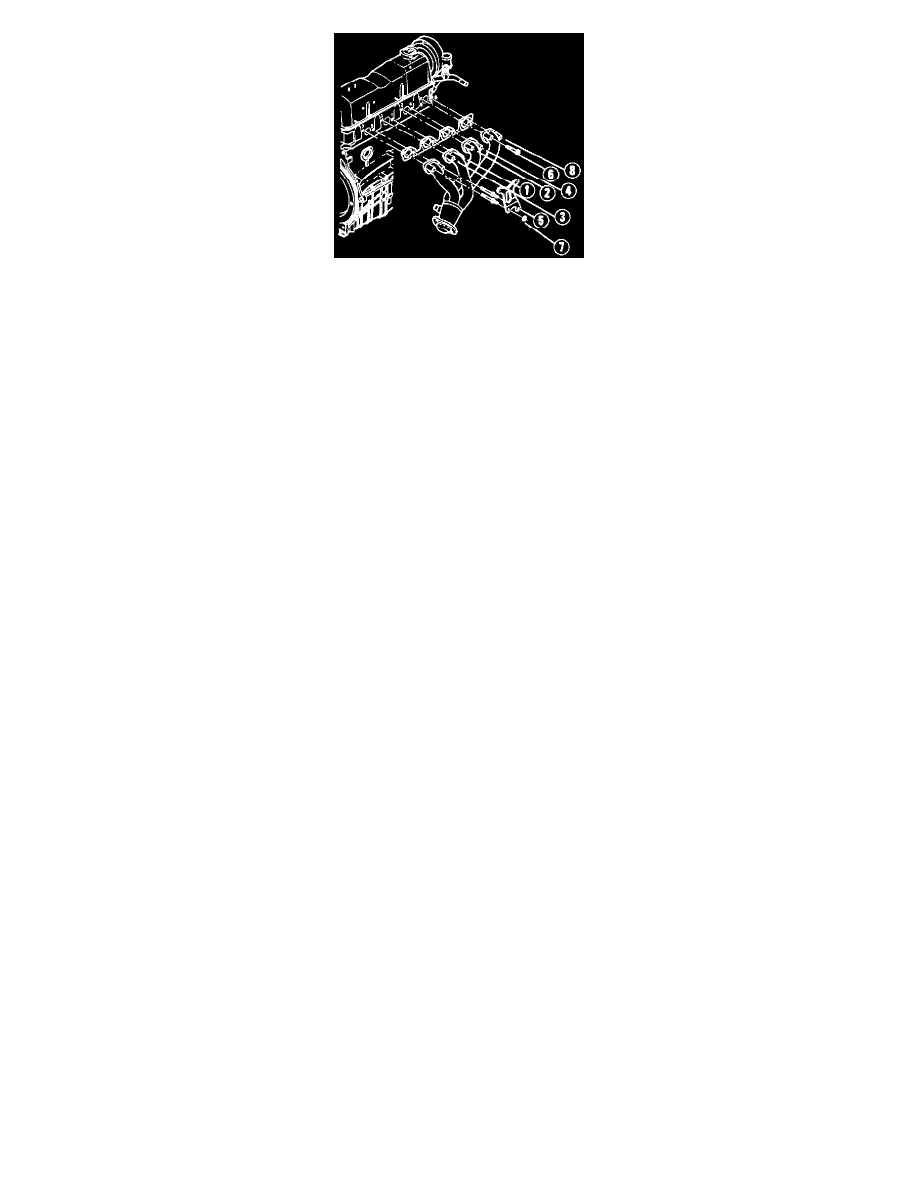
Exhaust Manifold
1. Install two guide pins into cylinder head holes 1 and 8.
2. Install the gasket over the guide pins.
3. Install the exhaust manifold over the gasket and guide pins.
4. Install the two bolts and remove the guide pins.
5. Install the remaining bolts and studs and tighten in the sequence shown in two steps.
Tightening torque:
Step 1: 20-30 Nm (15-22 ft.lbs.)
Step 2: 60-80 Nm (45-59 ft.lbs.)
6. Install the rear engine lifting eye on the studs with the nuts and tighten.
Tightening torque: 20-34 Nm (15-22 ft.lbs.)
7. Connect the heated oxygen sensor connector.
8. Connect the EGR pipe at the exhaust manifold and tighten.
Tightening torque: 34-47 Nm (25-35 ft.lbs.)
9. Install the intake air system components.