
B2300 SE Regular Cab 2WD L4-2.3L VIN A (1997)
Evaporator Core: Testing and Inspection
Leak Test
CAUTION
-
Disconnect the liquid line and suction accumulator from the evaporator core tubes. Do not leak test an evaporator core with the suction
accumulator attached to the core tubes. Refrigerant outgassing from oil and desiccant in the accumulator will indicate a false leak condition.
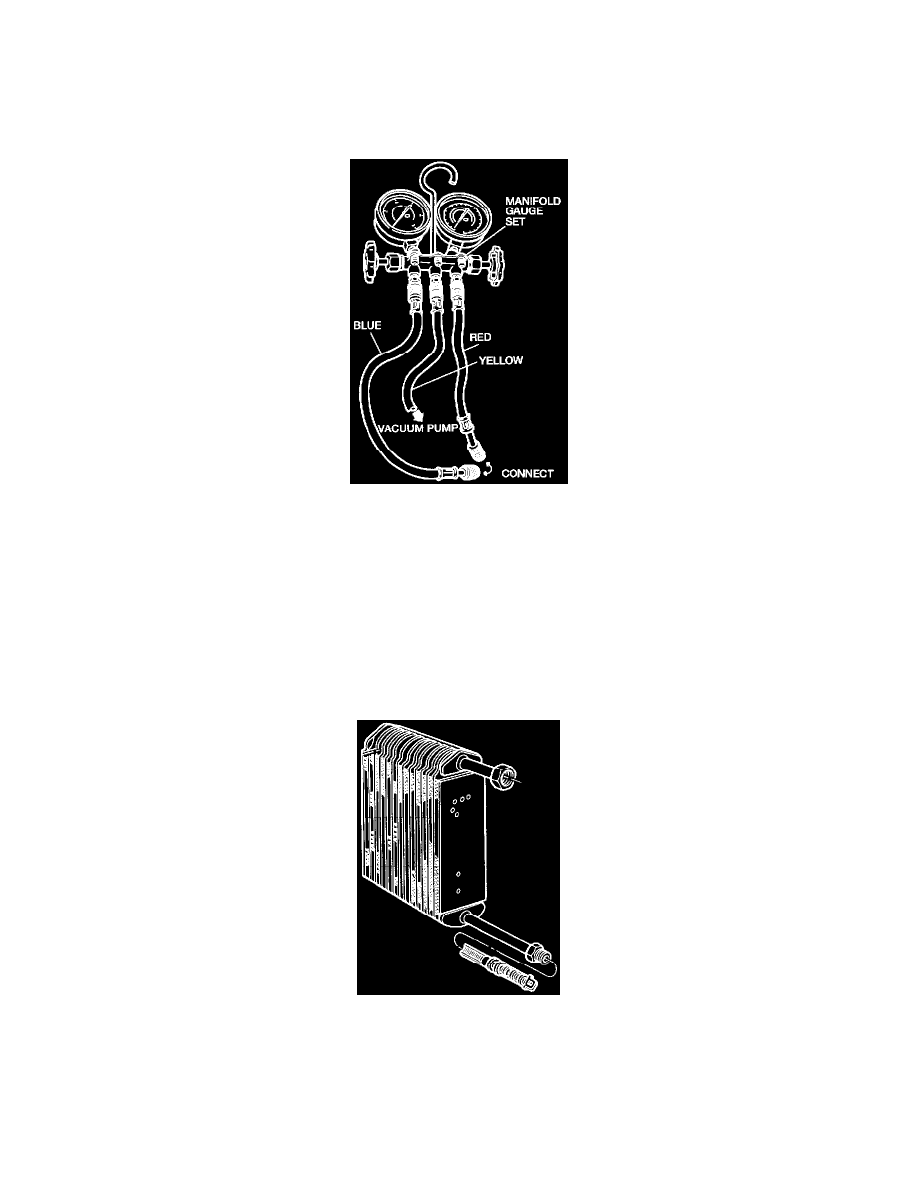
1. Verify that the manifold gauge set is capable of holding vacuum.
(a) Connect the Red and Blue hoses together using a 114 in (6.35 mm) flare coupling.
(b) Connect the gauge set Yellow hose to a known good vacuum pump.
(c) Turn the vacuum pump ON and open both gauge set valves.
(d) Operate the vacuum pump for 1 minute and close both gauge set valves
NOTE
-
The low side gauge should indicate 30 in-Hg of the vacuum.
(e) Allow the gauge set, with vacuum applied, to sit for at least 1/2 hour.
(f) If the gauge reading drops during that time, the gauge set hose connections, gauges or valves are leaking and should be repaired before
proceeding with the leak test.
2. Clean the evaporator core tube fittings.
(a) For threaded connections, wipe any dirt or debris from the sealing surfaces with a clean lint free rag.
(b) If the evaporator core tube fittings are the female Spring Lock design, check the inside of each fitting for scratches, corrosion or debris from
deteriorated O-rings.
(c) If scratches, corrosion or debris are found, the leak test results may not be accurate unless the fitting is properly cleaned. Refer to Step 3 for
cleaning procedure.