
B2300 SE Regular Cab 2WD L4-2.3L VIN A (1997)
Control Arm: Service and Repair
REMOVAL
1. Jack up the front of the vehicle and support it on safety stands.
2. Remove the front wheels.
3. Remove the front coil spring.
4. Remove the front stabilizer bar.
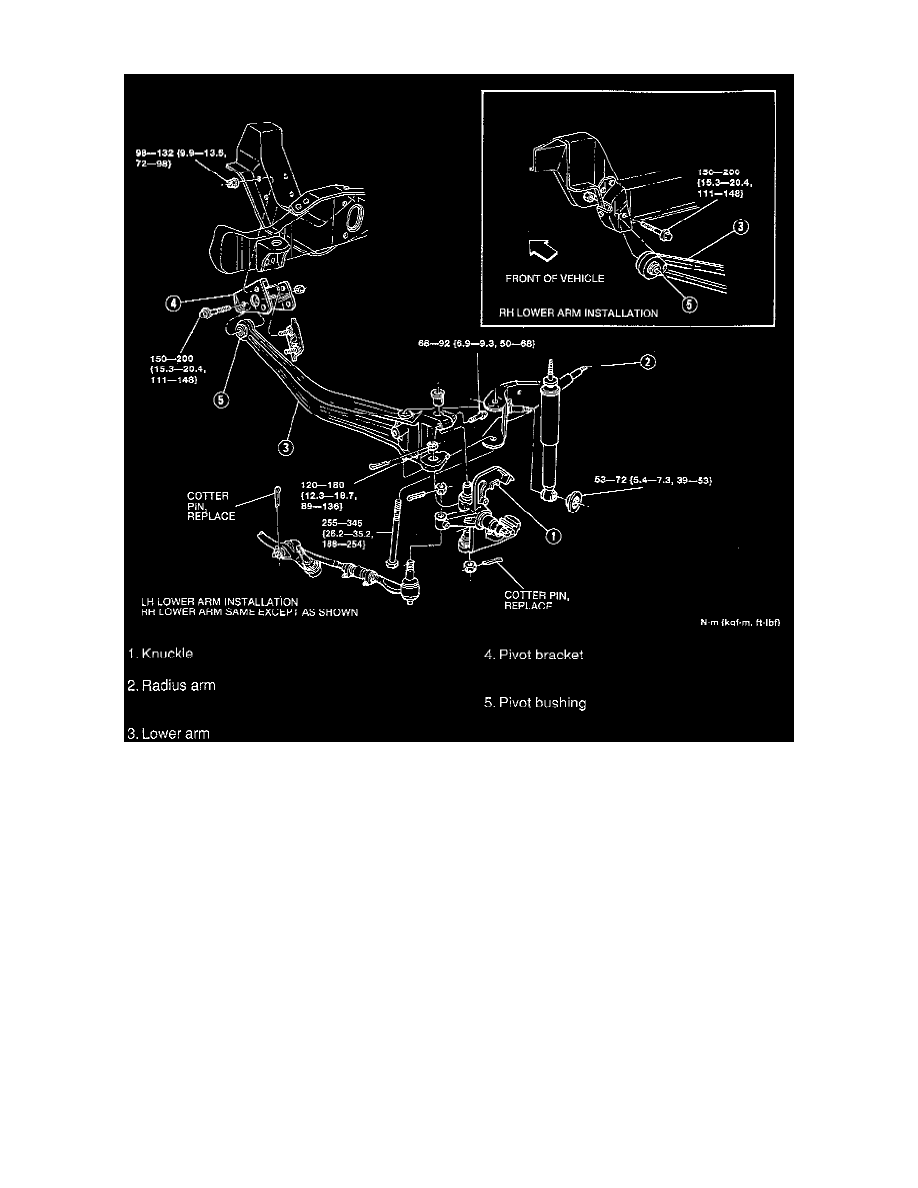
5. Remove in the order shown in the illustration, referring to the following:
Pivot Bracket (4)
1. Remove the four attaching nuts and the two bolts.
2. Remove the retainer assemblies.
3. Remove the axle pivot bracket.
Pivot Bushing (5)
1. Remove the left axle pivot nut and bolt.
2. Pull the pivot end of the left lower arm down until the bushing is exposed.
NOTE: To remove the right pivot bushing, the entire right lower arm must be removed in order to gain access to the pivot bushing.
3. Place Pivot Bushing Spacer T82T-3006-AH, or equivalent between the walls of the axle.