
B2300 SE Regular Cab 2WD L4-2.3L VIN A (1997)
Radius Arm: Service and Repair
REMOVAL
1. Jack up the front of the vehicle and support it on safety stands
2. Remove the front wheels
3. Remove the front coil spring
CAUTION: The lower arm or axle casing must be supported on a jack throughout the spring removal and installation procedure, and must not be
permitted to hang by the brake hose. If the length of the brake hose is not sufficient to provide adequate clearance for the removal and installation
of the spring, the caliper must be removed from the spindle. After removal, the caliper must be placed on the frame or otherwise supported to
prevent suspending the caliper from the brake hose. These precautions are absolutely necessary to prevent serious damage to the tube portion of
the brake hose assembly.
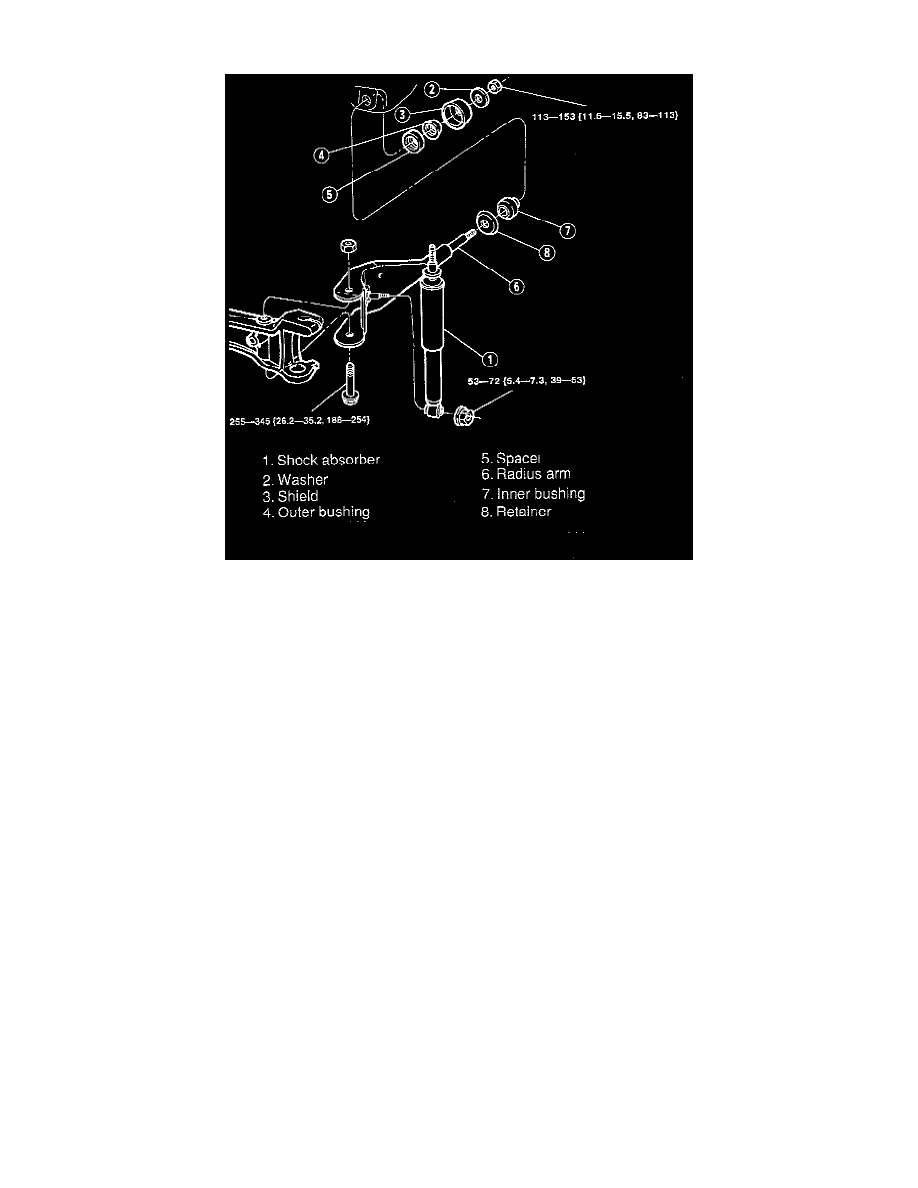
4. Remove in the order shown in the illustration, referring to the following:
Shock Absorber (1)
Disconnect the lower end of the shock absorber from the shock lower stud
Inner And Outer Bushing (7 & 4)
1. Remove the outer bushing, spacer and shield (if equipped) on the right radius arm.
2. Move the radius arm and the axle assembly forward and out of the radius arm bracket.
3. Remove the inner bushing and retainer.
INSPECTION
Inspect all parts and repair or replace as necessary.
INSTALLATION
Install in the reverse order of removal, referring to the following:
Radius Arm (6)
1. Install the radius arm nut.
Tightening torque: 113 - 153 Nm (83 - 113 ft. lbs.).
2. Install the bolt attaching the radius arm to the lower arm.
Tightening torque: 255 - 345 Nm (188 - 254 ft. lbs.).