
B2300 SE Regular Cab 2WD L4-2.3L VIN A (1997)
Rear Knuckle: Service and Repair
REMOVAL
1. Jack up the vehicle and support it with safety stands.
2. Remove the wheel and tire assembly.
3. Remove the caliper, disc plate and dust shield.
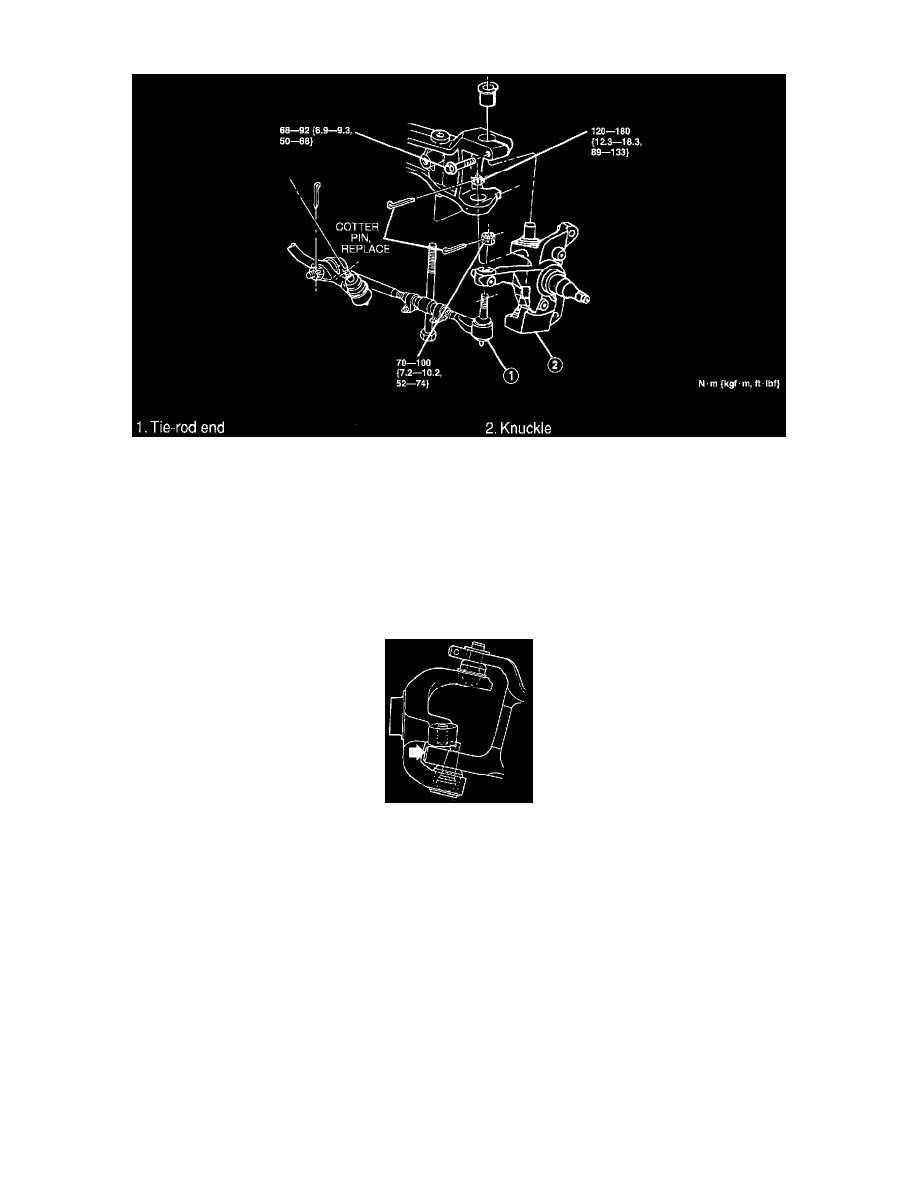
4. Remove in the order shown in the illustration, referring to the following notes:
Tie Rod End (1)
1. Remove and discard the cotter pin from the tie rod end.
2. Remove the nut.
3. Separate the tie-rod end from the knuckle using Tie Rod End Remover TOOL-3290-D, or equivalent.
Knuckle (2)
1. Remove and discard the cotter pin.
2. Remove the nut.
3. Mark the position of the camber/caster adjuster.
4. Remove the bolt.
5. Remove the camber/caster adjuster using Ball Joint Remover D81T-3010-B, or equivalent.
6. Strike the lower arm as shown in the illustration to remove the knuckle.
CAUTION: Do not use a ball joint separator fork to separate the knuckle from the lower arm.
INSPECTION
Inspect all of the parts and repair or replace as necessary.
INSTALLATION
Install in the reverse order of removal, referring to the following notes:
Knuckle (2)
1. Install the knuckle into the lower arm.