
B3000 V6-3.0L (2007)
6. Remove the camshaft synchronizer.
Installation
CAUTION:
-
Do not turn the crankshaft or camshaft during the removal and installation procedure or the fuel system timing will be out of time with
the engine and possibly causing engine damage.
-
A special tool must be used during the installation of the new synchronizer assembly. Failure to follow this procedure will result in the
fuel system being out of time with the engine, possibly causing engine damage.
-
It is very important to coat the gear on the camshaft synchronizer with engine oil prior to installation. Failure to do so could result in
gear failure.
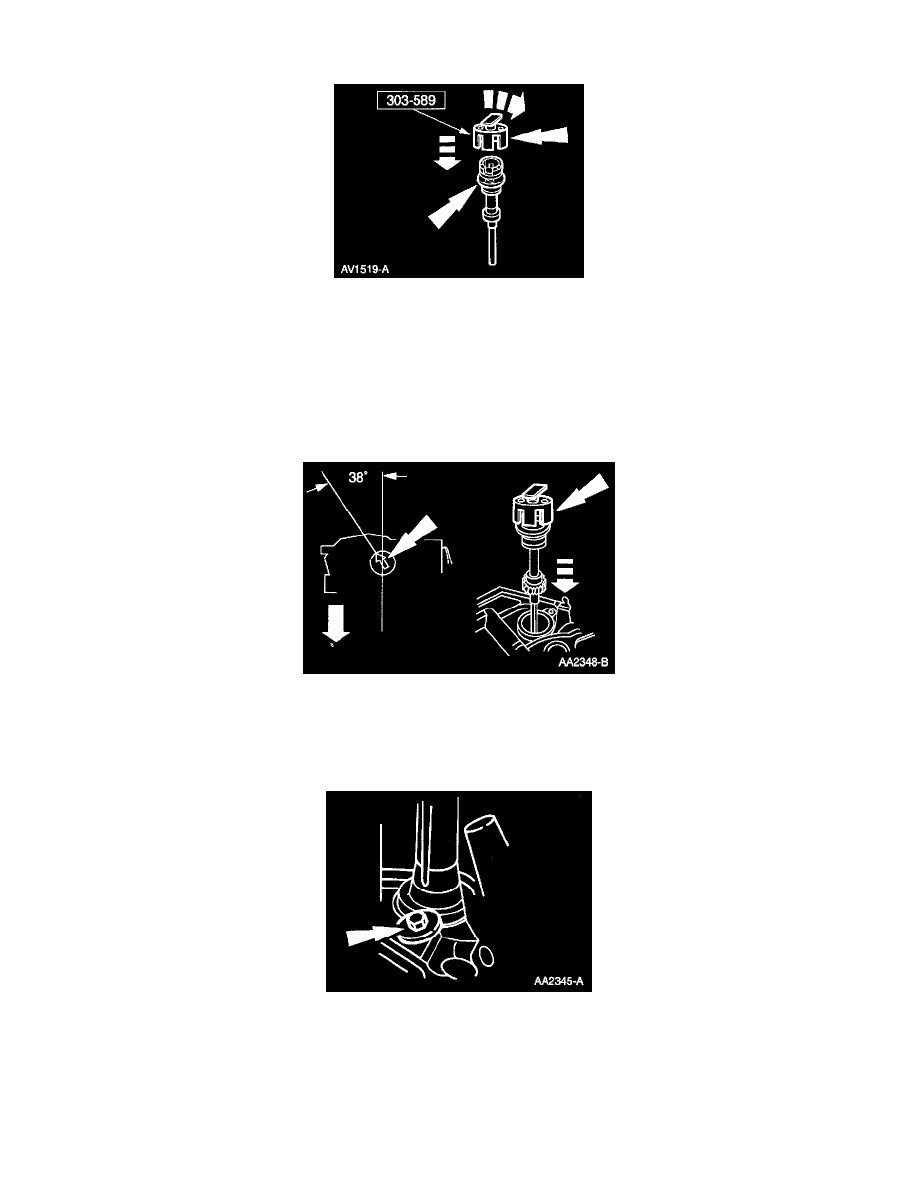
1. Install the special tool on the camshaft synchronizer by rotating the tool until it engages the notch in the camshaft synchronizer housing and the
armature.
NOTE: During installation, the arrow on the special tool will rotate clockwise until the oil pump intermediate shaft and the camshaft gear
engages.
2. Install the camshaft synchronizer housing assembly so the arrow on the special tool is 38° from the centerline of the engine.
3. Install the bolt.
Tightening torque: 30 N.m {30 kgf-cm, 22 ft-lbf}
4. Install the camshaft position (CMP) sensor. See CAMSHAFT POSITION (CMP) SENSOR REMOVAL / INSTALLATION - 3.0L.