
B3000 2WD V6-3.0L OHV (1994)
Fuel Injector
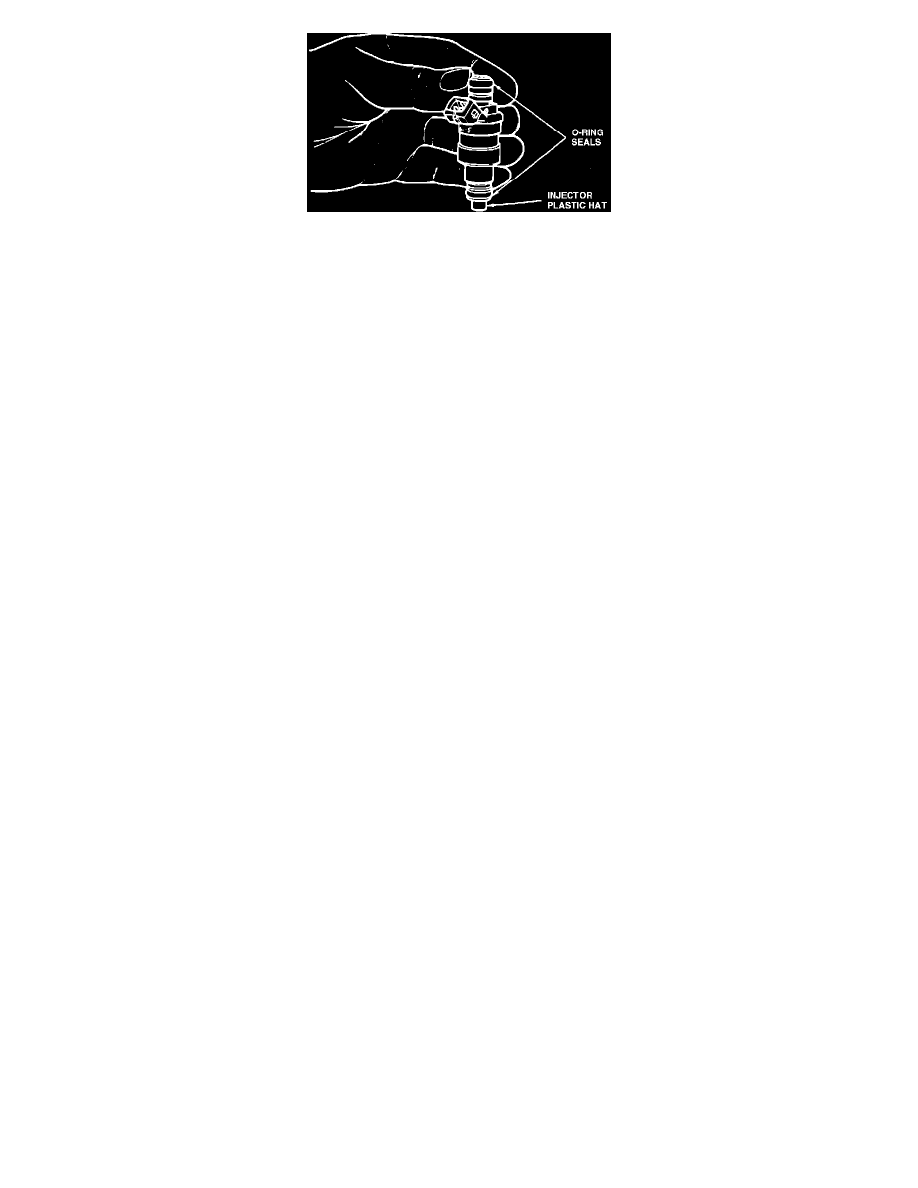
9. Inspect injector O-rings (two per injector) for signs of deterioration. Replace as required.
10. Inspect injector "plastic hat" (covering the injector pintle) and washer for signs of deterioration. Replace as required. If hat is missing, look for it
in intake manifold.
INSTALLATION
1. Make sure injector caps are clean and free of dirt.
2. Lubricate top O-rings with clean engine oil.
NOTE: Never use silicone grease. It will clog the injectors.
3. Install the injectors into the fuel rail using a light, twisting, pushing motion.
4. Lubricate the lower O-rings with clean engine oil.
NOTE: Never use silicone grease. It will clog the injectors.
5. Carefully install fuel rail assembly and injectors into the lower intake manifold, one side at a time. Push the fuel rail down to make sure that all
injector O-rings are fully seated in the fuel rail cups and intake manifold.
6. While holding the fuel rail assembly in place, install the two retaining bolts and then tighten.
7. Connect the fuel lines to the fuel rail.
8. Install the spring lock safety clips on the fuel rail connections.
9. Turn the ignition key On for 2-3 seconds to presurize the fuel system, then check for leaks.
10. Install electrical harness connectors to injectors and the vacuum hose to the fuel pressure regulator.
11. Install upper intake manifold/throttle body assembly.
12. Install the fuel filler cap.
13. Start engine and warm to operating temperature. Check for leaks.