
B3000 DS Cab Plus 2WD V6-3.0L OHV (2001)
5. Remove the A/C clutch pulley.
CAUTION: Do not use air tools. The A/C clutch field coil can be easily damaged.
6. Remove the A/C clutch field coil.
1. Mark the location of the A/C clutch field coil electrical connector.
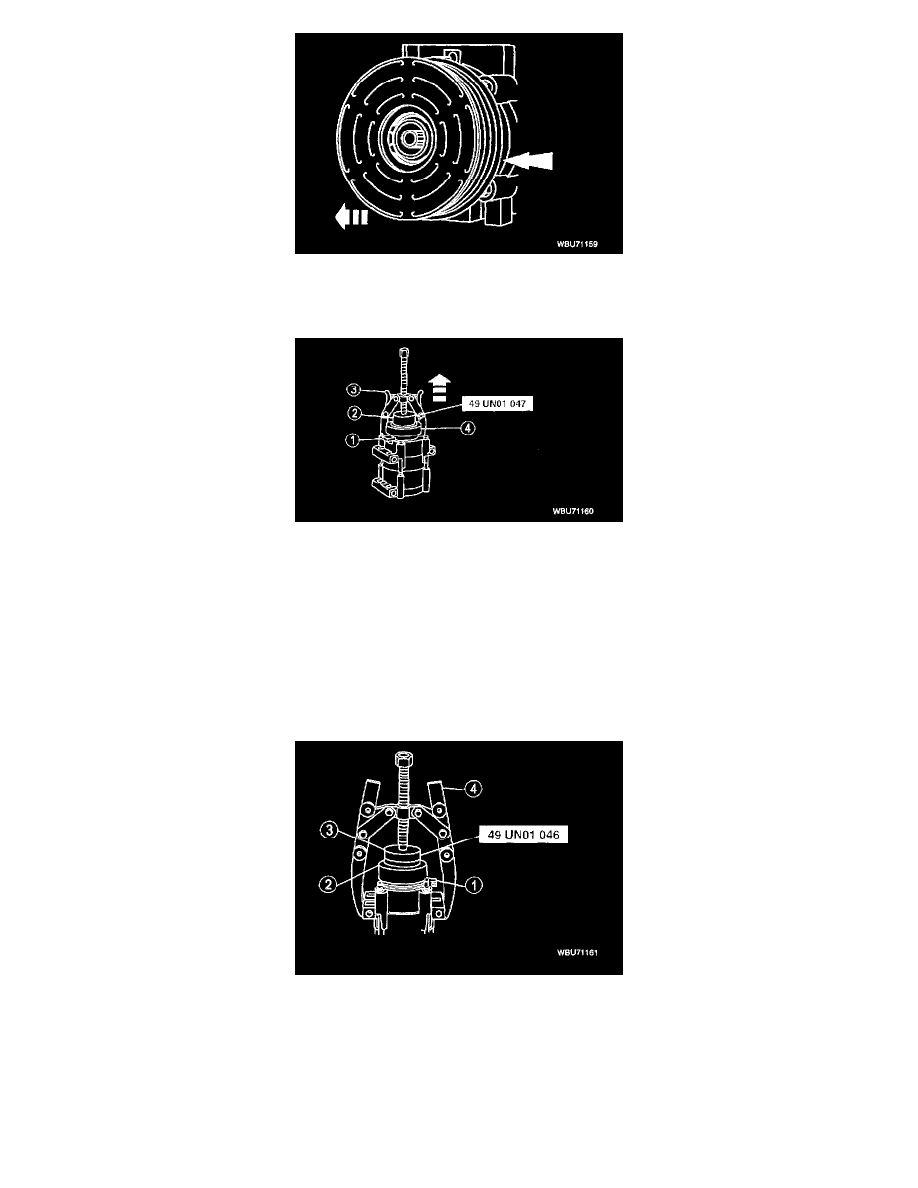
2. Install Shaft Protector Tool for Coil Removal SST 49 UNO1 047 on the nose opening of the A/C compressor.
3. Install a 2-jaw puller on the compressor with tip of the puller forcing screw in the center pilot. Place the jaws of the puller around the back
edge of the field coil. Tighten the puller forcing screw to pull coil from compressor.
4. Remove the A/C clutch field coil.
Installation Note
1. Clean the A/C clutch field coil and pulley bearing mounting surfaces
CAUTION: Do not use air tools. The A/C clutch field coil can be easily damaged.
2. Install the A/C clutch field coil.
1. Place the A/C clutch field coil on the A/C compressor with the A/C clutch field coil electrical connector correctly positioned.
2. Place the Field Coil Replacer 412-078 (T91L-19623-CH) or equivalent on the A/C clutch field coil.
3. Place the Coil Pressing Tool SST 49 UN01 046 on the Field Coil Replacer.
4. Use a 2-Jaw Puller to install the A/C clutch field coil until bottomed completely against the A/C compressor.
NOTE: The bearing is a tight fit on the A/C compressor head; it must be properly aligned to push on.