
B3000 DS Cab Plus 2WD V6-3.0L OHV (2001)
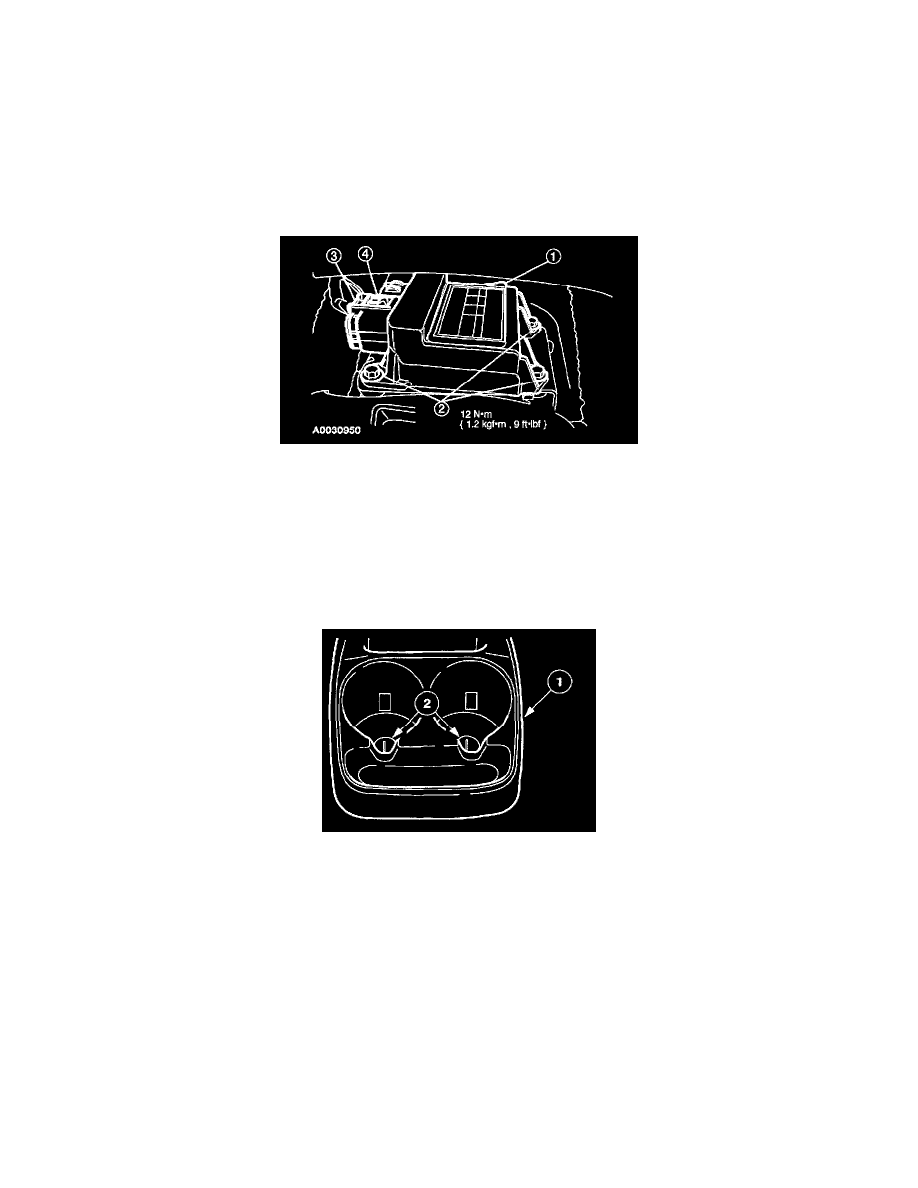
3. Remove the restraints control module (RCM).
1. Slide and disengage the RCM electrical connector locking clip.
2. Release the tab and disconnect the connector from the RCM.
3. Remove the bolts.
4. Remove the RCM.
Installation
WARNING:
-
To reduce the risk of serious personal injury, read and follow all warnings, cautions and notes at the beginning of the removal procedure.
-
The tightening torque of the air bag restraints control module (RCM) bracket retaining bolts is critical for correct system operation.
1. Install the RCM.
1. Position the RCM.
2. Install the bolts.
3. Connect the RCM electrical connector.
4. Slide and engage the RCM electrical connector locking tab.
2. Connect the negative battery cable.
3. With the restraint system diagnostic tools installed at all deployable devices, prove out the supplemental restraint system (SRS).
4. Disconnect the negative battery cable and wait at least one minute.
5. Install the utility tray.
1. Position the utility tray.
2. Install the fasteners.
6. Restore the vehicle to operating condition.
WARNING: To reduce the risk of serious personal injury, read and follow all warnings, cautions, notes, and instructions in the
supplemental restraint system (SRS) deactivation/reactivation procedure.
1. Reactivate the supplemental restraint system (SRS).
WARNING: The restraint system diagnostic tool is for restraint system service only. Remove from the vehicle prior to road use.
Failure to remove could result in injury and possible violation of vehicle safety standards.
2. With all the restraint system diagnostic tools removed, prove out the supplemental restraint system (SRS).