
B3000 DS Cab Plus 2WD V6-3.0L OHV (2001)
1. Align the pins in the holes of the solenoid brackets and gently push down.
Caution: Excessive pressure may break the locating pins.
23. Test the solenoid valves.
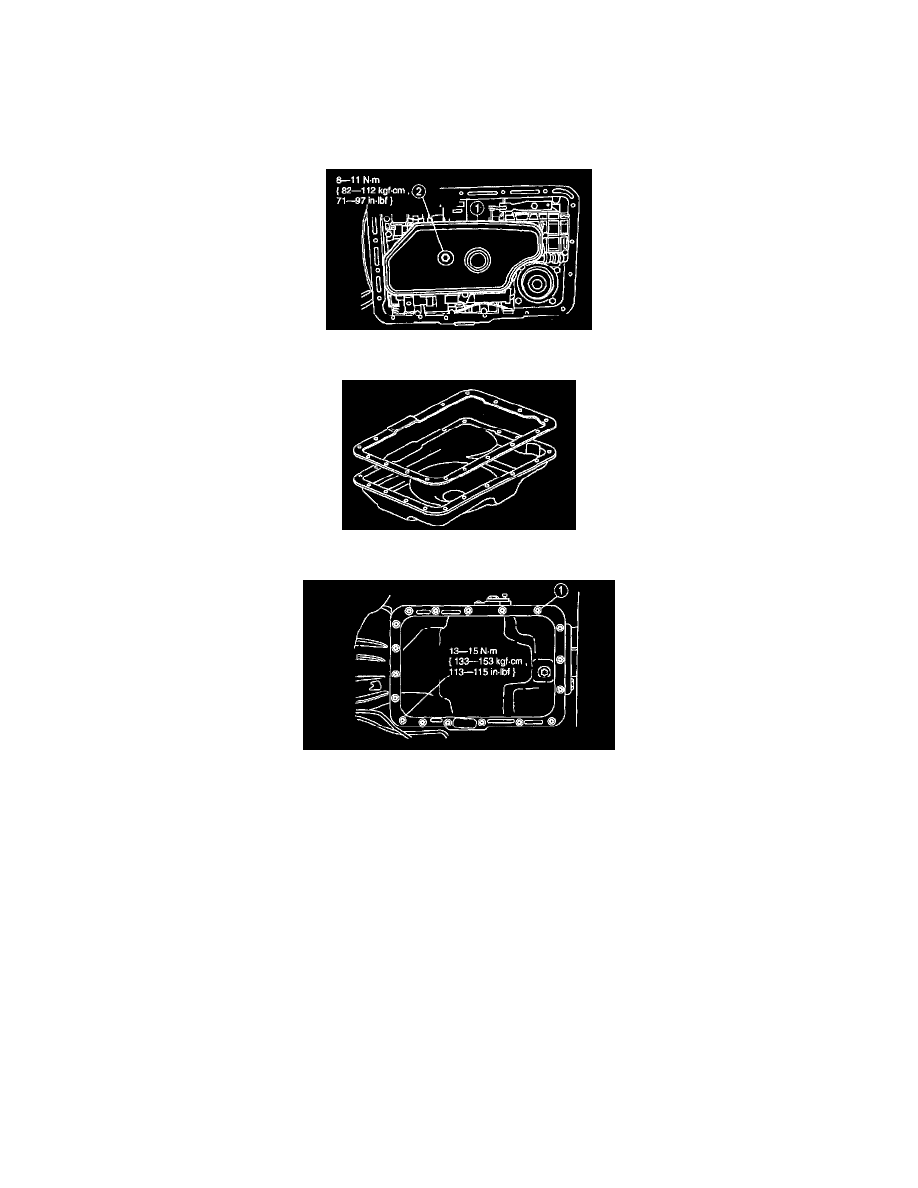
24. Install new O-rings on the oil strainer.
25. Apply petroleum jelly to the O-rings.
26. Install the oil strainer.
27. Install the oil pan gasket.
28. Install the oil pan.
Note: Use a crisscross sequence to tighten the transmission fluid pan bolts.
29. Install transmission heat shield (5R44E/5R55E only).
Tightening Torque 8 - 11 Nm (82 - 112 kgf-cm, 71 - 97 inch lbs.)
30. Lower the vehicle.
Note: When the battery has been disconnected and reconnected, some abnormal drive symptoms can occur while the vehicle relearns its adaptive
strategy. The customer needs to be notified that they may experience slightly different upshifts either soft or firm and this is a temporary condition
and will eventually return to normal operating condition.
31. Connect the negative battery cable.
32. Fill transmission to the proper fluid level.
Note: Use equivalent.
33. Drive vehicle and check shift points, shift schedule and shift shock.