
B3000 SE Cab Plus 4 4WD V6-3.0L OHV (2000)
Air Bag Control Module: Service and Repair
WARNING:
-
Air bag diagnostic monitor orientation is critical for correct system operation. If a vehicle equipped with an air bag system has been
involved In a collision in which the center tunnel area has been damaged, Inspect the mounting and bracket for deformation. If damaged,
the air bag diagnostic monitor must be replaced whether or not the air bags have deployed. In addition, make sure the area of the air bag
diagnostic monitor mounting is restored to its original condition.
-
To avoid accidental deployment and possible personal Injury, the backup power supply must be depleted before repairing or replacing
any air bag system components.
-
To deplete the backup power supply energy, disconnect the negative battery cable and wait at least one minute. Be sure to disconnect
auxiliary batteries and power supplies (if equipped).
CAUTION: Electronic modules are sensitive to static electrical charges, if exposed to these charges, damage can result.
NOTE: Repair is made by installing a new part only. If a part is replaced and the new part does not correct the condition, install the original part and
perform the diagnostic procedure again.
1. Disconnect the negative battery cable and wait at least one minute.
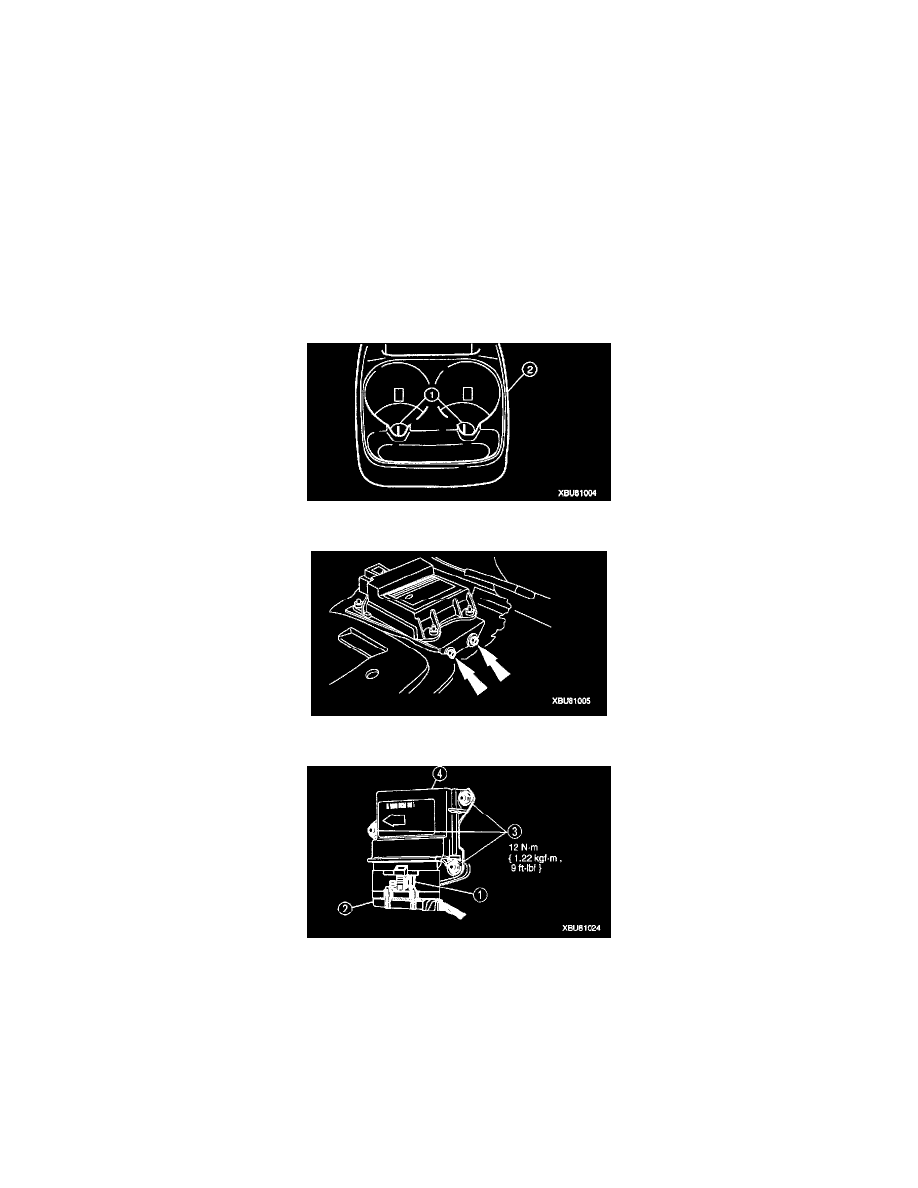
2. Remove the utility tray beverage holder.
3. Remove the two bolts retaining the air bag diagnostic monitor bracket.
4. Remove the air bag diagnostic monitor and bracket.
1. Slide the electrical connector locking clip to disengage it.
2. Disconnect the electrical connector.
3. Remove the two air bag diagnostic monitor bolts retaining the bracket.
4. Remove the air bag diagnostic monitor and bracket.
WARNING: The tightening torque of the air bag diagnostic monitor bracket retaining bolts is critical for correct system operation.
NOTE: A repair is made by installing a new part only. If a part is replaced and the new part does not correct the condition, install the original part
and perform the diagnostic procedure again.