
B3000 SE Regular Cab 4WD V6-3.0L OHV (1998)
1.
Remove and discard the upper control arm-to-frame nuts and shims.
2.
Install new washers (9XG0-50-409Z) and nuts (9XB0-54-80R7). Tighten the nuts so there is tension, but the upper control arm can be moved for
the alignment adjustment.
3.
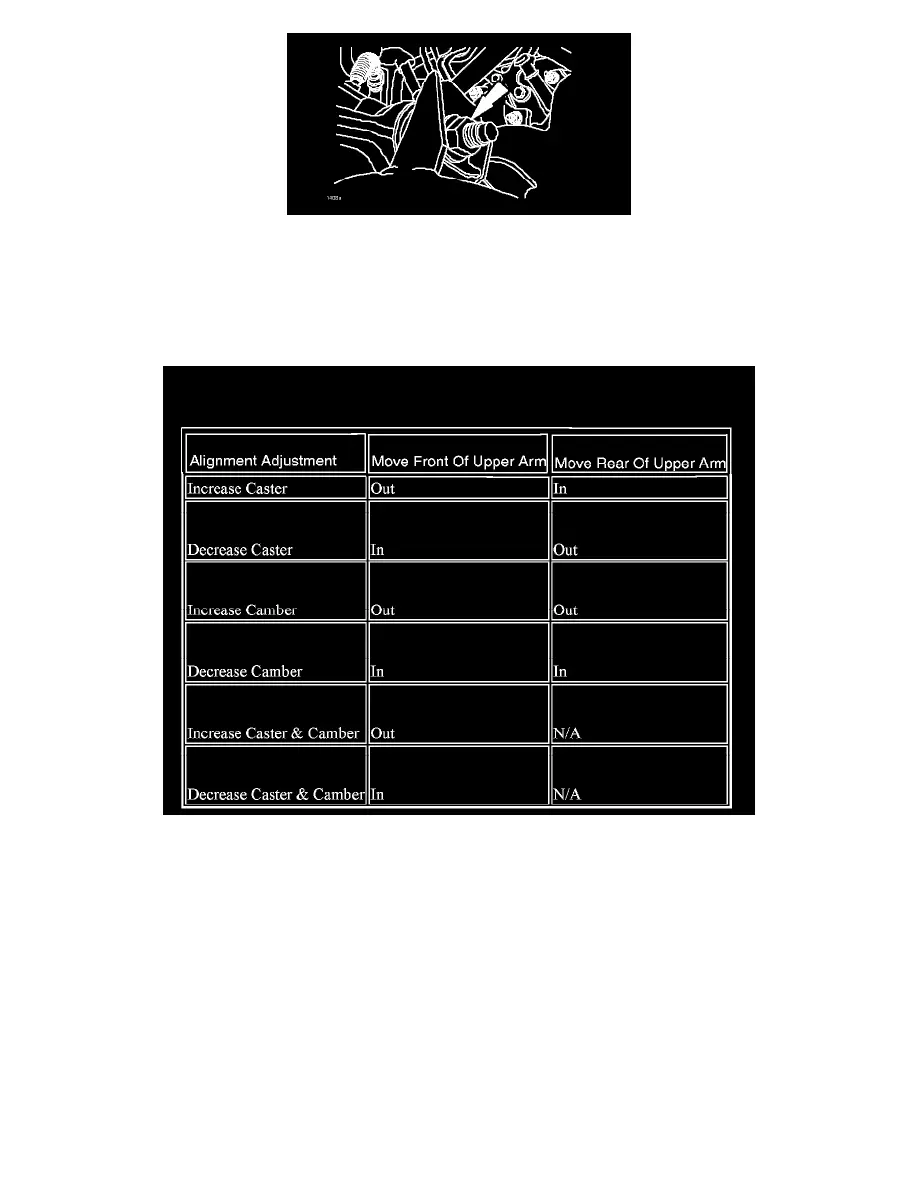
To adjust caster and camber refer to ALIGNMENT ADJUSTMENT CHART. Refer to Workshop Manual (section 02-11 WHEEL
ALIGNMENT) for alignment specifications. Adjustments that require moving the front and rear of the upper control arm should be made equally.
ALIGNMENT ADJUSTMENT CHART
4.
Torque the upper control arm-to-frame nuts to 98 lb-ft. (133 N.m).
5.
Check and if necessary adjust the front toe according to Workshop Manual (section 02-11 WHEEL ALIGNMENT).
6.
Verify repair.
CASTER SPLIT ADJUSTMENT - ORIGINAL TWO PIECE RIGHT HAND UPPER CONTROL ARM
1.
To decrease right hand caster, loosen the ball joint adjustment nuts and move the ball joint forward. Refer to Workshop Manual (section 02-11
WHEEL ALIGNMENT) for alignment specifications.
2.
To increase right hand caster, loosen the ball joint adjustment nuts and move the ball joint rearward. Refer to Workshop Manual (section 02-11
WHEEL ALIGNMENT) for alignment specifications.