
B4000 V6-4.0L SOHC (2005)
Brake Drum: Service and Repair
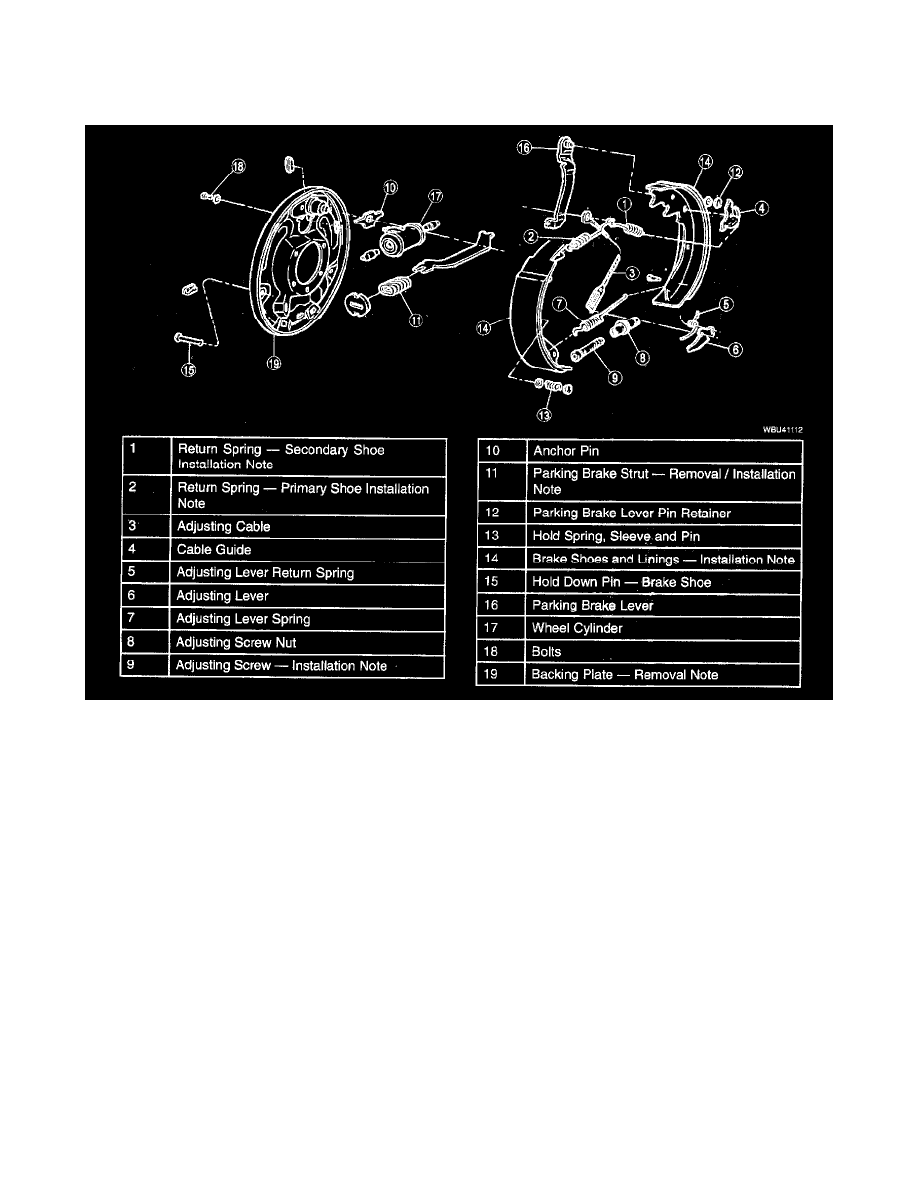
BRAKE DRUM, REAR REMOVAL / INSTALLATION
1. Remove spring nut and the brake drum.
2. Remove in order shown in the figure.
3. Inspect all parts and repair or replace as necessary.
4. Install in reverse order of removal.
5. After installation, check the following:
1
Add fluid and bleed the air.
2
Check for fluid leaks.
3
Depress pedal a few times, then verify that the brakes do not drag while rotating the wheel by hand.
Rear Brake Drum Removal
Caution: Use of a drum puller or a torch is not recommended. Drum distortion can result.
Note: If the drum is rusted to the axle shaft pilot diameter, tap too center of the brake drum between the lug bolts.
1. Remove the brake drum.
1
Remove and discard the spring nut.
2
Pull the brake drum off the axle shaft.
Note: If drums will not come off, follow these steps.
2. Loosen the brake shoe adjusting screw nut.
1
Using a screwdriver, move the brake shoe adjusting lever off the brake adjuster screw.
Note: Move the adjustment tool handle downward to loosen the brake shoe adjusting screw nut.