
B4000 V6-4.0L SOHC (2005)
Fluid - A/T: Service and Repair
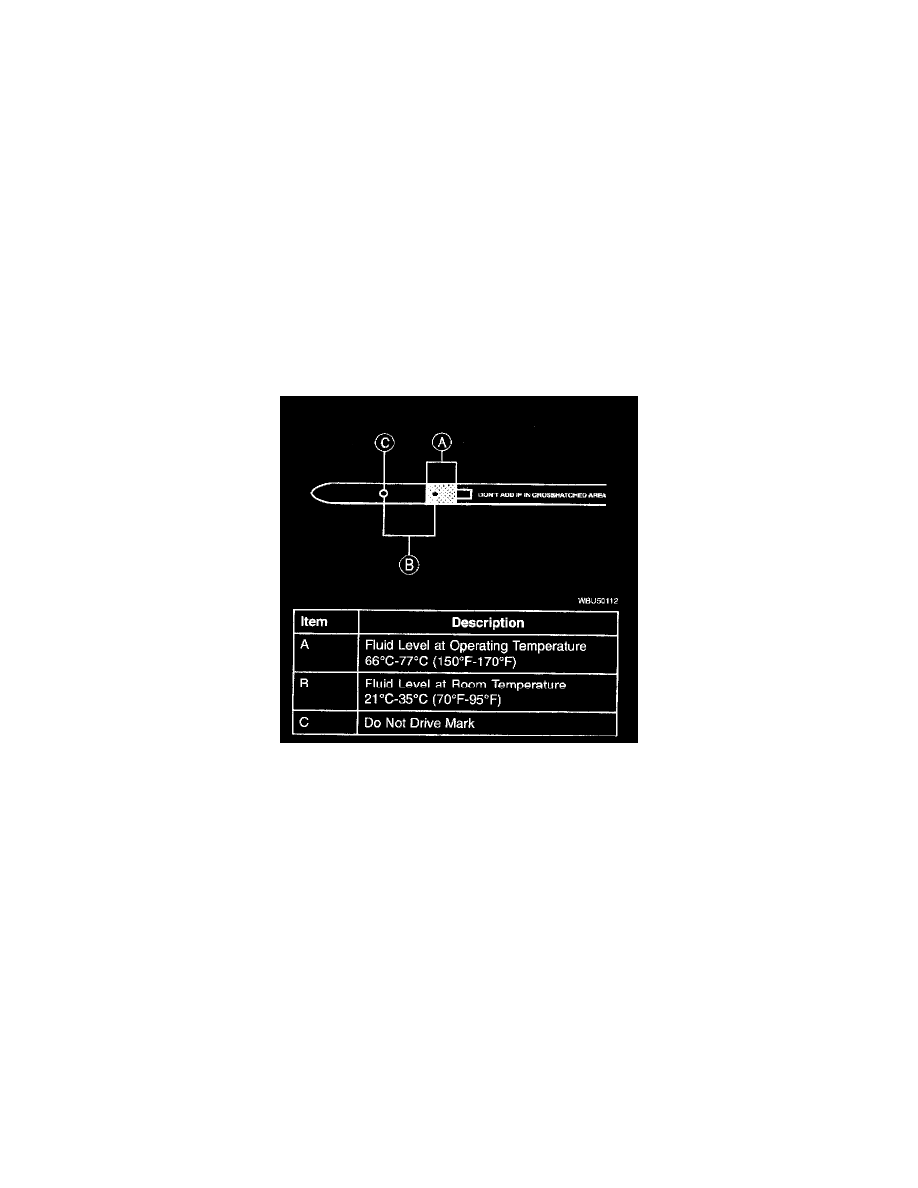
Check Fluid Level and Condition
Fluid Level Check
Caution:
^
The vehicle should not be driven if the fluid level indicator shows the fluid below the do not drive mark or internal failure could result.
Note:
^
If the vehicle has been operated for an extended period of time at highway speeds, city traffic, hot weather, or pulling a trailer, the fluid needs to
cool down to obtain an accurate reading.
The fluid level reading on the indicator will differ from operating and ambient temperatures. The correct reading should be within the normal
operating range. Under normal circumstances, the fluid level should be checked during normal maintenance. If the transmission starts to slip, shift
slowly, or has signs of fluid leaking, the fluid level should be checked and leak(s) repaired.
1. With the transmission in (P) Park, the engine at idle, foot pressed on the brake, move the range selector [ever through each gear and allow
engagement of each gear. Place the selector lever in the PARK position.
2. Wipe the fluid level indicator cap and remove the indicator.
3. Wipe the fluid level indicator with a clean cloth.
4. Install the fluid level indicator back in the oil filler tube until it is fully seated, then remove the fluid level indicator. The fluid level should be
within the normal operating range.
High Fluid Level
A fluid level that is too high may cause the fluid to become aerated due to the churning action of the rotating internal parts. This will cause erratic
control pressure, foaming, loss of fluid from the vent tube and possible transmission malfunction and/or damage. If an overfill reading is indicated.
Low Fluid Level
A low fluid level could result in poor transmission engagement, slipping, malfunction and/or damage. This could also indicate a leak in one of the
transmission seals or gaskets.
Adding Fluid
Caution:
^
The use of any other type of transmission fluid than specified could result in transmission malfunction and/or damage.
Before adding fluid be sure that the correct type is being used; see GENERAL SPECIFICATIONS.
If fluid needs to be added, add fluid in 0.25L (1/2 pint) increments through the filler tube. Do not overfill the fluid. For fluid type, see the
specification chart.
Fluid Condition Check
1. Check the fluid level.
2. Observe the color and the odor. The color under normal circumstances should be dark reddish, not brown or black.