
B4000 2WD V6-4.0L OHV (1994)
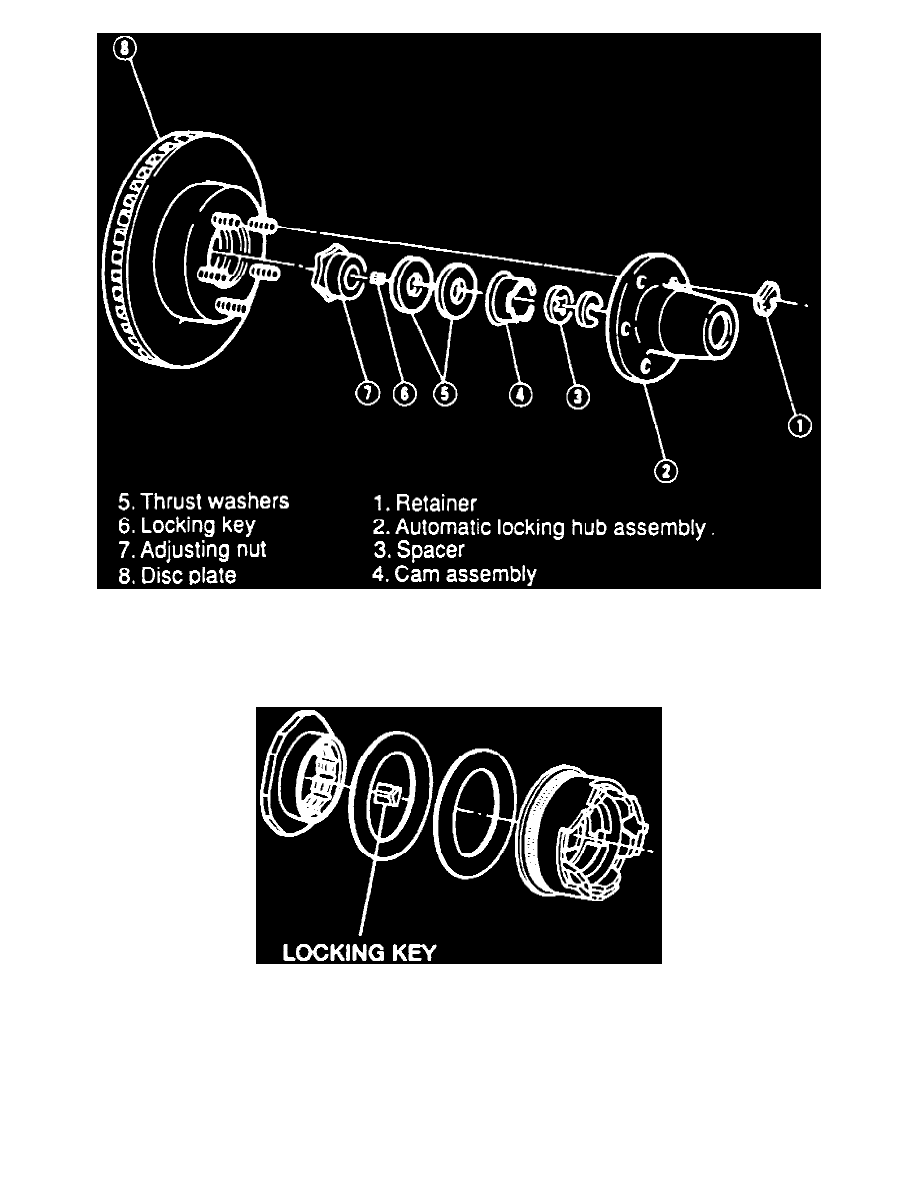
Fig. 4 Automatic Locking Hub
5. Remove snap ring and spacer.
6. Remove cam assembly and thrust washers.
7. Rotate adjusting nut to relieve pressure from locking key, then remove locking key using a magnet, Fig. 5.
Fig. 5 Hub Locking Key
8. Remove adjusting nut and brake disc plate.
9. Reverse procedure to install, noting the following:
a. Rotate brake disc plate counterclockwise while tightening adjusting nut using adjustment tool No. 49 UN01 037, or equivalent. Torque to 35
ft.lb. Rotate brake disc plate 1/4 turn to loosen adjusting nut, then torque to 16 in.lb.
b. Install locking key and align closest lug in adjusting nut with center of knuckle key slot.
c. Install cam assembly and align cam key on cam assembly with knuckle key slot.
d. Install automatic locking hub assembly and align three legs with three notches in the cam assembly.