
B4000 4WD V6-4.0L OHV (1995)
Alignment: Service and Repair
Front Wheel Alignment
Camber
Camber and caster adjustment is possible with adjusters available in 0°30', 1°, and 1°30' increments. One adjuster is used to adjust both caster and
camber, depending on orientation.
1. Measure vehicle camber and caster. Note the difference between actual measurement and required specifications.
2. If adjustment is needed, determine amount of camber and caster in adjuster installed in the vehicle.
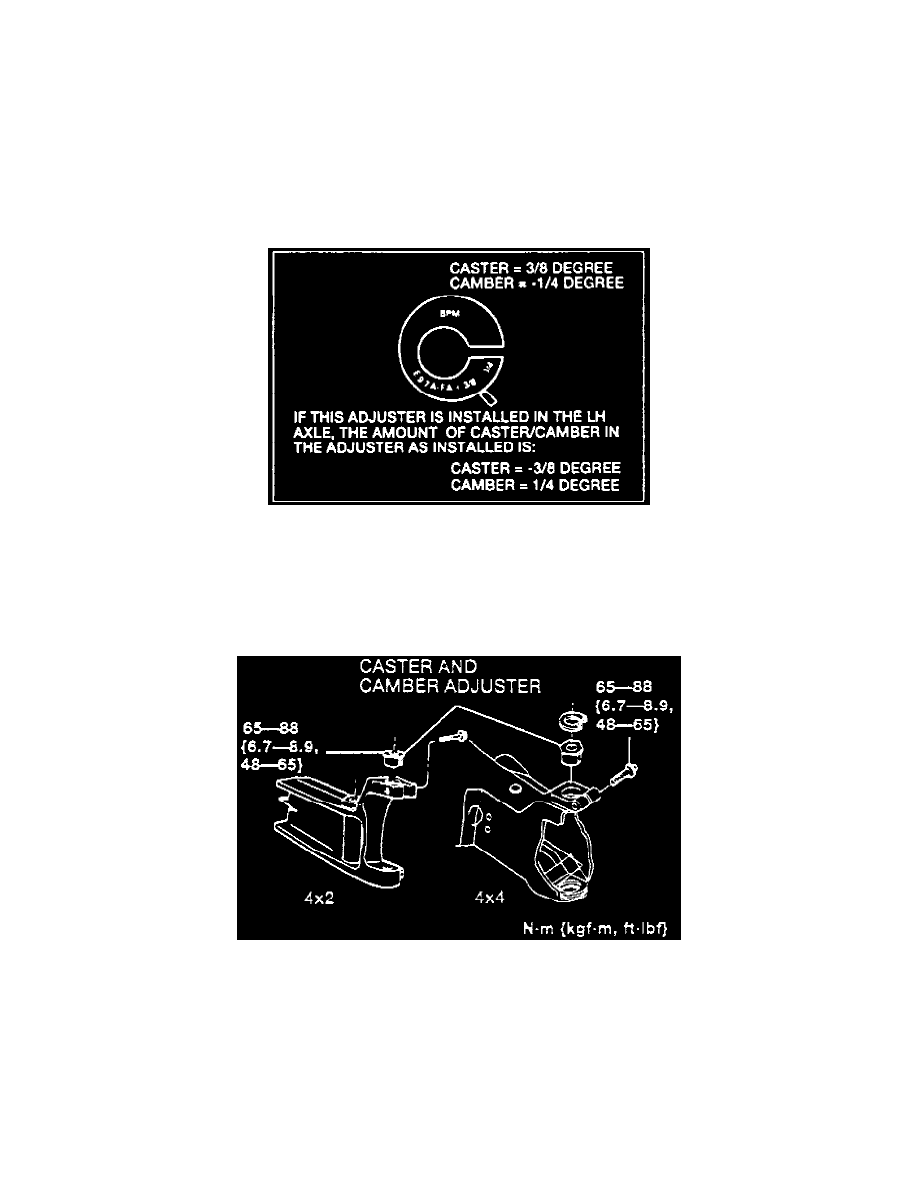
3. The degree of camber and caster are stamped on top of the production adjuster. For the right side of vehicle, the first number is the amount of
caster and the second number is the amount of camber, Fig. 3. For the left side of vehicle the numbers are opposite.
Fig. 3 Caster & Camber Adjuster
4. Select a new adjuster. The camber or caster change required to obtain optimum settings must be added to the amounts of camber and caster in the
production adjuster.
5. Remove front wheels, then loosen pinch bolt at upper ball joint and pry out adjuster. If necessary, use special pitman arm puller tool No.
T64P-3590-F, or equivalent, to remove adjuster.
6. Install new adjuster and torque pinch bolt to 48 - 65 ft.lb., Fig. 4.
Fig. 4 Adjuster Installation
7. On 4X4 models with Dana 35 axle, install new camber/caster adjuster snap ring.
8. Install front wheels and check alignment. If necessary, rotate adjuster until optimal alignment setting is reached.
9. Adjust total toe-in.
Caster
Caster and camber are adjusted at the same time. Refer to Camber adjustment procedure.
King Pin Inclination