B4000 Regular Cab 4WD V6-4.0L OHV (1997)

INSPECTION
Inspect all parts and repair or replace as necessary.
INSTALLATION
Install in the reverse order of removal, referring the following:
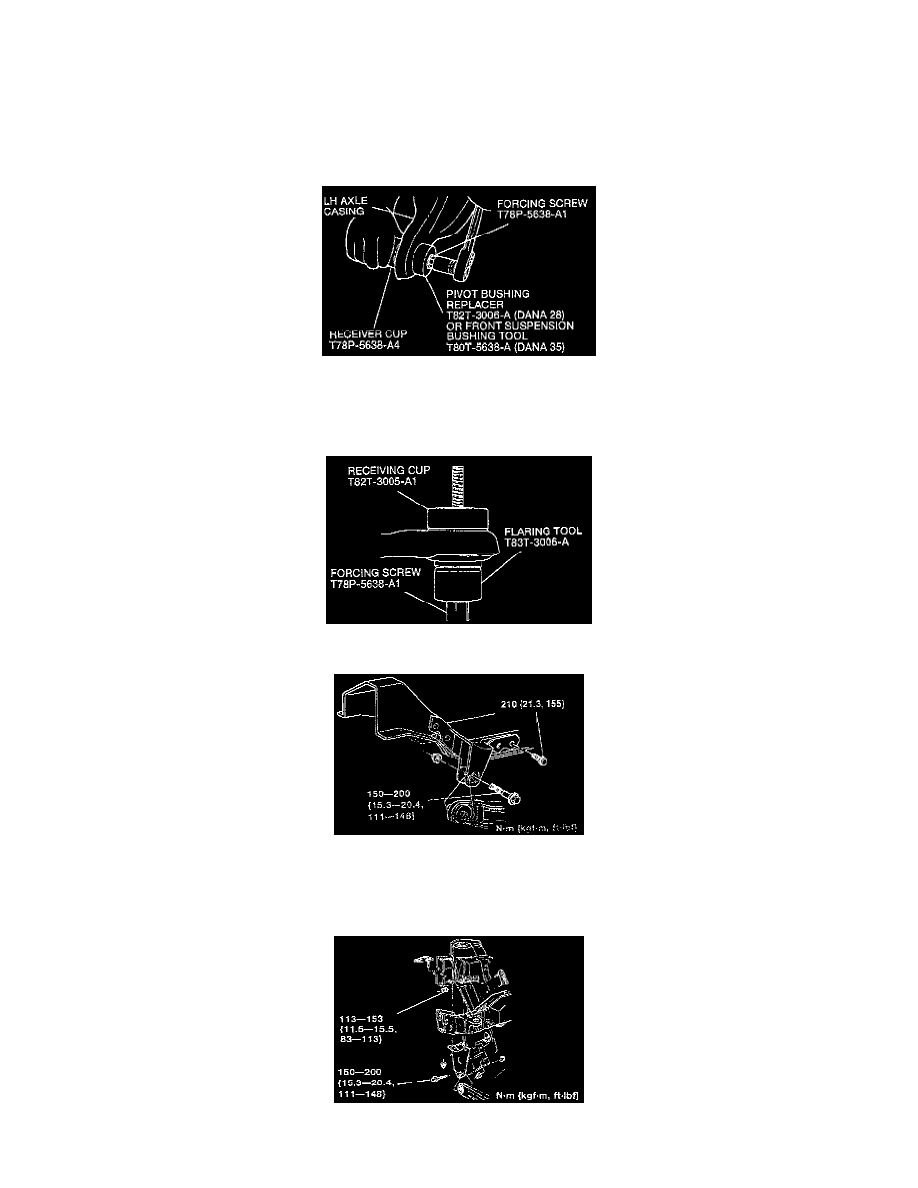
Pivot Bushing (5)
1. Using Receiver Cup T78P-5638-A4, Forcing Screw T78P-5638-A1, or equivalents and either Bushing Replacer T82T-3006-A (Dana 28) or
Front Suspension Bushing Tool T80T-5638-A (Dana 35), or equivalents install the bushing.
NOTE: After installing, the "lead in" end of the bushing must be flared to prevent movement.
2. Flare the bushing using Forcing Screw T78P-5638-A1, Flaring Tool T83T-3006-A and Receiving Cup T82T3005-A1, or equivalents.
Pivot Bracket (4)
1. On the left pivot bracket, position the bracket on the crossmember. Make sure the 14 - 28mm (0.56 inch) drilled holes are in alignment
2. Install the 9/16-12 x 1-1/2 inch Grade 8 replacement bolts, washers (2) and nuts.
Tighten torque: 210 Nm (155 ft. lbs.).
3. On the right axle pivot bracket, position the bracket on the crossmember.
