
B4000 SE Cab Plus 4WD V6-4.0L OHV (1997)
3. Clean the Spring Look fittings as follows:
(a) Remove any surface residue from the inside of the female SLC by polishing with 400 grit emery cloth or equivalent.
(b) Polish the female surface by using a twisting motion so that any scratches made will not cross the O-ring sealing surface.
(c) Perform additional polishing of surface using 600 grit emery cloth or equivalent.
(d) Remove all residue from the polishing operations by wiping the fittings with a lint free rag.
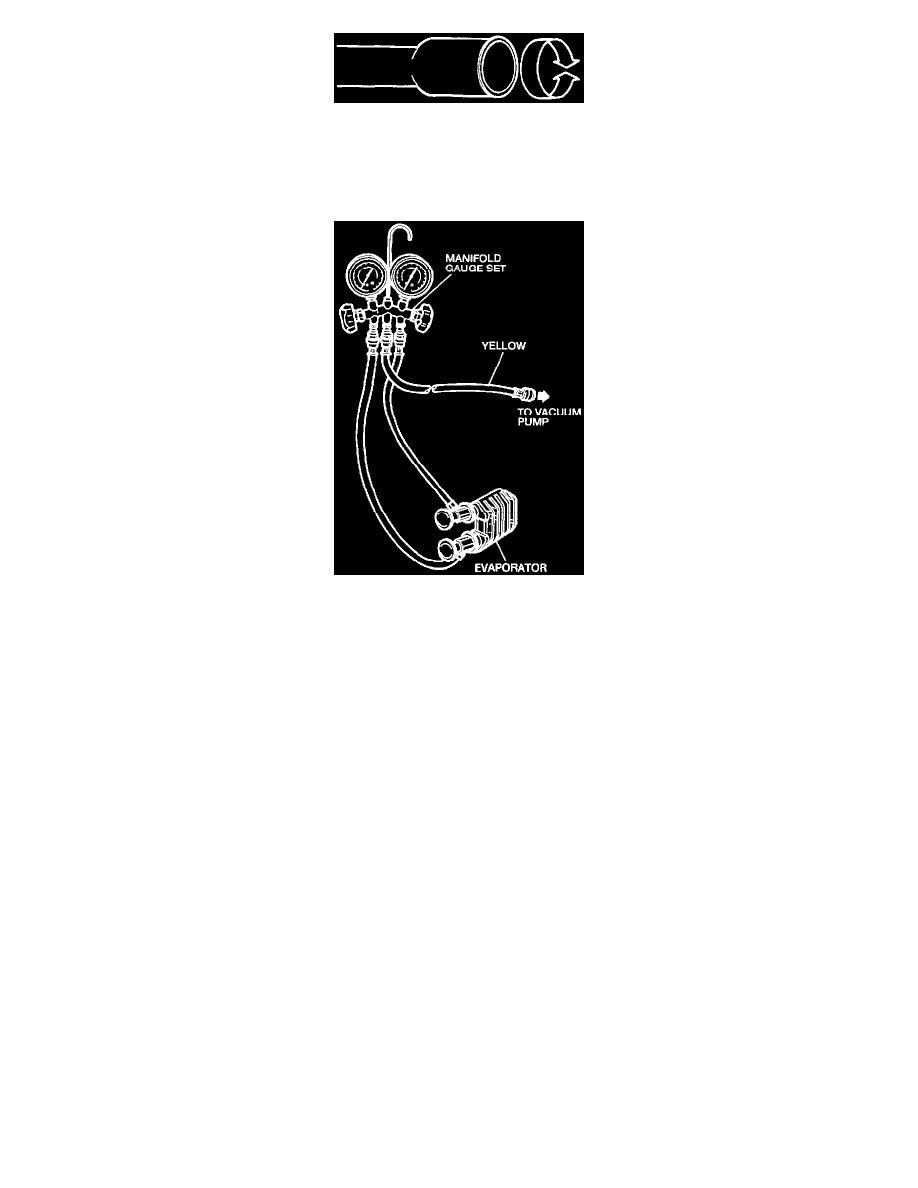
4. Connect the appropriate test fittings to the evaporator tube connections.
5. Connect the Red and Blue hoses from the manifold gauge set to the test fittings on the evaporator core. Connect the Yellow hose to a known
quality vacuum pump.
NOTE
-
The automatic shut-off valves on some gauge set hoses do not open when connected to the test fittings. If available, use hoses with shut-off
valves. If hoses with shut-off valves are used, check to be sure the valve opens when attached to the fittings or install an adapter which will
activate the valve. The test is not valid if the shut-off valve does not open, only the hose will be tested.
6. Open both gauge set valves and start the vacuum pump.
(a) Turn the A/C system blower on low to allow the vacuum pump to operate for a minimum 1/2 hour after the gauge set low pressure gauge
indicates 30 in-Hg.
NOTE
-
The 1/2 hour evacuation is necessary to remove any refrigerant from the oil left in the evaporator core.
(b) If the refrigerant is not completely removed from the oil, outgassing will occur and degrade the vacuum and appear as a refrigerant leak.
7. Take the following action depending on the test results:
-
If the low pressure gauge reading will not drop to 30 in-Hg:
When the valves on the gauge and manifold set are open and the vacuum pump is operating, close the gauge set valves and observe low
pressure gauge.
-
If the pressure rises rapidly to zero: A large leak is indicated. Recheck the test fitting connections and gauge set connections before replacing
the evaporator core.
8. The following information is helpful in determining if a leak is present:
-
If low pressure gauge reading rises 10 or more inches of vacuum from the 30 in-Hg position in ten minutes:
A leak is indicated.
-
If a very small leak is suspected:
Wait 30 minutes and observe the vacuum gauge and allow the system to sit overnight with vacuum applied and check for vacuum loss.
-
If a small amount of vacuum is lost: Operate the vacuum pump with the gauge valves open for an additional 30 minutes with the system
blower on low to remove any remaining refrigerant from the oil in the evaporator core. Then, recheck for loss of vacuum as outlined.
NOTE
-
Always remember that a leaking fitting, gauge set or hose connection will appear as a leaking evaporator core.