
B4000 SE Cab Plus 4WD V6-4.0L OHV (1997)
Ignition Coil: Service and Repair
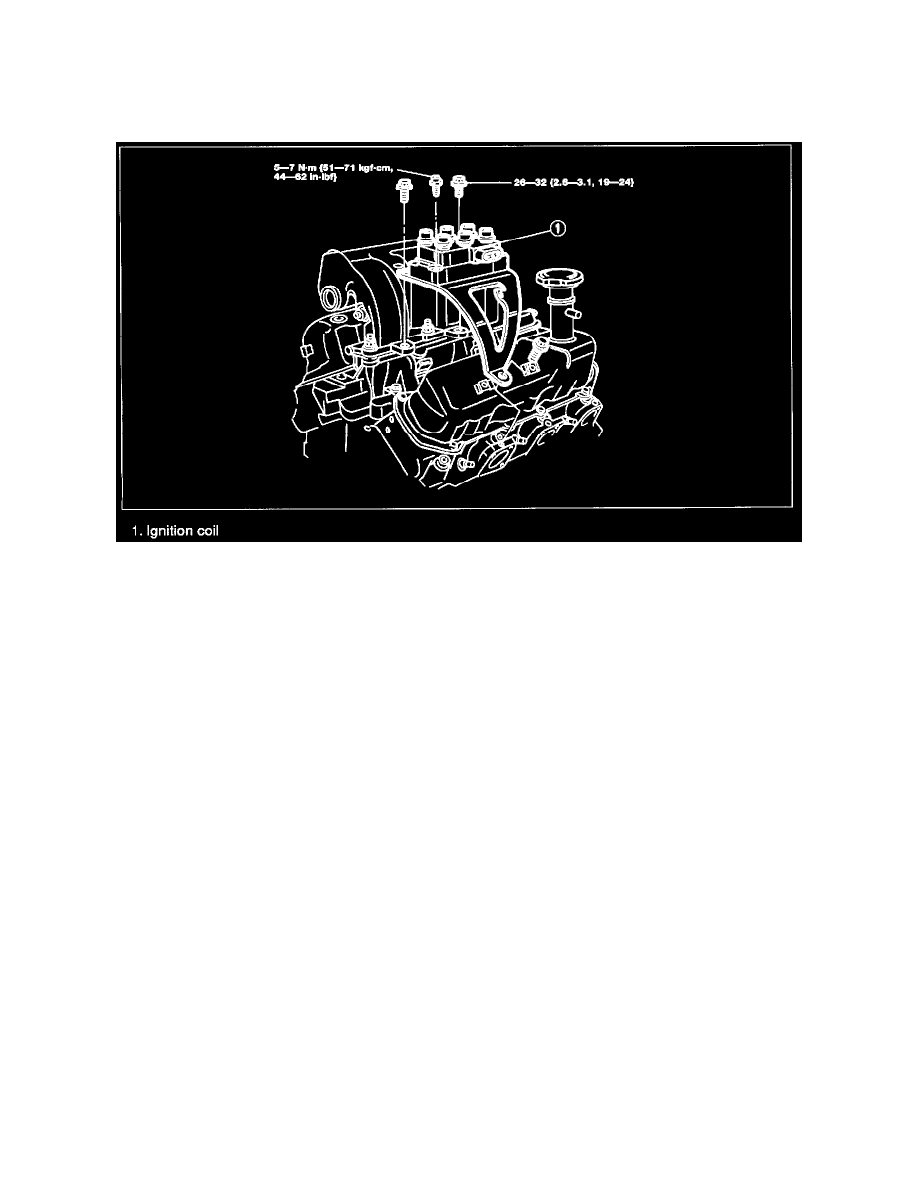
Removal/Installation
1. Disconnect the negative battery cable.
2. Remove in the order shown in the figure, referring to REMOVAL NOTE.
3. Install in the reverse order of removal, referring to INSTALLATION NOTE.
Removal Note
Ignition coil
1. Disconnect the harness connector from the coil.
2. Disconnect the high-tension leads by squeezing the locking tabs to release the coil boot.
NOTE
^
On vehicles equipped with A/C, remove the air conditioning tube-to-plenum bolt and move the tube enough to gain access to the upper coil
pack bolts.
3. Remove the coil bolts and remove the coil.
Installation note
NOTE
^
The terminals are identified on the ignition coils. Install wires as shown in the illustration. The 2.3L firing order is 1-3-4-2 for both ignition
coil assemblies.
Ignition coil
1. Position the coil on the mounting bracket.
Tightening torque:
5 - 7 N.m {51 - 71 kgf.cm, 44 - 62 in.lbf}
2. On vehicles equipped with A/C, reposition the air conditioning tube.
Tightening torque:
25 - 32 N.m {2.6 - 3.1 kgf.m, 19 - 24 ft.lbf}
3. Connect the high-tension leads and the harness connector to the ignition coil.