
B4000 SE Cab Plus 4WD V6-4.0L OHV (1997)
Starter Motor: Service and Repair
Disassembly and Assembly
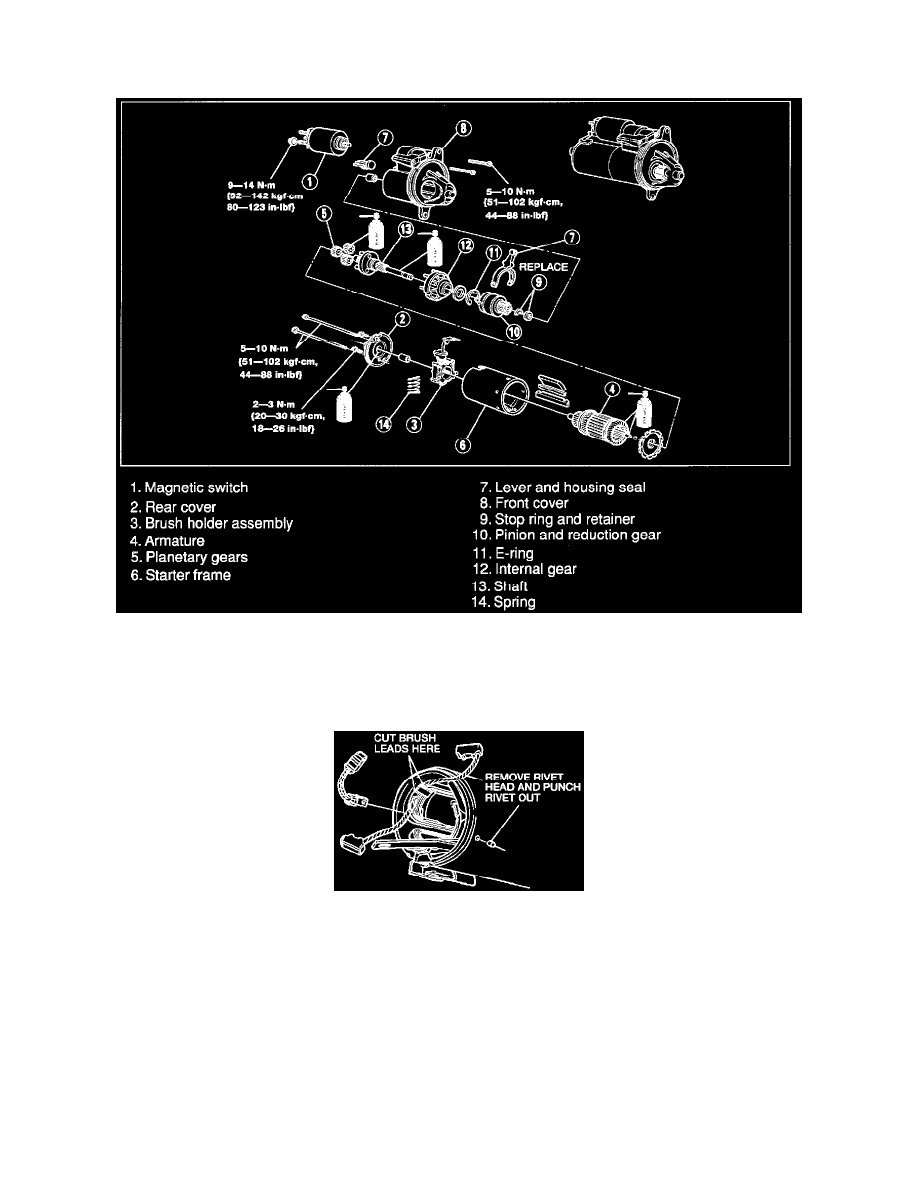
DISASSEMBLY/ASSEMBLY
1. Remove the positive brush connector from magnetic switch Terminal M.
2. Remove in the order shown in the figure, referring to Disassembly Note.
3. Inspect all parts and replace if necessary.
4. Install in the reverse order of removal, referring to ASSEMBLY NOTE.
Disassembly Note
Brush holder assembly
1. Remove the brush spring and pull the brushes loose from the brush holder.
2. Remove the brush holder assembly.
3. Remove the front cover housing and the plunger lever return spring.
4. Remove the starter drive plunger lever pivot pin, lever and remove the armature.
5. Remove the ground brush rivet head with a file or chisel and remove the rivet with a 1/8-in punch.
6. Cut the brush leads from the field coils as close to the filed connection point as possible.
Assembly Note
Pinion and reduction gear
Partially fill the rear cover housing bearing bore with grease (approximately 1/4 full). Install the pinion and reduction gear assembly in the housing,
making sure to line up the bolt holes in the gear assembly and the housing.