
B4000 SE Cab Plus 4WD V6-4.0L OHV (1997)
3. Remove the snap ring.
Upper Ball Joint (5)
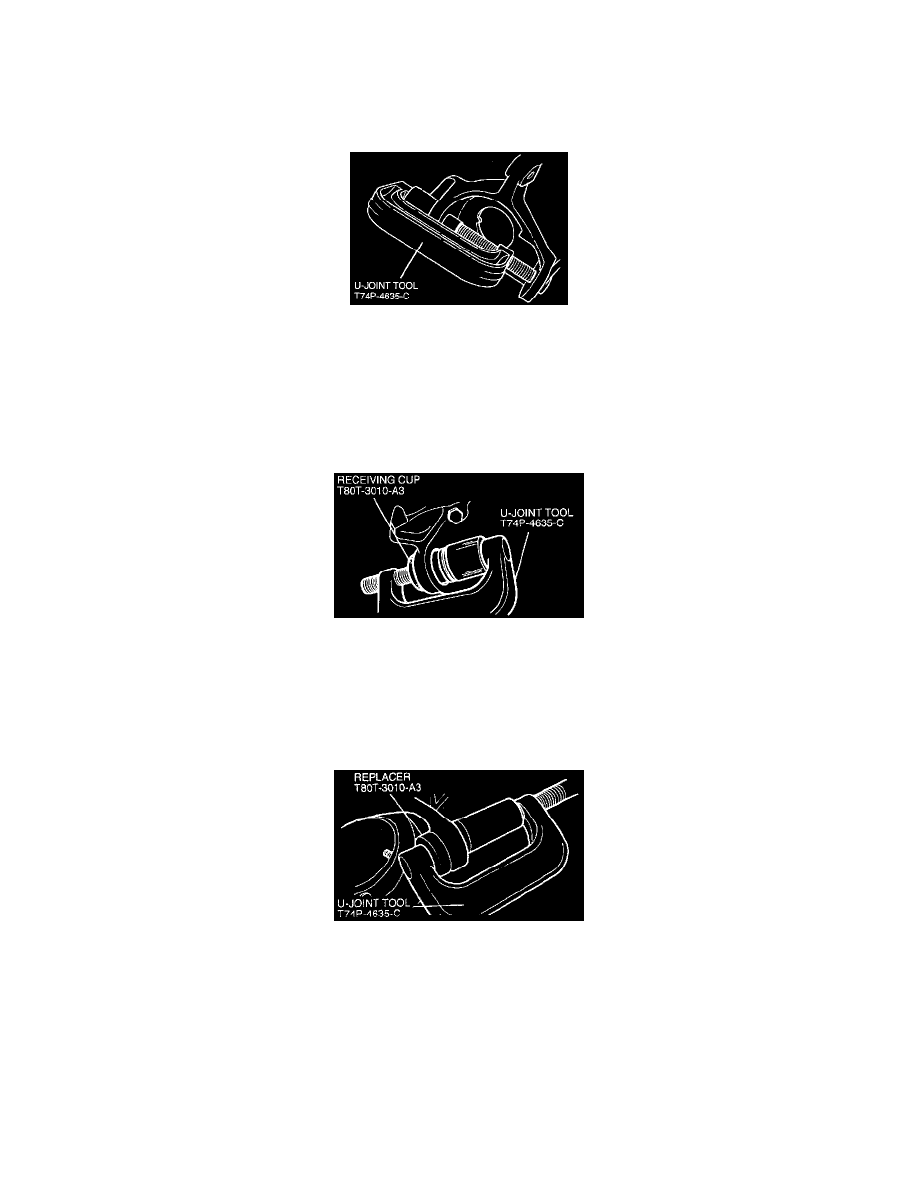
1. Assemble U-Joint Tool T74P-4635-C and suitable ball joint remover.
2. Remove the lower ball joint.
3. Assemble U-Joint Tool T74P-4635-C and suitable ball joint remover.
4. Remove the upper ball joint.
INSPECTION
Inspect all of the parts and repair or replace as necessary.
INSTALLATION
Install in the reverse order of removal, referring to the following steps.
Lower Ball Joint (4)
1. Assemble U-Joint Tool T74P-4635-C and Receiver Cup.
2. Install the lower ball joint.
NOTE: Realign the installation tool if the proper depth cannot be achieved.
3. Install the snap ring.
Upper Ball Joint (5)
1. Assemble U-Joint Tool T74P-4635-C and ReplacerT80T301 0-A3, or equivalents.
2. Install the upper ball joint.
Camber / Caster Adjuster (3)
^
Install the camber/caster adjuster in the same position it was removed from.
Nut (2)
1. Install a new nut. Tighten to 122 Nm (90 ft. lbs.).
2. Tighten the nut to align the next slot with the hole in the lower ball joint.
3. Install a new cotter pin.
4. Install the snap ring on the upper ball joint stud.